How do I install Outbrain’s pixel on Google Tag Manager?
Google Tag Manager (GTM) allows you to easily implement the Outbrain pixel without extensive knowledge of coding or altering the HTML of your pages.
This article will walk you through adding and configuring the Outbrain tag in GTM in a few simple steps.
You are able to implement the Outbrain pixel through GTM two ways:
- Via direct integration within the Amplify Dashboard
- By manually configuring the tag in the GTM dashboard
1. Directly connect your GTM account within the Amplify dashboard
You can easily install the Outbrain pixel via GTM by directly connecting your GTM account with the Amplify dashboard. Follow the steps outlined below to learn how:
- Navigate to the Conversions tab available on the right-hand side of the dashboard, and click “Create Conversion” .
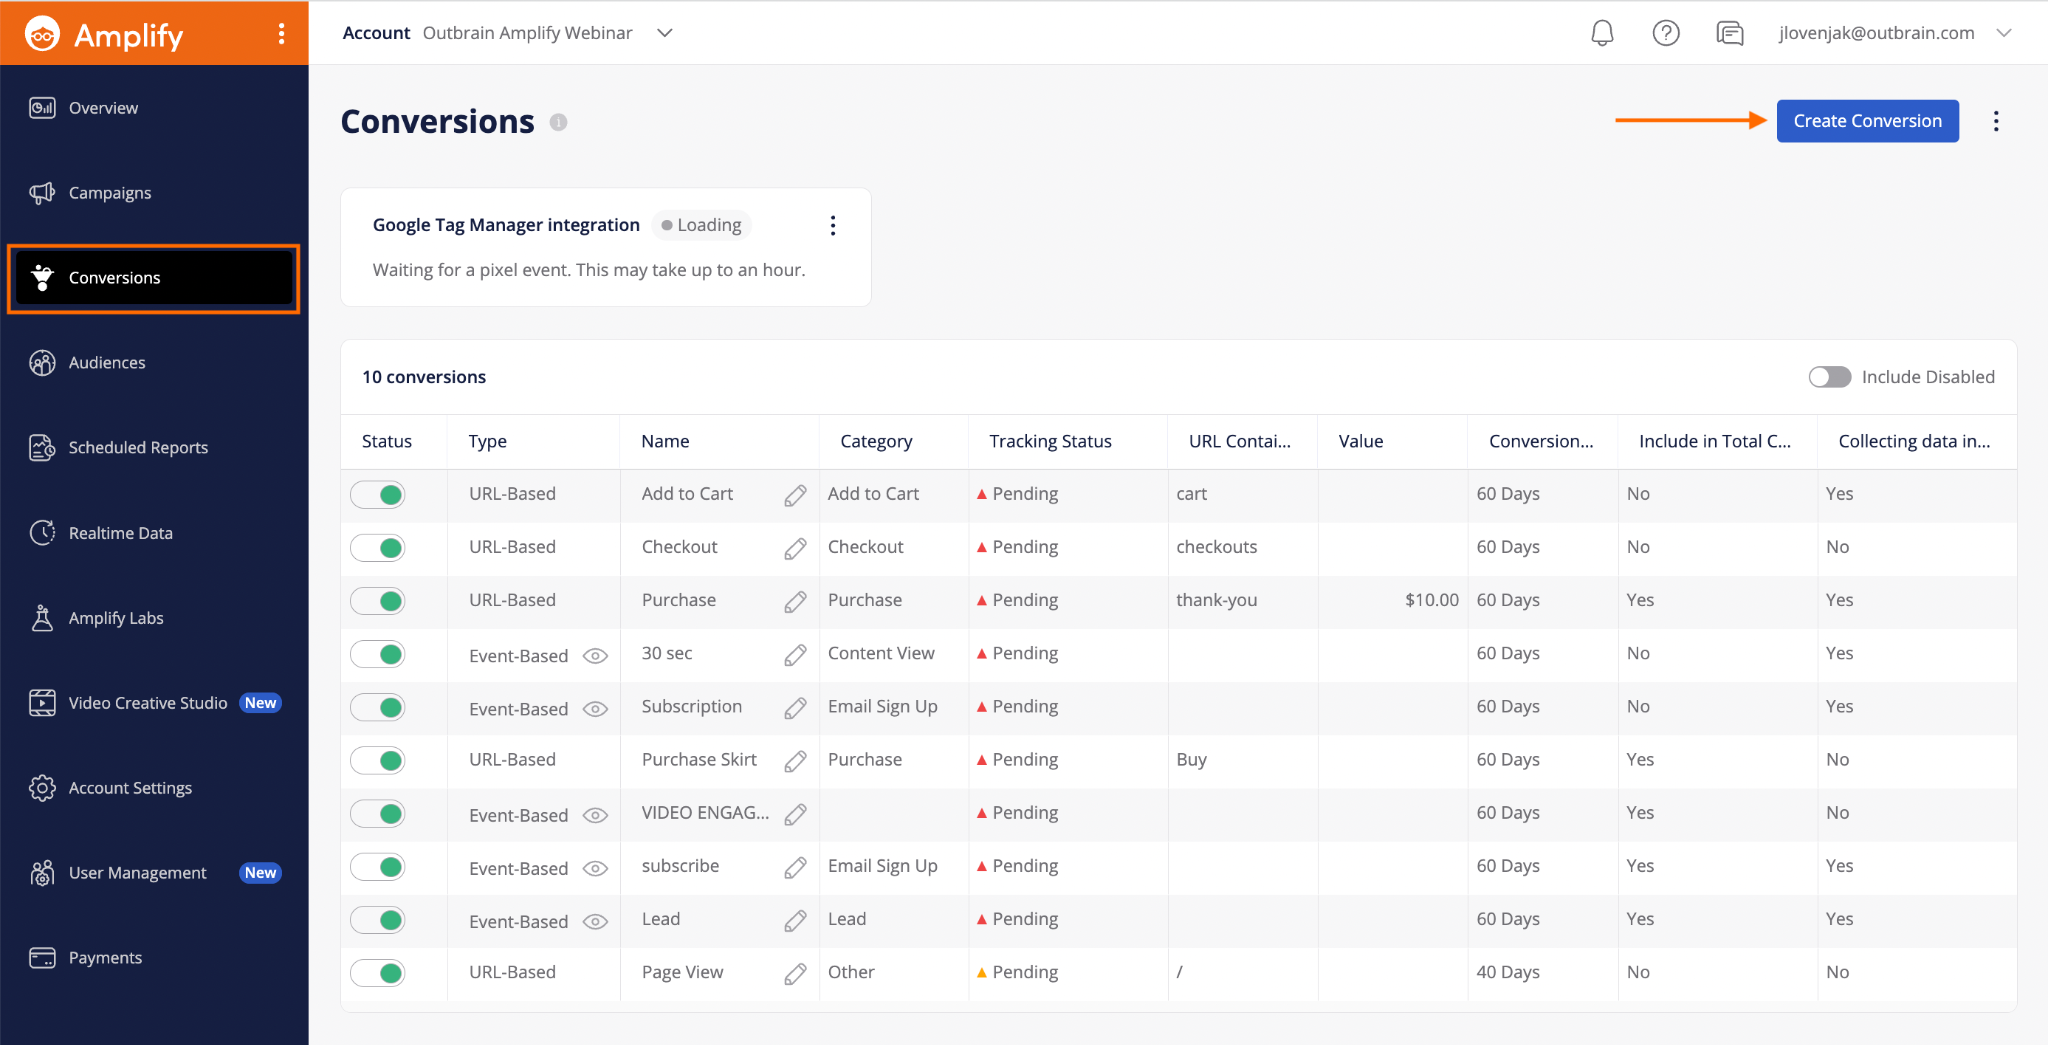
- Choose “Outbrain Pixel” as your data source and select “Install via Google Tag Manager'” and click “Connect Your account”:
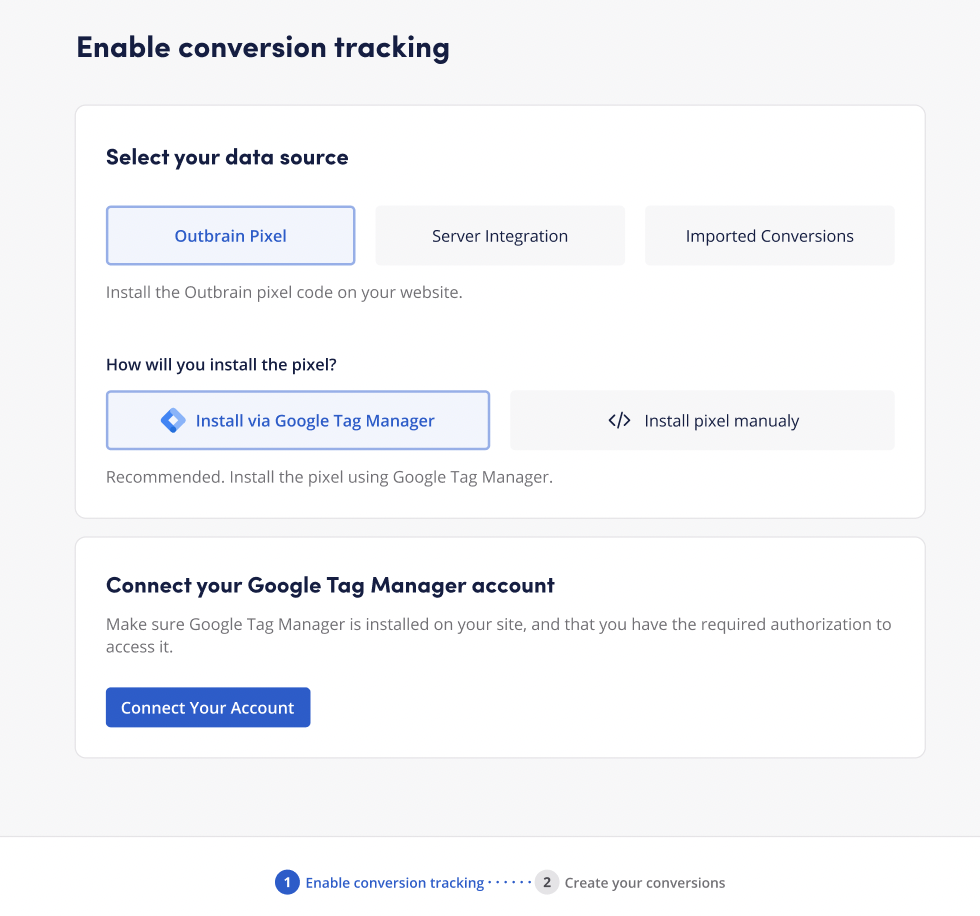
3. Accept the terms, in order to make sure Outbrain can automatically install the pixel for you.
*If you’re using more than one GTM account, you’ll need to select the account you wish to connect.
4. Click “Next” and wait a few moments until the pixel tag is generated for you.
5. Lastly, click “Publish” to save the integration and automatically publish and enable the Outbrain tag.
Please note:
- If you’d like to review the setup manually before publishing the tag, you can choose to navigate to your GTM account and publish it from there.
- In case your GTM workspace contains additional changes that need reviewing, you can navigate to GTM to review them manually, or choose to Publish the tag, and Outbrain will automatically publish the changes for you.
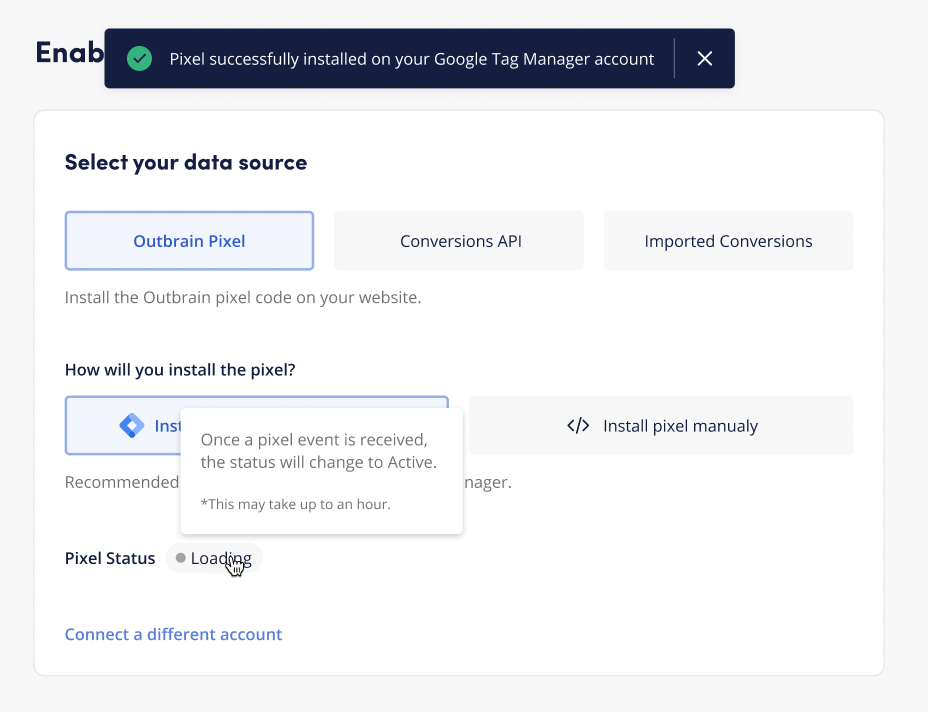
- You will see the pixel status available in the Conversions tab.
- If the status registers as “Not Active”, it indicates an issue with the integration. In that case, you can retry the integration or reach out to our team for assistance.
What’s Next?
After you’re done with the pixel implementation, make sure to set up conversion tracking to define which conversions you’d like to track and optimize for.
To learn all about conversion tracking, click here.
Keep in mind:
- Current in-dashboard implementation fully supports URL-based conversions.
- Creating and implementing Event-based conversions will require setting up a corresponding tag and trigger on Google Tag Manager.
2. Configure the Outbrain tag in Google Tag Manager
If you already have our pixel installed, check out how to update the existing template.
1. Create Conversion(s) in the Amplify Dashboard
To set up conversion tracking, you’ll first need to create the needed conversions on your Amplify account. Please refer to this article in order to learn how.
Keep in mind the GTM Outbrain Pixel tag supports both URL and Event-based conversions, as well as dynamic values.
*Important note: To prevent tracking discrepancies between your Outbrain campaigns and Google Tag Manager, please make sure to add our UTM string to your campaign tracking. Read more about it here.
2. Add the Outbrain Pixel tag in GTM
After you’ve created conversions in the Amplify dashboard, navigate to the Google Tag Manager Community Template Gallery.
- Open Google Tag Manager and select “Templates” on the left-hand side:
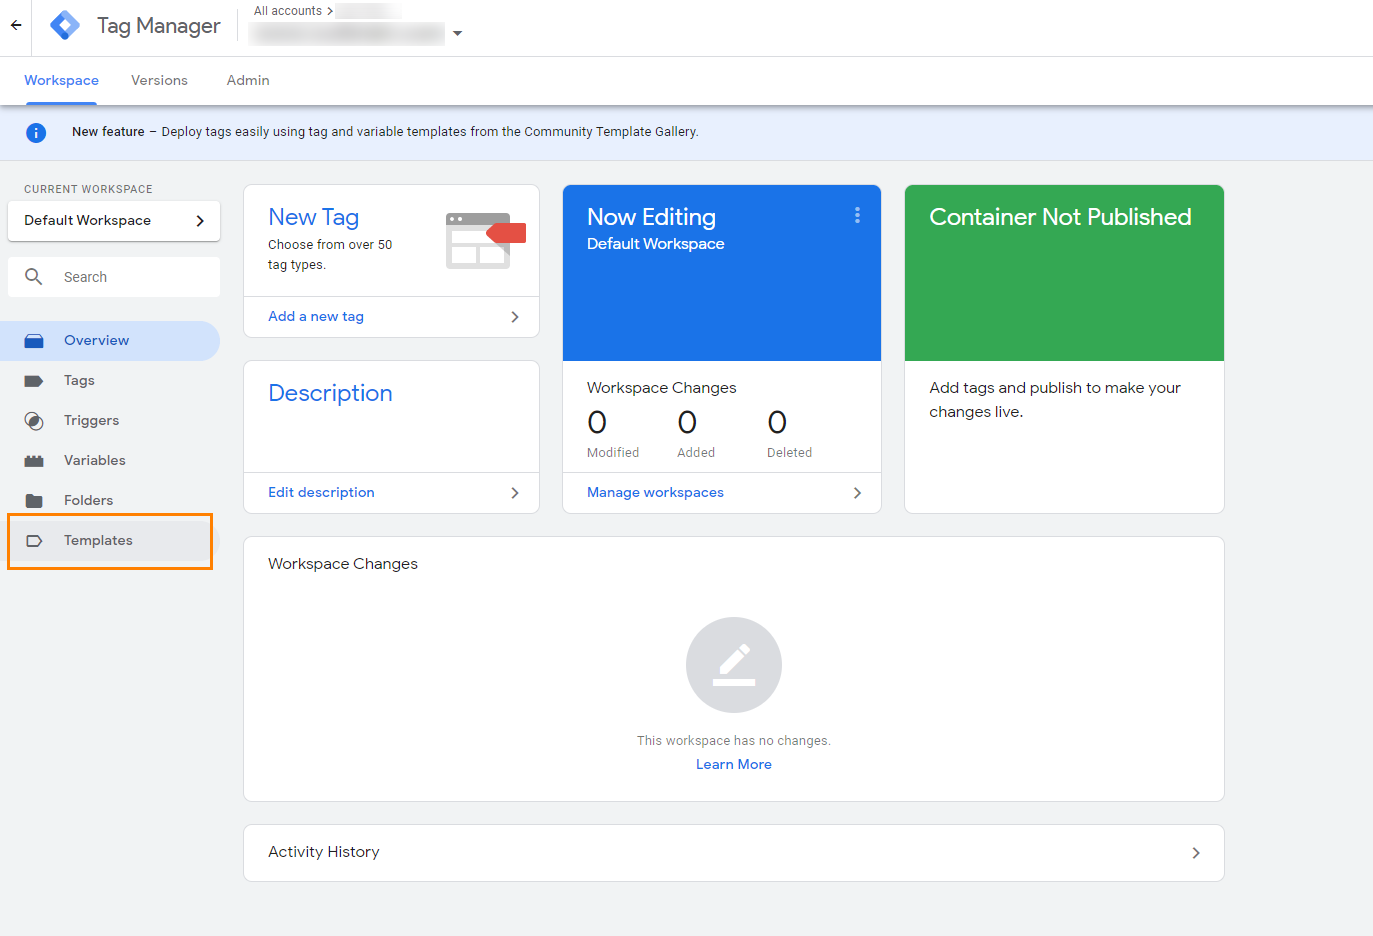
- Next, in the Tag Templates section, click “Search Gallery” to access the Template Gallery.
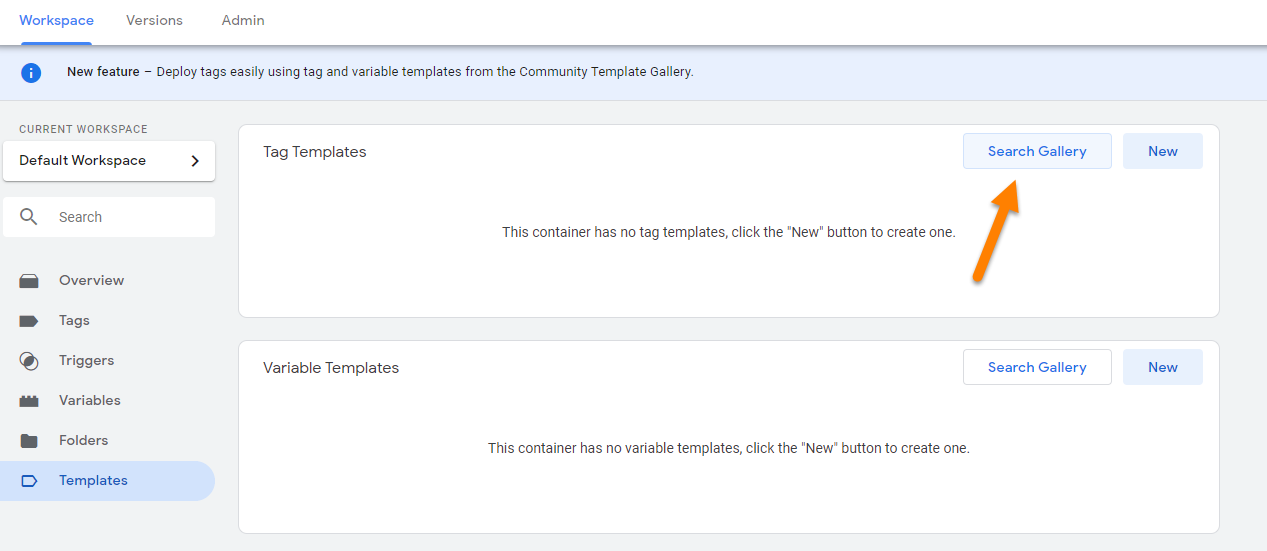
- Find the Outbrain Pixel by Outbrain-Inc on the list and click on it in order to proceed. You can find it easily using the Search function on the top right.
- Note: If you have already installed the old Outbrain Pixel (by Outbrain – no INC) please replace with the new tag.

- Click the “Add to workspace” button to install the template.

- Now that the template is installed, you’ll need to create a new tag for the Outbrain pixel.
- Navigate back to the “Overview” tab on the left-hand side rail. Click “New Tag” in your Tag Manager account and select “Tag Configuration.”

- Under the Custom tag type, select “Outbrain Pixel” (you can find it quickly and easily using the search function).

- A tag configuration tab will open up, where you will define the tag properties and set up trigger rules. Keep in mind that you’ll need to create separate tags for every conversion you’ve set up in the Amplify dashboard.
3. Configure the Tags in GTM
- Add your Outbrain Marketer ID
You can find your Marketer ID in Amplify: It appears as an alphanumeric chain in the URL when you are viewing your dashboard.
- Select Tag Type
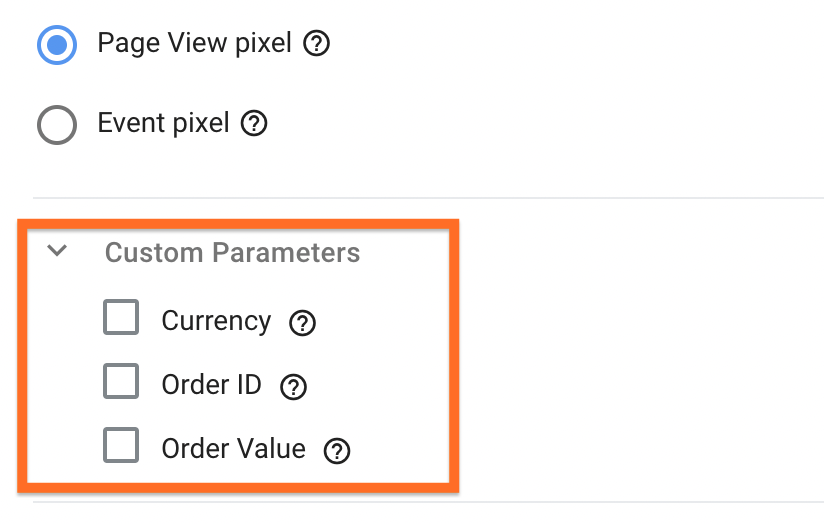
Select between a Page View pixel and an Event pixel:

Page View pixel:
A Page View pixel allows you to track a specific page view event.
If you’re using URL-based conversions, you can now also append Custom Parameters directly from the Tag setup tab. Custom Parameters include Currency, Order ID and Order Value. For example, you can add the Order Value parameter to pass back information about the exact value of the order each time a customer reaches your Checkout page.
Event pixel:
An Event pixel enables you to set up and track event-based conversions using GTM.
To create the event tag, choose “Event pixel” and select the corresponding event you’d like to track from the available dropdown:
For ease-of-use, the pre-set Event Names in the above drop-down list precisely match the default event names in the Conversions section of the Amplify dashboard. If you haven’t yet created the conversions in the Amplify dashboard, learn how to do it here.
In case you want to create a Custom event which is not available on the list, select “Custom event” and insert its name manually. Keep in mind that the name will have to match the Event name you’ve set up in the Amplify dashboard.
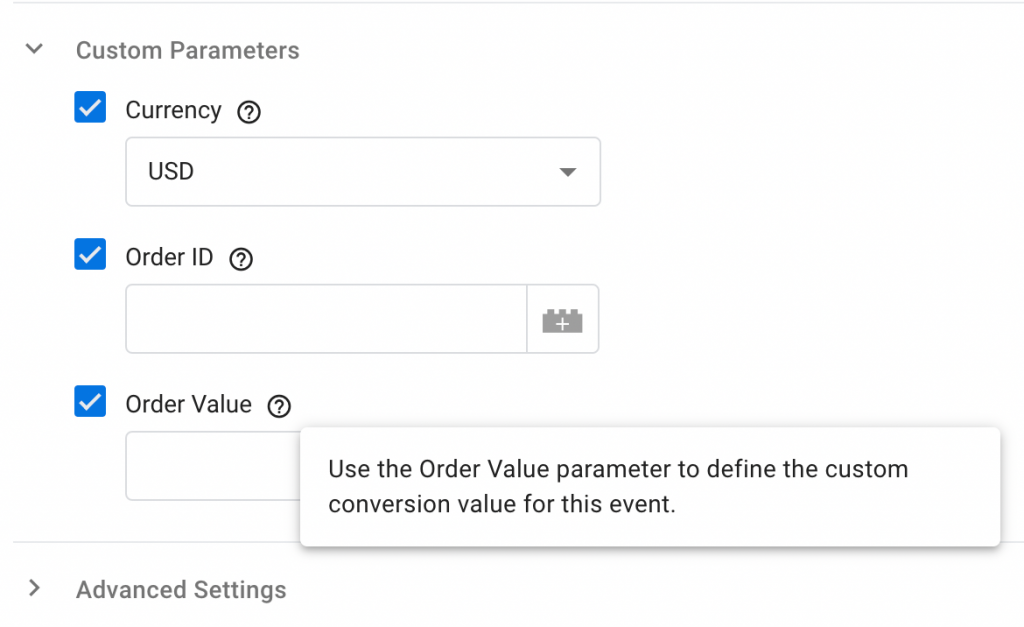
As with the Page View pixel, you can now add Custom Parameters to your Event pixel, directly from the Tag setup tab:
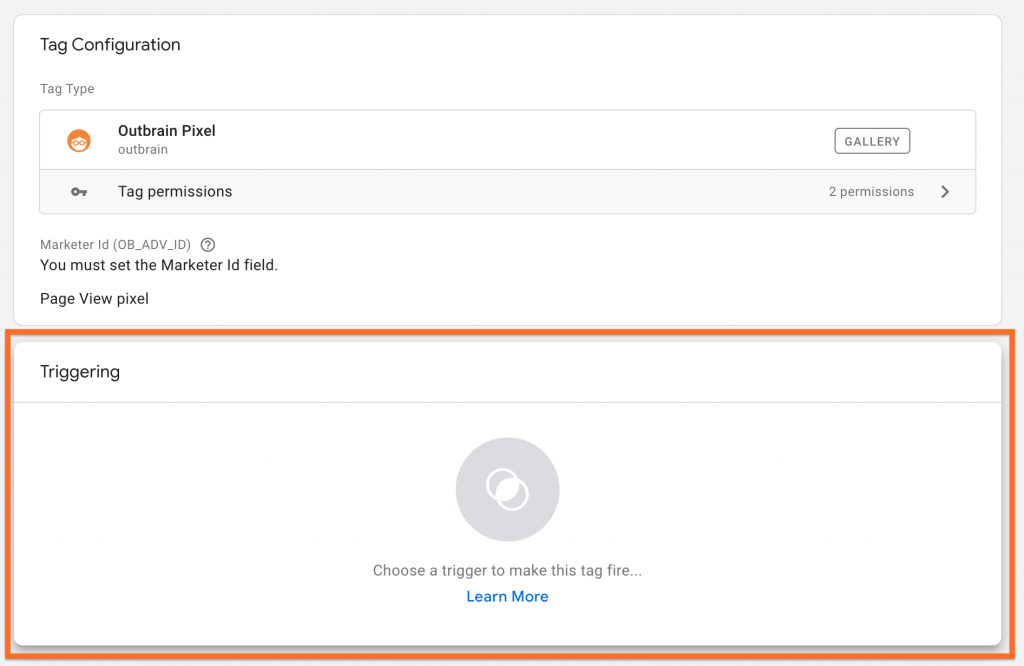
- Set up Triggering
Lastly, you’ll need to set the trigger to make sure the tag fires correctly. To define the trigger, click on the box shown below (not the “Learn More” link), and you will be presented with a menu of options.
For this example, let’s look at how to set up a trigger if you want to fire a conversion after a certain button has been clicked:
Select “All Elements” as the trigger type. Have the trigger fire on “Some Clicks” and enter the Click ID or Click Class that the action is associated with.
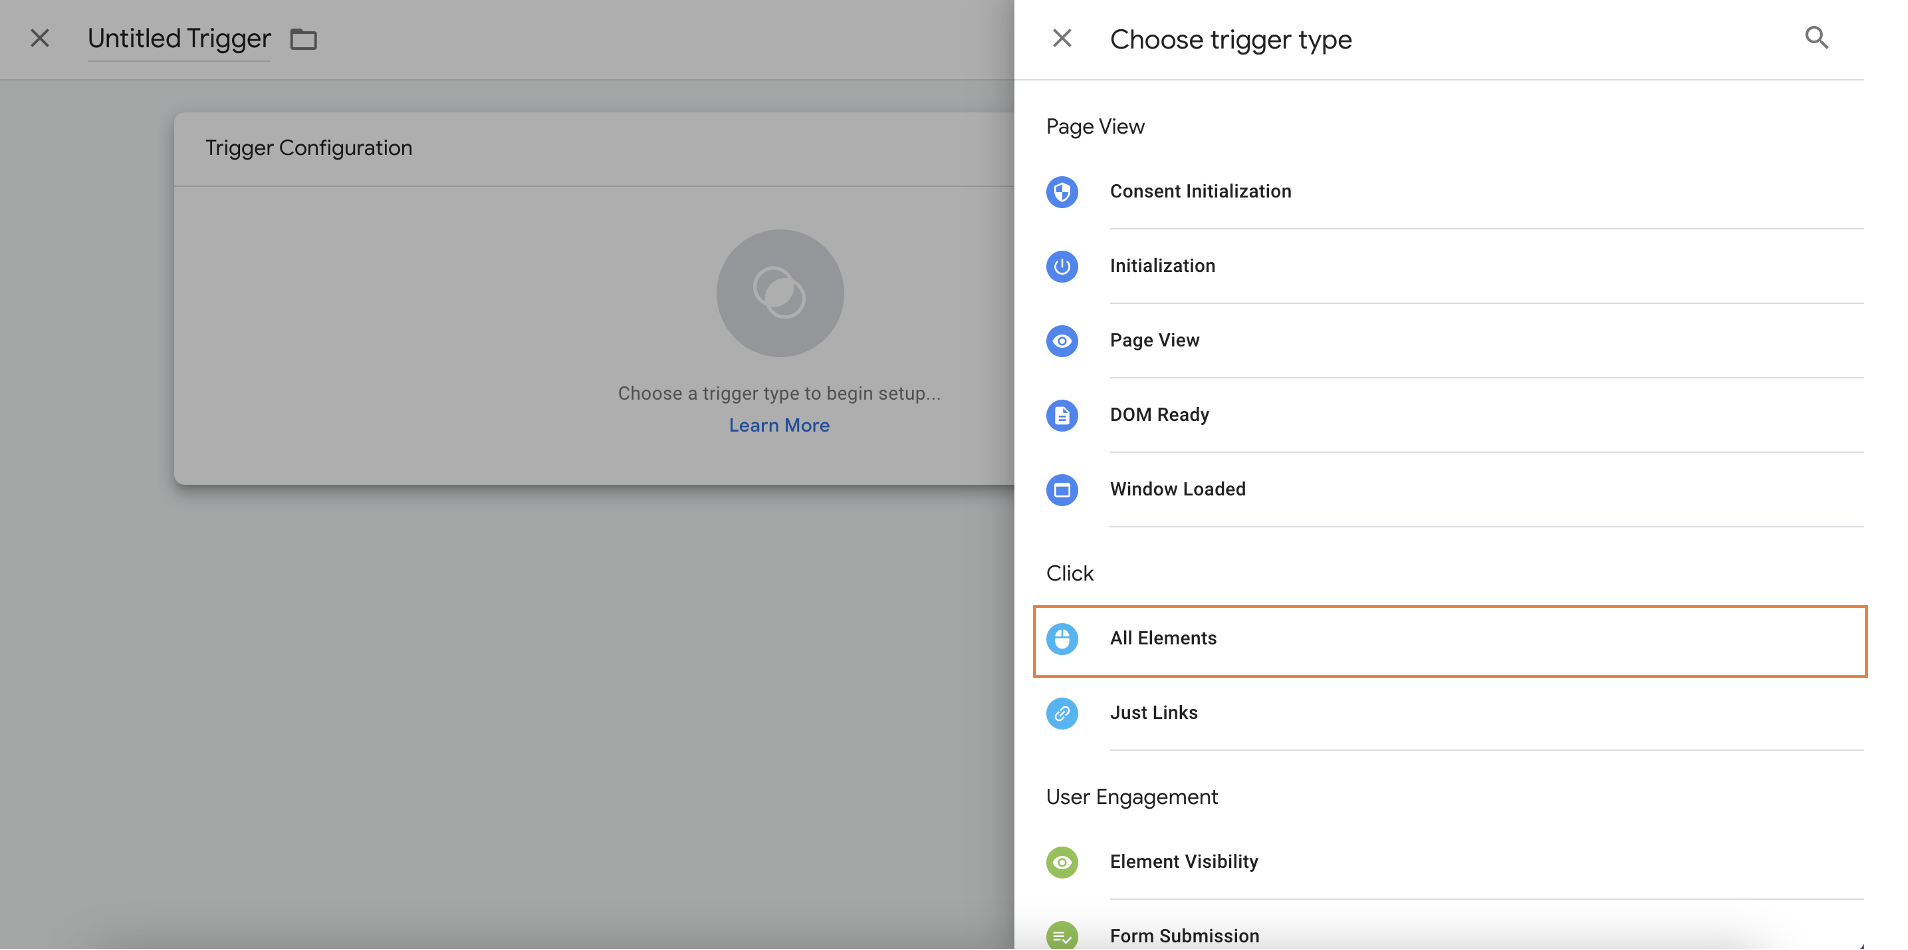
For example, if the action was written as follows, you can set the ‘Click ID’ to targetlink1.


If you’re unable to locate “Click ID ” or “Click Class” in the “Variables” drop-down, you can configure which variables to show under “Variables” in the main dashboard.
Once you have created and saved your conversion points, use our Outbrain Pixel Tracker to test the pixel fire and implementation.
Please note that you will need to either use a pre-defined variable for your value or create a new variable within Google Tag Manager. Outbrain Support cannot assist you with variable creation; we recommend consulting with a web developer for assistance.
Important note:
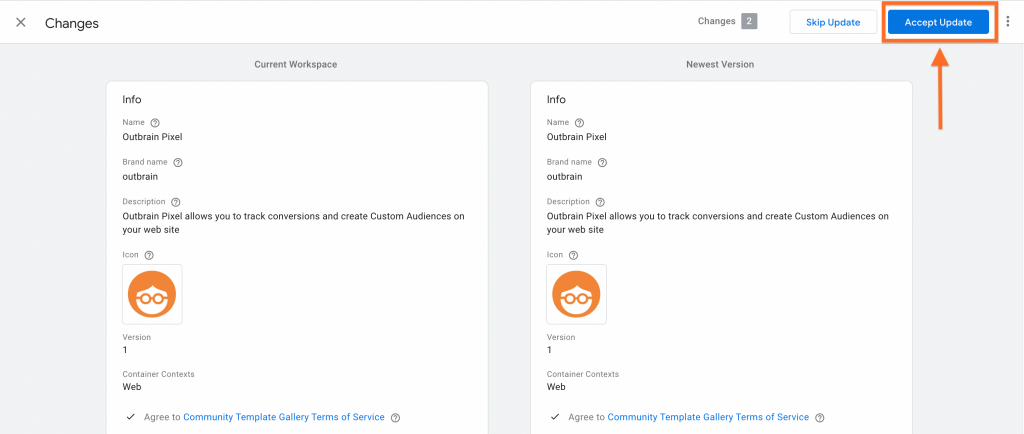
- In case you’ve already implemented Outbrain’s pixel using GTM, we encourage you to update the existing template to the new one. To do that, navigate to the GTM dashboard and you should see a notification about a new available template:
- Click “View” and select Outbrain pixel in the “Available Template Updates” Tab. Select “Accept Update” in the Changes tab and the existing template will be replaced by the new one.
Want to implement our Pixel in Floodlight? Check out this guide.
For any further questions, feel free to reach out to our DIY Customer Success team.