Codeless Conversion allows you to create event-based conversions from the Amplify dashboard without touching on your website code. Simply put, this gives you the ability to just enter your website URL in the dashboard, and then identify and select buttons/CTAs for which you’d like to create event-based conversions. Et voila! It’s just easier than ever before. This article will tell you everything you need to know to use this feature like a pro!
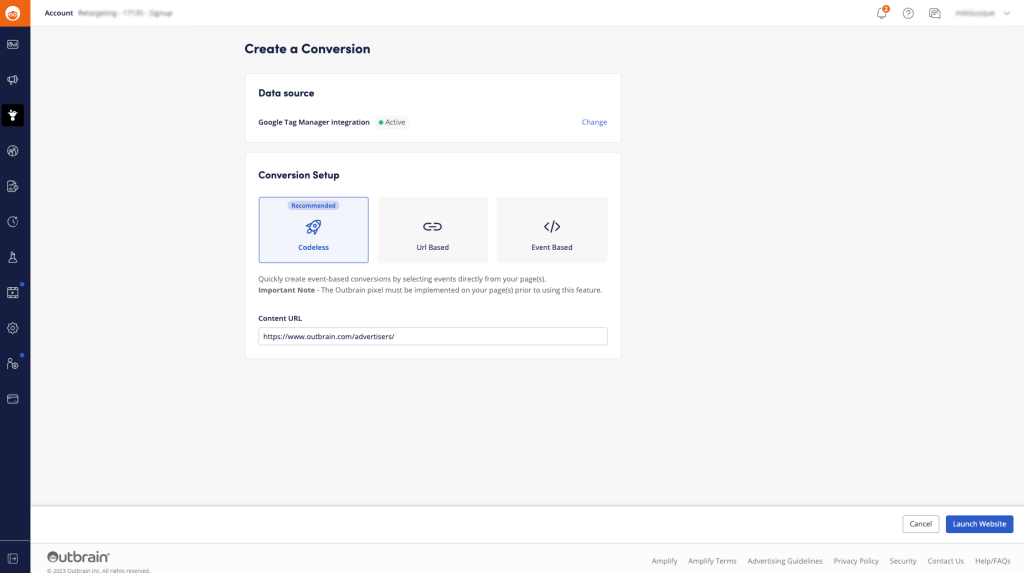
1. In the Amplify dashboard, go to the Conversions tab and click on the “Create Conversion” button. In the “Conversion Setup” screen, select “Codeless”. Then, simply enter your content URL, and click on the “Launch website” button when done:
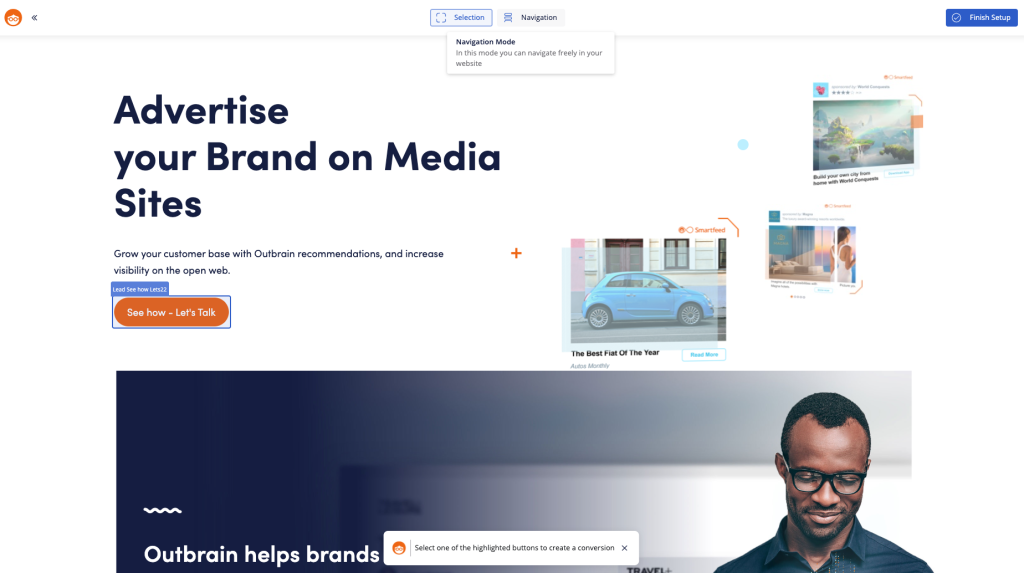
2. This will open your content page in a new tab with an Outbrain navigation bar at the top of the page. You have 2 different modes to select your event-based conversions.
- 2.1. “Selection” automatically identifies and allows to select suggested events on the page

- 2.2. “Navigation” allows you to freely browse your website and navigate to other pages on the website. With this mode, you cannot select buttons (vs. Selection mode)
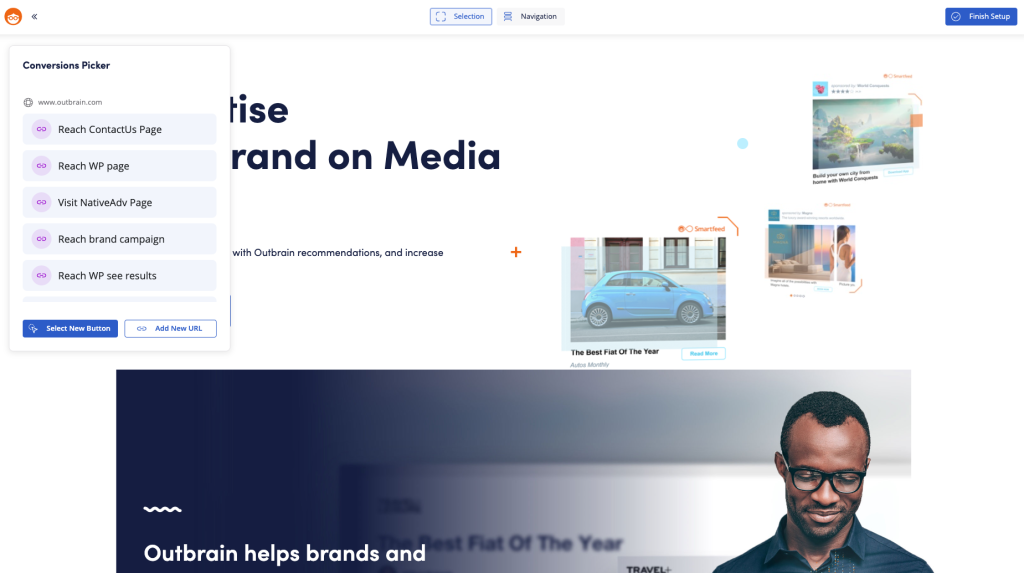
3. A dialog box will show you conversion events already existing on the page. You can also choose to see all the events existing across the website. Clicking on the “Select New Button” button, you’ll be able to add new ones by simply selecting the relevant buttons on the page or website. You can also delete existing events, if necessary:
- 3.1. After clicking the “Select New Button” button, the “Selection” mode is on. All the buttons and links on the page will be highlighted, allowing you to select them. When done, you can exit this mode through the navigation bar displayed at the bottom of the screen:

4. After you selected a button or a link on the page, a dialog box will allow you to:
- 4.1. Create a new conversion:
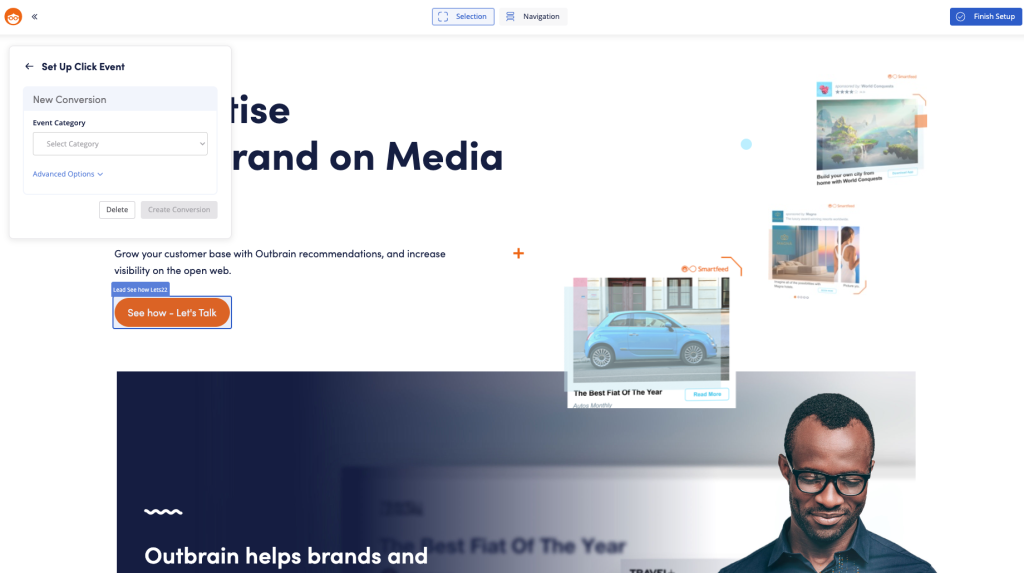
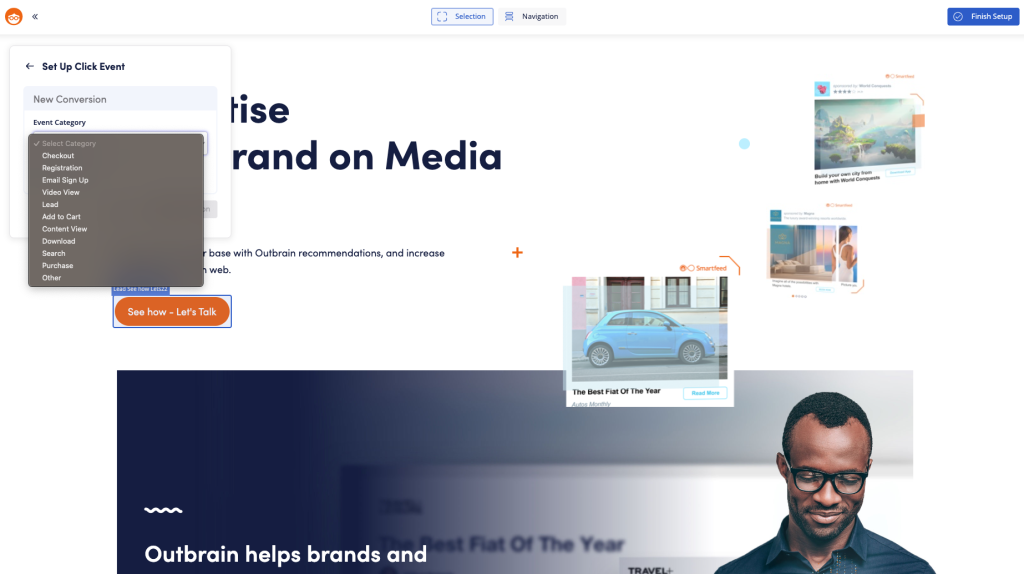
- 4.2. Select an event category for the chosen conversion event:
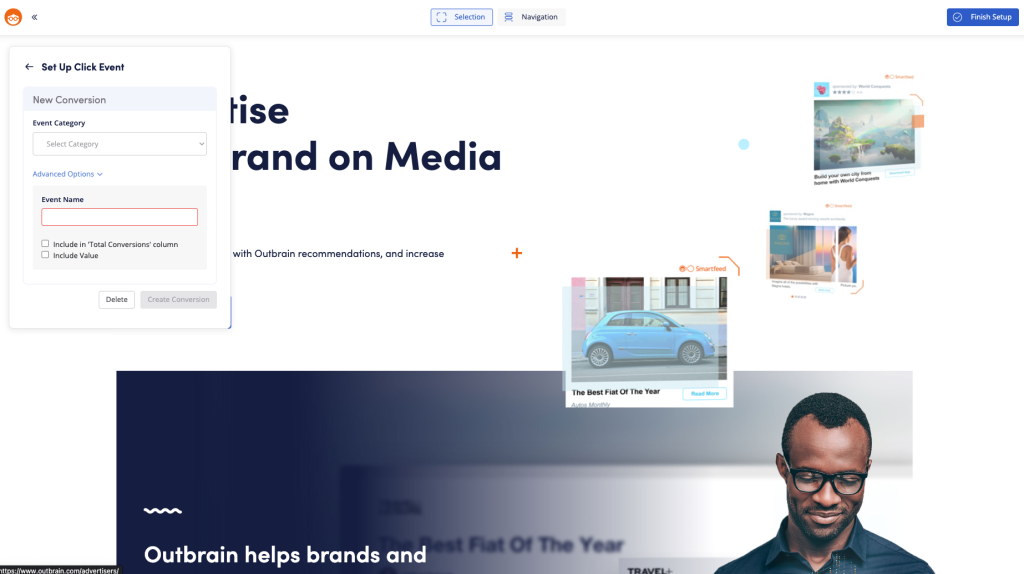
- 4.3. Under “Advanced Options, you can name your event, select a conversion value (and the relevant currency) as well as include it in the “Total Conversions” column on the reporting grid:
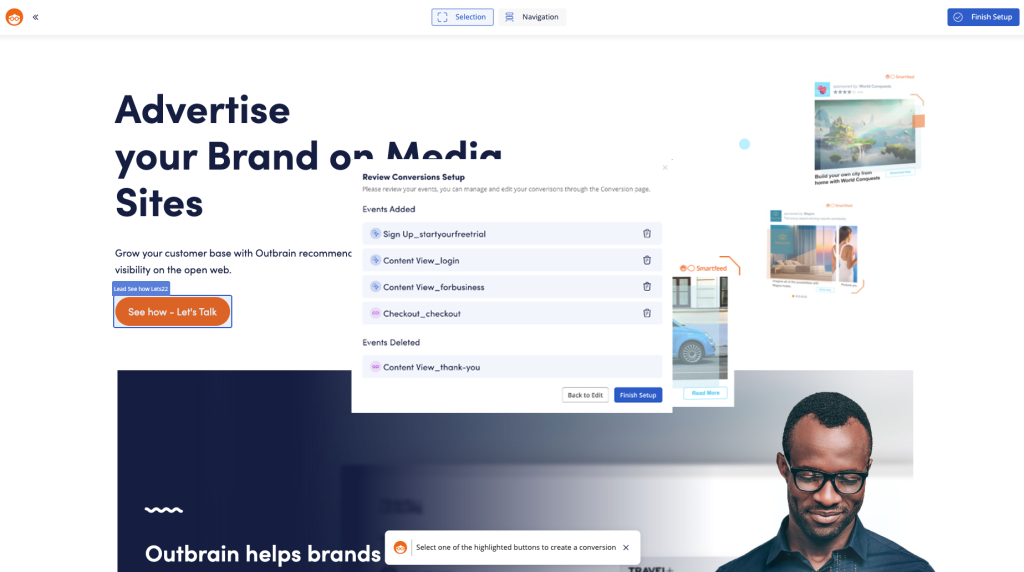
5. When you’re done, a summary screen will show you the events you’ve added and/or the ones you’ve deleted. You can delete your conversions through this screen directly (if you wish to edit those conversion events, please refer to Step 3 above). If you’re happy with your setup, simply click ”Finish Setup”:
