How do I add dynamic values to my conversion reporting?
If you’re an e-commerce customer, you probably have products with different values. Wouldn’t you want to track your conversion data with the same value differentiation?
With dynamic values, you can accurately pass back the value of each purchase to help measure your return on investment and view the true value of each conversion. Dynamic values are especially helpful if your KPI is ROAS, and/or you’re running a Target ROAS campaign.
Please note that setting up a dynamic value requires modification to the conversion pixel code.
We assume that you have already placed the Outbrain pixel across your entire site and that you have created a conversion event for your purchase. If you have not, please read over our conversions set-up guide. It’s important to note that placing dynamic values on your site code will override any default value you have set in the Conversions section of your dashboard.
You can pass your dynamic values back through both of our two different conversion types – Event-Based or URL based. If you are using an Event-Based conversion (for instance, when a user clicks the “purchase” button), you can pass your dynamic value back through an event conversion. Example below:
<script>
obApi('track', 'PURCHASE', {
	orderValue: '%%DYNAMIC_ORDER_VALUE_COMES_HERE%%',
	currency: 'USD',
});
</script>
Or, you can pass your dynamic value back through a URL based conversion (for instance when a user gets to a certain page of your website). In order to do that, look for the code obApi(‘track’, ‘PAGE_VIEW‘) in your OB pixel code and replace it with the below:
<script>
obApi('track', 'PAGE_VIEW', {
	orderId: '123456',
	orderValue: '4.99',
	currency: 'USD',
});
</script>
For event based conversions, the conversion name (in bold) will be different for each conversion/marketer and the purchase variables differ from each site as well. Instead of adding a set value to the code, such as 0.00, you will add a dynamic code that automatically determines the correct price of the sale.
Then, you will need to add this additional snippet of code to track the dynamic values on the conversion event page. Please note that you always need to send the actual value as eg. '4.99' and not '4,99' as the latter would be incorrect decimal format.
Below are implementation guides for the following systems:
-
- Server-to-Server
- Shopify
- Google Tag Manager
- Server-to-Server
Changing the Currency
To report your value in a currency other than US dollars, modify the ‘currency’ field. For example, if you would like to report in British Pounds, you would modify the currency part of the code to: ‘GBP’. Here are each of the currencies we support: USD, CAD, EUR, GBP, ILS, AUD, MXN, BRL, SEK, SGD, RUB, NZD, INR, JPY, PHP, CHF, MYR.
Adding an Order ID
Users will want to pass back an Order ID if they want to count two different conversions coming from the same user that happen within a short amount of time in order to not deduplicate them and count only one of the conversions.
To track Order IDs, you’ll need to assign a new value to the ‘OrderId’ field. We should combine all properties to track the Order Value, Order ID and Currency. So, if your checkout Order ID was ‘123456’, you would modify the code like this:
<script>
obApi('track', 'Purchase', {
orderValue:'4.99',
currency: 'GPB',
orderId: '123456'
});
</script>
Keep in mind that how you define a variable and pass it over from your website is based on how your site is structured and what information you want to receive. There are several standard options and you should consult with your web site’s development team or web developer to determine what is best for you and your campaign goals.
How do I pass Dynamic Values using Server-to-Server?
You can define the postback URL using the following template:
https://tr.outbrain.com/unifiedPixel?ob_click_id=OUTBRAIN_CLICK_ID_VALUE&name=EVENT_NAME&orderValue=ORDER_VALUE&orderId=ORDER_ID¤cy=CURRENCY
Remember that the “OUTBRAIN_CLICK_ID_VALUE”, “EVENT_NAME”, “ORDER_VALUE”, “ORDER_ID”and “CURRENCY” are placeholder values that you would need to fill in with your own information.
Check out this Help Center article for a full step-by-step guide on how to implement Server-to-Server dynamic conversions.
How do I pass Dynamic Values using Shopify?
For Event-Based conversions, you’ll need to locate the file in Shopify that contains the button where the action takes place. The location will vary depending on your Shopify setup, and conversion type. For this example, we’ll use “Add to Cart.” Within the relevant Shopify theme, the button will be identified by an “Add To Cart” button or input tag. Within the tag, add this “onclick” attribute to trigger the Outbrain conversion code: onclick=”obApi(‘track’, ‘Add To Cart’);”
Example Pixel Code:
<script>
obApi('track', 'Purchase', {
orderValue:'{{ total_price | money_without_currency }}',
currency: 'USD'
});
</script>
For more information on how to implement Outbrain’s pixel and conversions in Shopify, please visit our dedicated article.
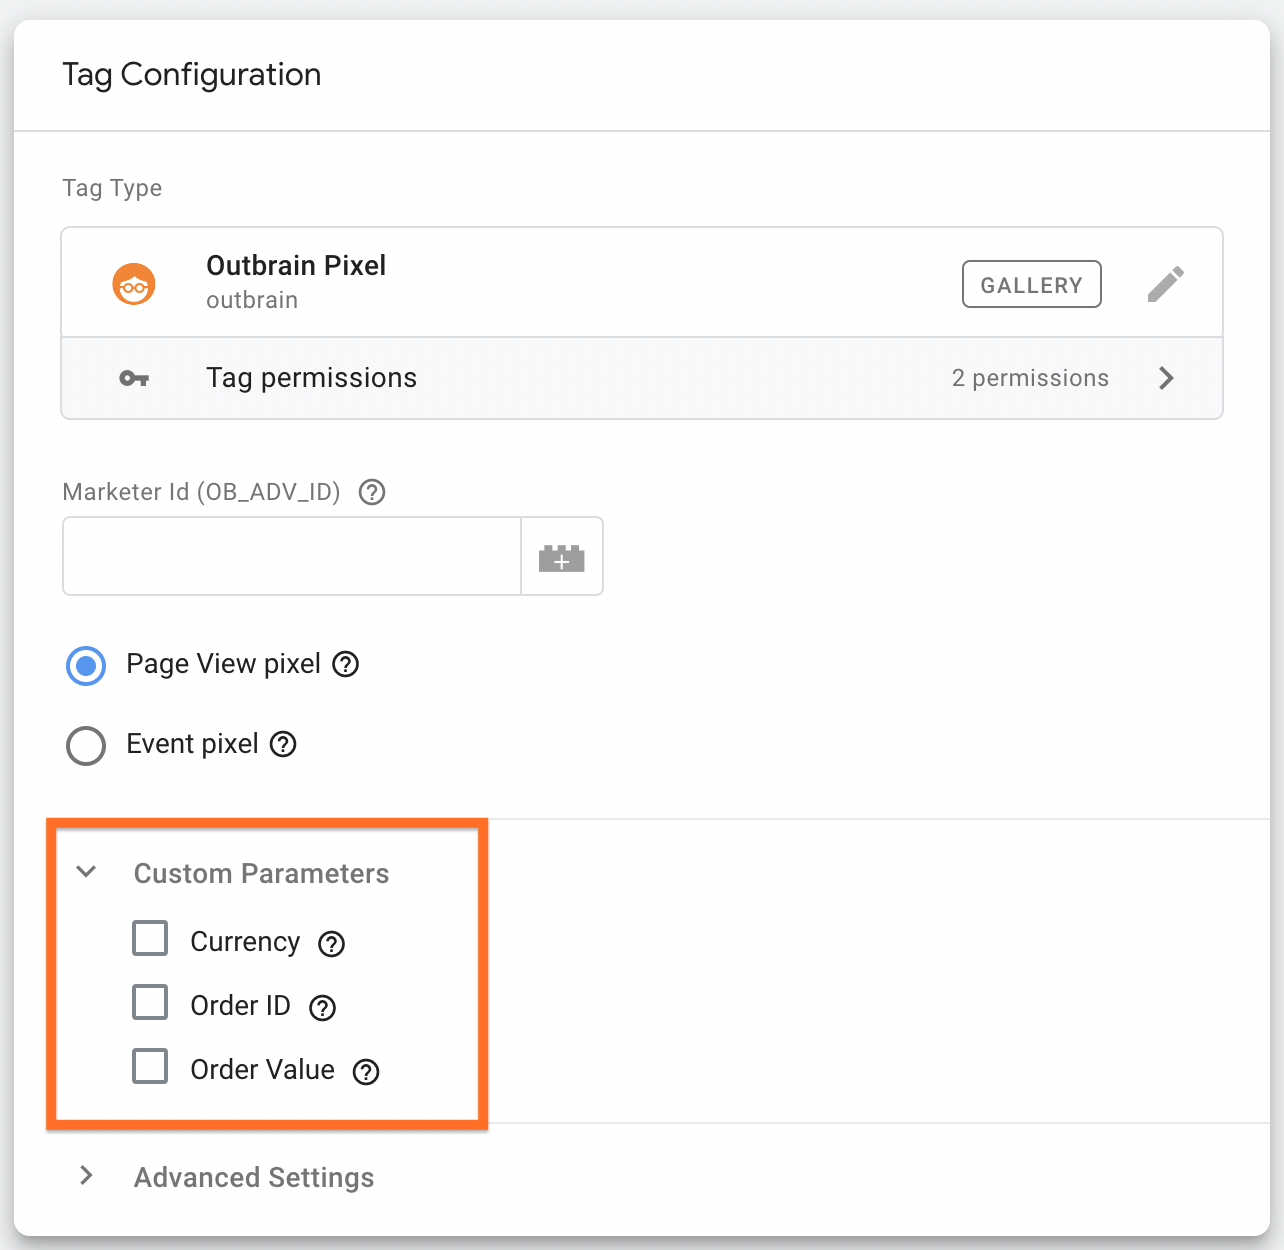
How do I pass Dynamic Values using Google Tag Manager?
Setting up Dynamic Values with Google Tag Manager conversions can be easily done while configuring your Outbrain Tags in GTM.
In the Tag Configuration tab simply choose to add a Currency, Order ID and Order Value parameters:
Please note that you will need to either use a pre-defined Variable for your value or create a new variable within Google Tag Manager. Outbrain Support cannot assist you with variable creation. We recommend consulting with a web developer for assistance.
For more detailed instructions on setting up tags in GTM, please refer to this article.
Questions? We’ve got answers! Feel free to reach out to us and we’ll be happy to assist.