How do I implement Outbrain’s pixel on my Drupal website?
*Are you targeting users in the EU or UK? If so, please ensure you have implemented an IAB-compliant CMP. Without properly passing consent, you will not be able to track conversions using the Outbrain Pixel. For more information on CMPs and how to implement see HERE.*
Successful implementation of your Outbrain pixel is a crucial factor for the success of your campaigns, as it ensures proper conversion tracking.
To help guide you through the setup process, you can find instructions on how to implement the Outbrain pixel based on your website provider.
Please note: The guide below refers to the URL-Based pixel implementation. If you’re looking for instructions on how to implement event-based conversions, please refer to this article.
How to implement the Outbrain pixel in Drupal
1. Navigate to the “Conversions” tab in the Amplify dashboard, click “Install pixel” on the top right-hand corner, and copy the code to your clipboard. If you have any trouble finding this, refer to our Conversions setup guide here.
2. Log into your website.
3. In the admin panel on the top left corner of the dashboard, navigate to “Structure”.

4. In the Structure tab, click “Blocks“.
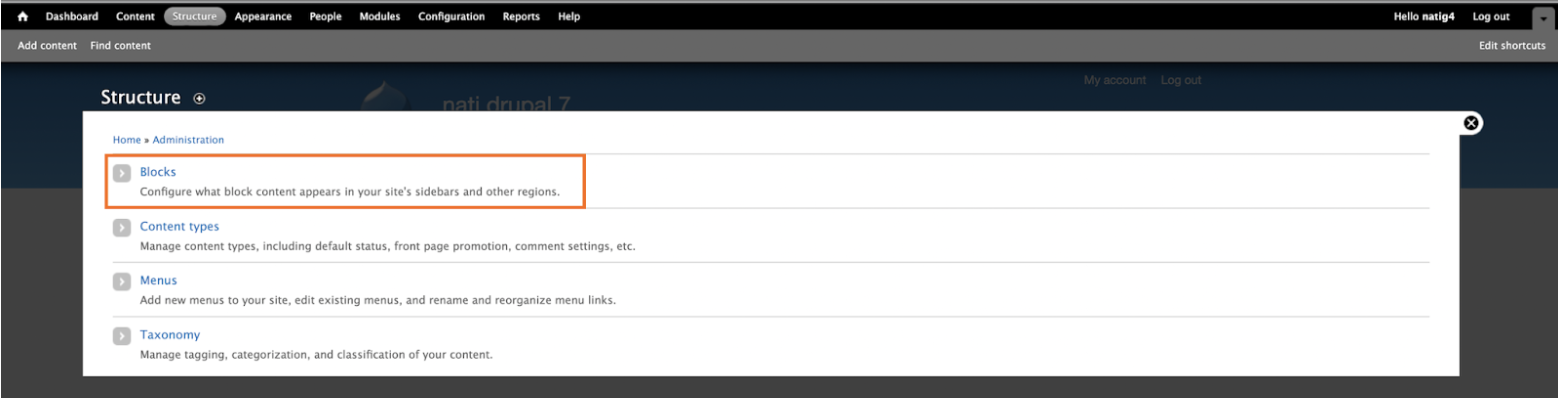
5. In the Blocks tab, click “Add block“:

6. Fill out the block according to the screenshots below. In the “Block body” field, paste the pixel code copied to your clipboard from your Amplify account.
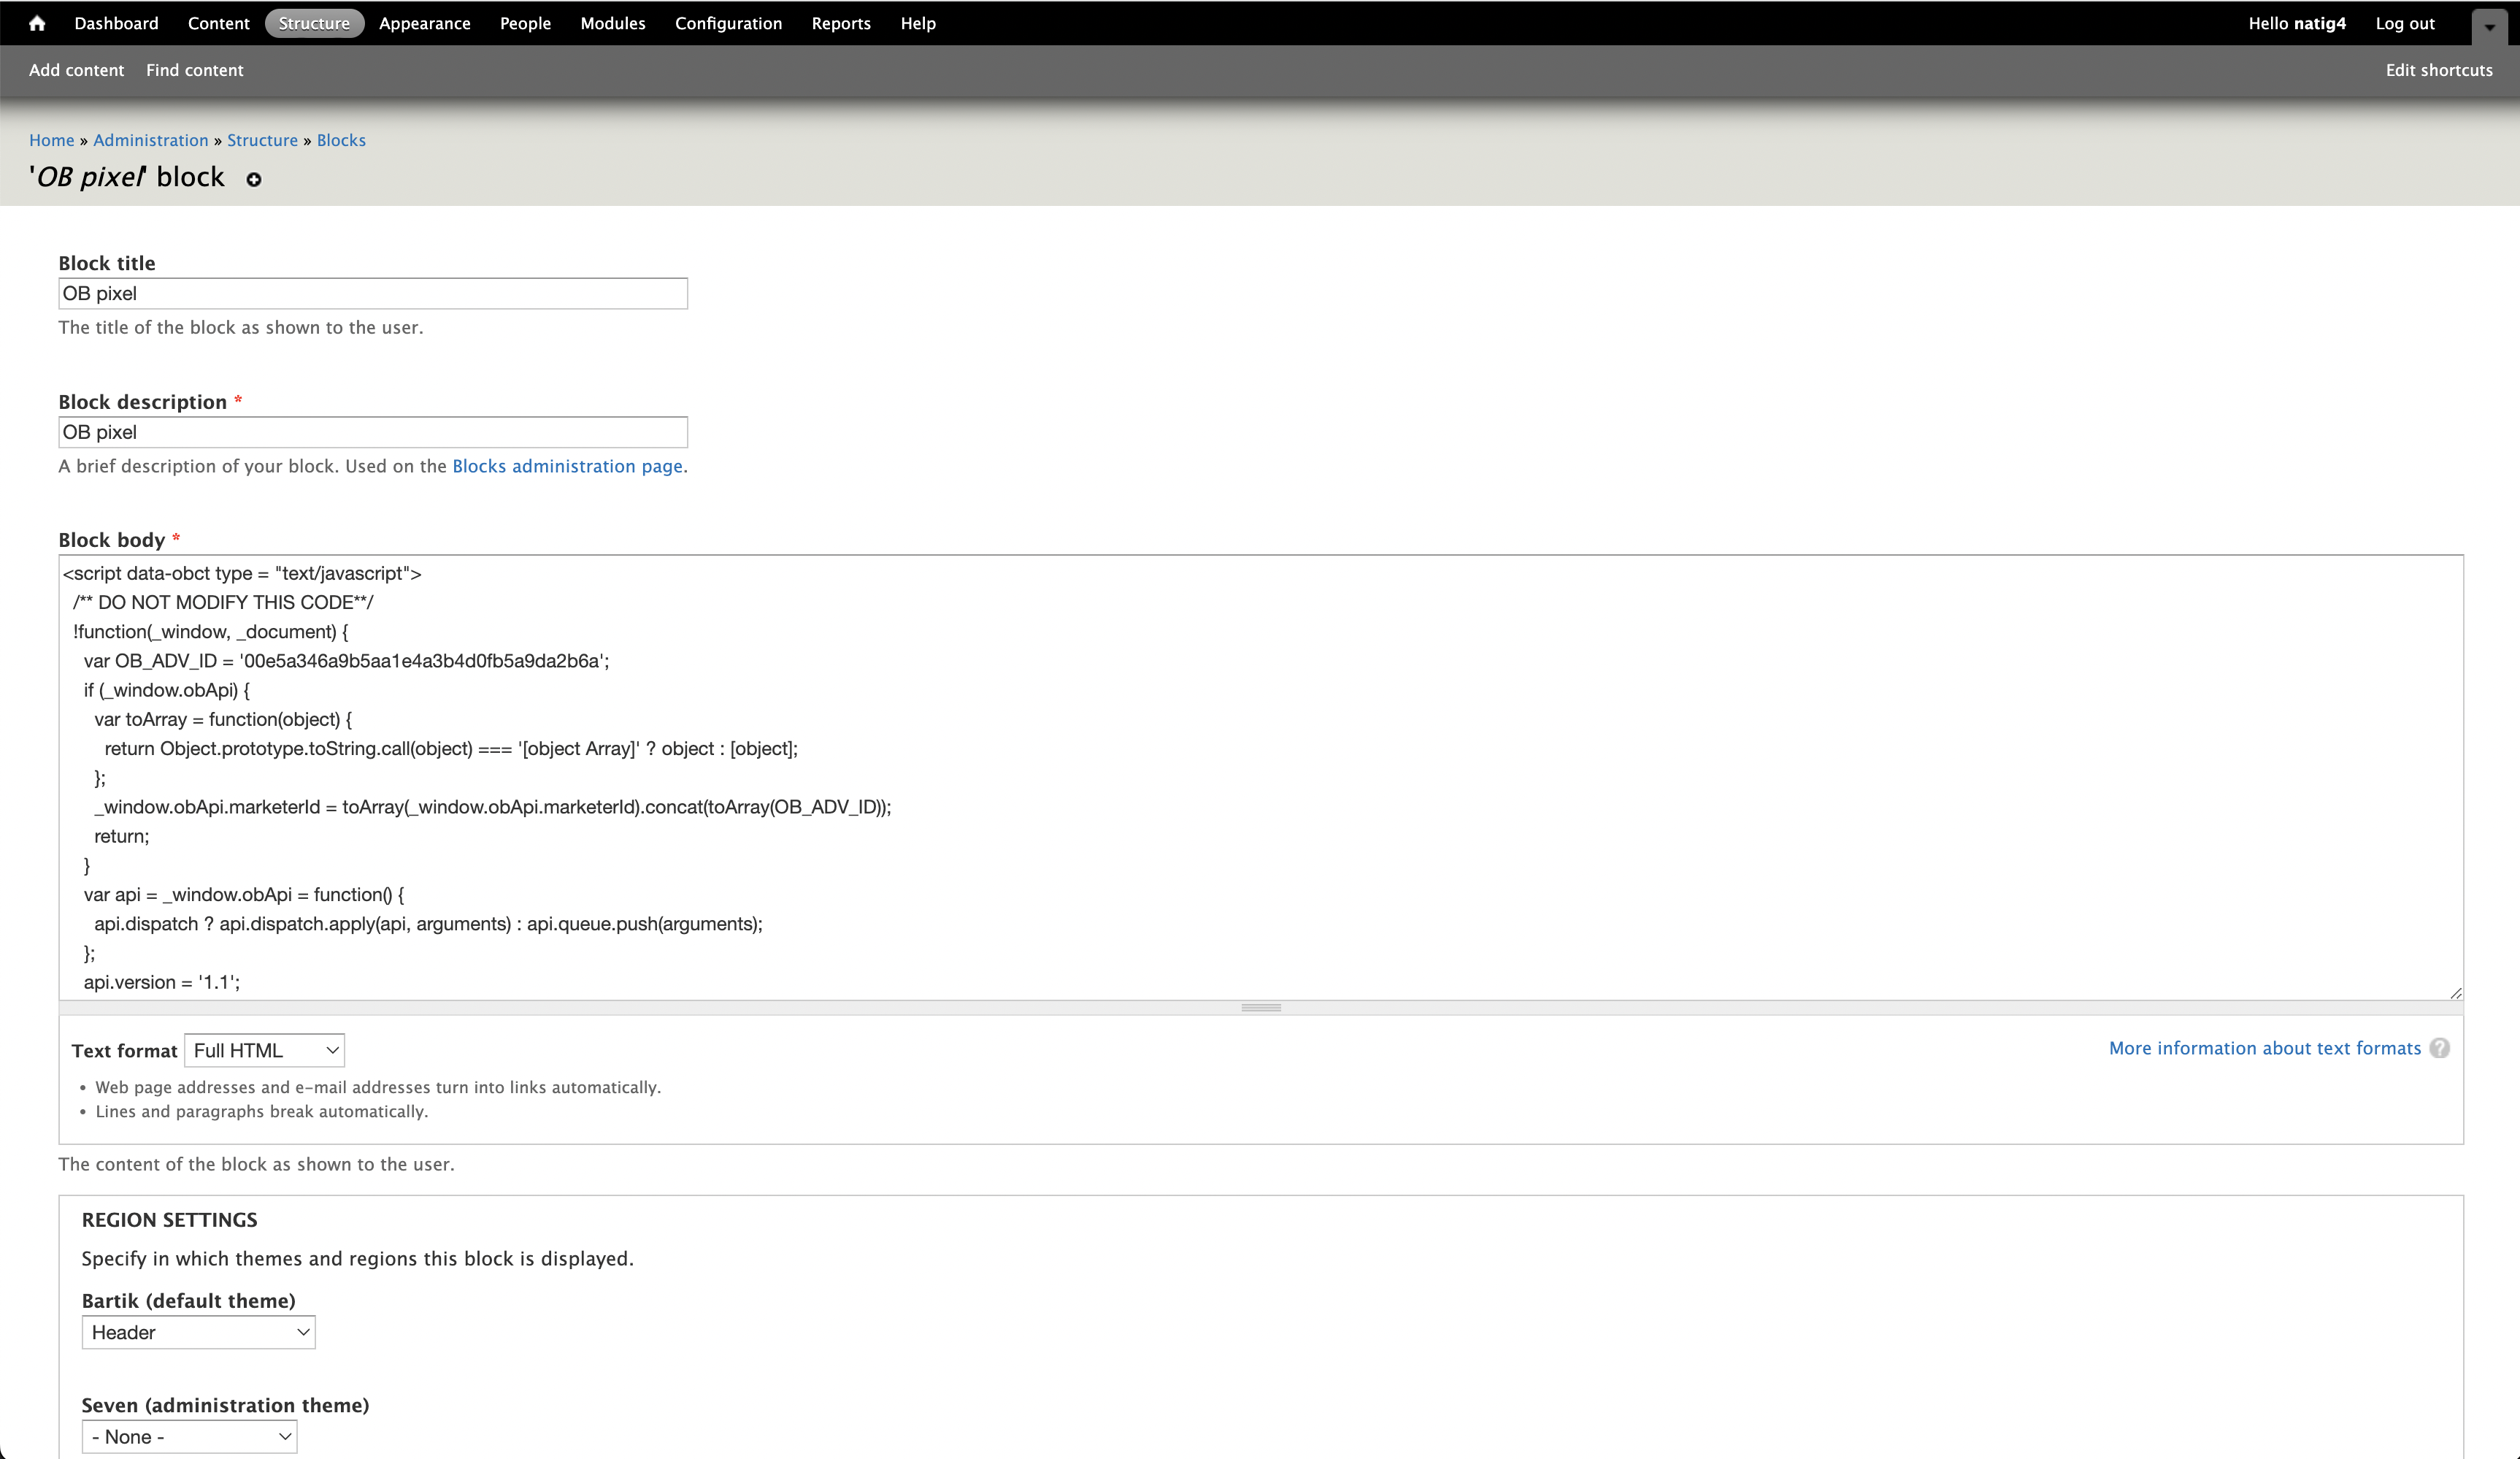

7. Click “Save block” and you’re all set!
To make sure the pixel is implemented as expected, test the implementation using our pixel tracker extension, and make sure it reads as “Active” back in your Conversions tab.