New campaign creation flow to improve your campaign setup experience (BETA) 
Note: The new campaign creation experience is currently in beta and available to a small number of marketers. If you’re interested in testing the new experience, please reach out to your dedicated account manager or our customer success team, if you’re a self-serve client.
Outbrain Amplify enables large and small marketers to reach their goals on the open web. Listening to your feedback, we’re aware that setting up your campaigns can be somewhat complicated, especially for new marketers.
This is why we’re happy to introduce a new campaign creation experience that simplifies your campaign setup, while still ensuring access to the same tools and solutions that help you achieve your specific business objectives.
What’s new?
- A guided and more simplified onboarding flow, that allows you to set up a campaign in a few simple steps
- Campaign setting recommendations, driven by your selected campaign objective and our network insights and best practices
- A refreshed look & feel with an updated and clean flow, keeping you focused on the task at hand
*Please note that the existing workflow and tools are still fully supported. In case you wish to disable the new experience, navigate to the Account Settings page and toggle “Automated Creation mode”.
New campaign creation flow overview
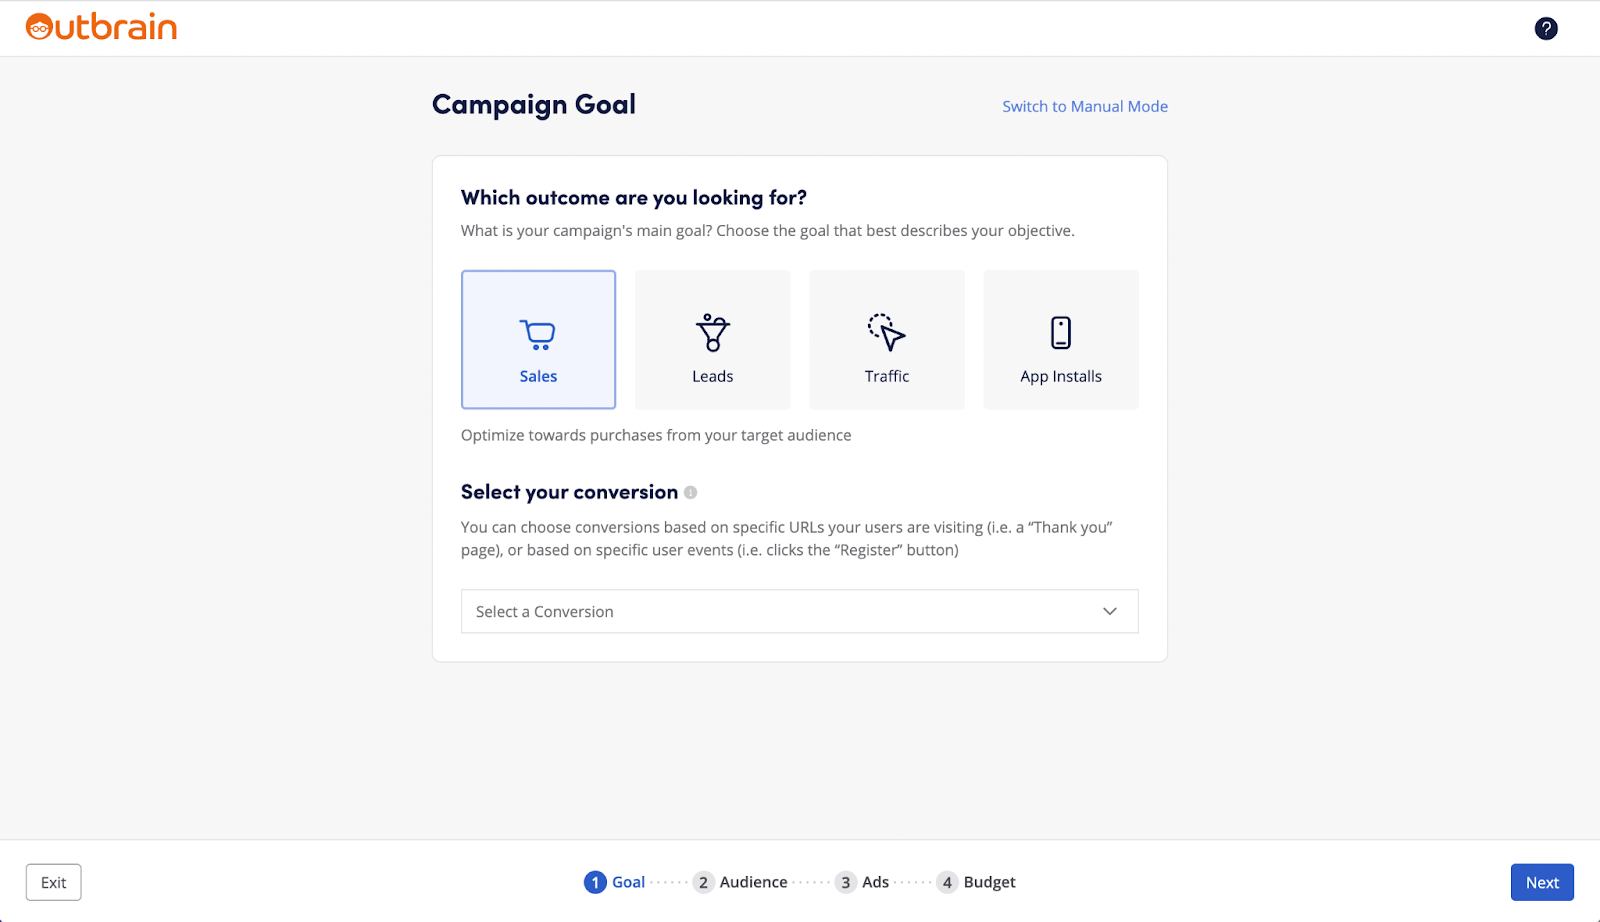
STEP 1: Start by selecting your campaign goal.
If you’re looking to target Sales or Leads, please make sure you’re able to implement conversion tracking to ensure successful campaign optimization. Read more about conversion tracking here.
STEP 2: Define your Audience and Targeting.
Location: Location will be automatically selected based on your IP address. You can always adjust the selection by clicking “Edit”.
Supported breakdowns: Country, Region, DMA, or Zip code.
Audience Targeting: Choose between Outbrain’s full audience, Contextual Categories or User Interests.
Devices: Select the device you’d like your ads to appear on. For better performance, we recommend to run mobile and desktop campaigns in parallel, as these devices usually require different CPCs. Keep in mind only one device can be selected per campaign.
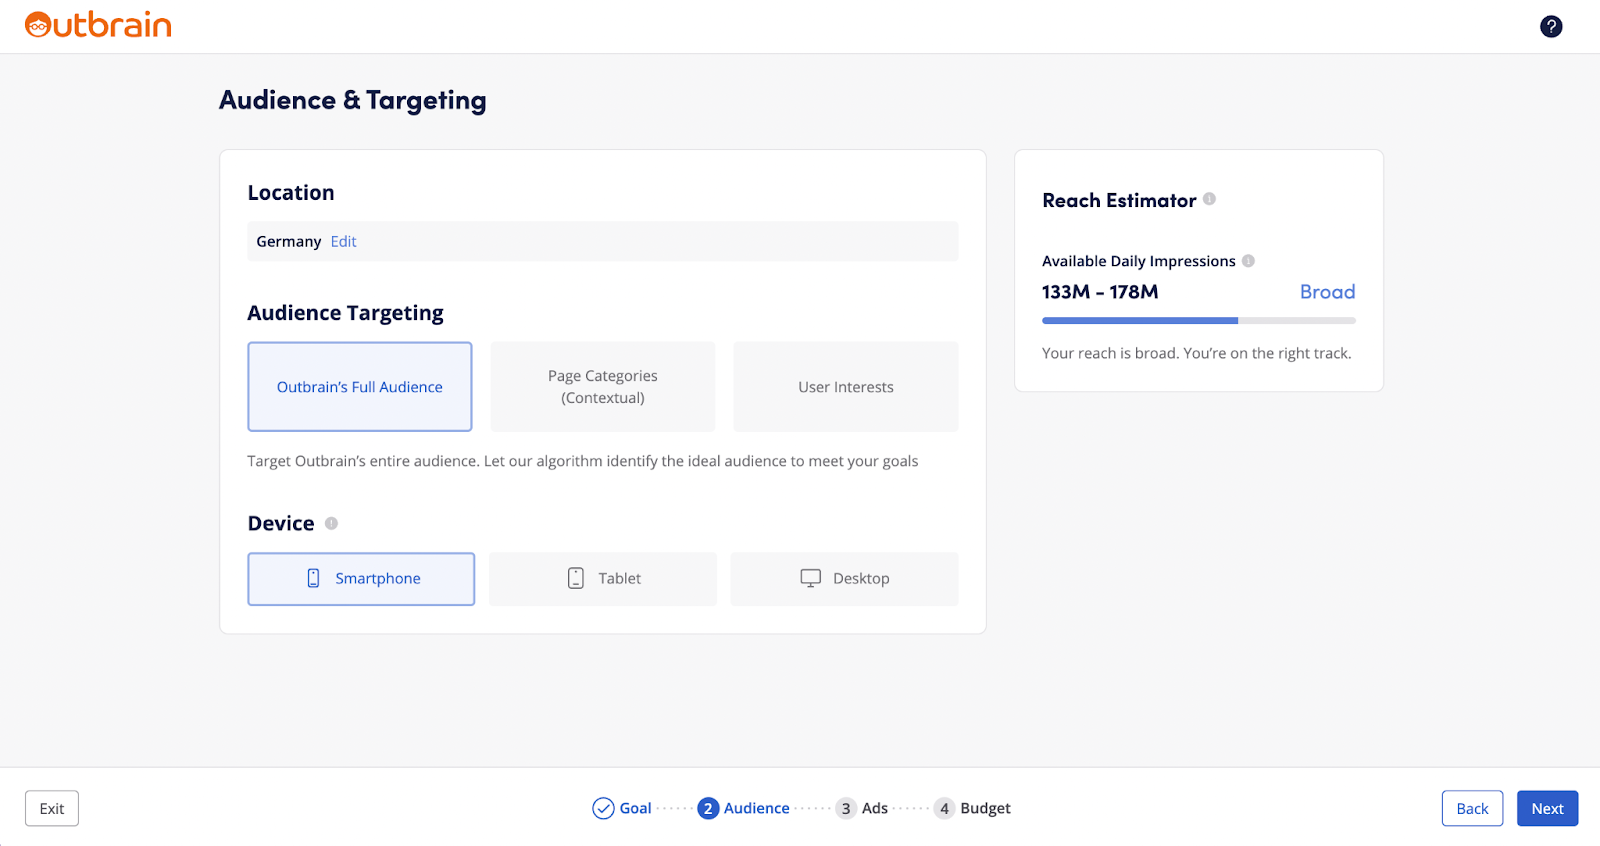
While selecting your targeting, you’ll see the settings reflected in the Reach Estimator on the right-hand side. If you noticed the available impressions are very narrow, consider expanding your targeting or increasing CPC. To learn more about the Reach estimator, click here.
STEP3: Upload your ads
To simplify the ad upload process, use our Automated Ad Generation tool that will automatically create different image and title combinations, based on your website content.
If you’re uploading existing ads, we recommend adding at least 3 title and image variations per URL, helping the system locate the top performer ad and drive attention to a specific page.
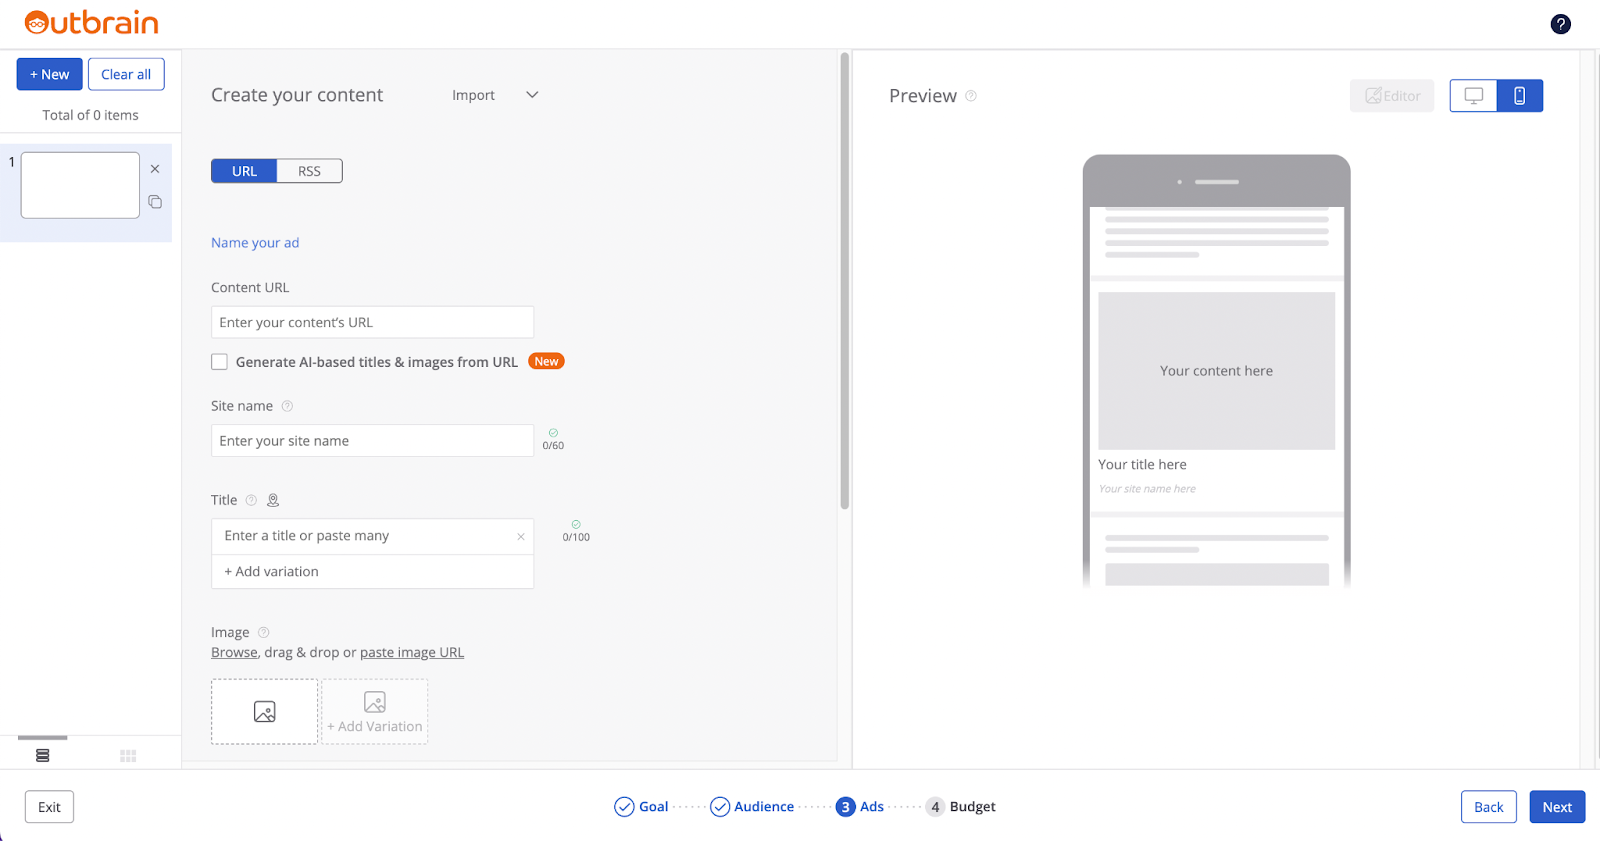
To learn more about how to upload ads, click here.
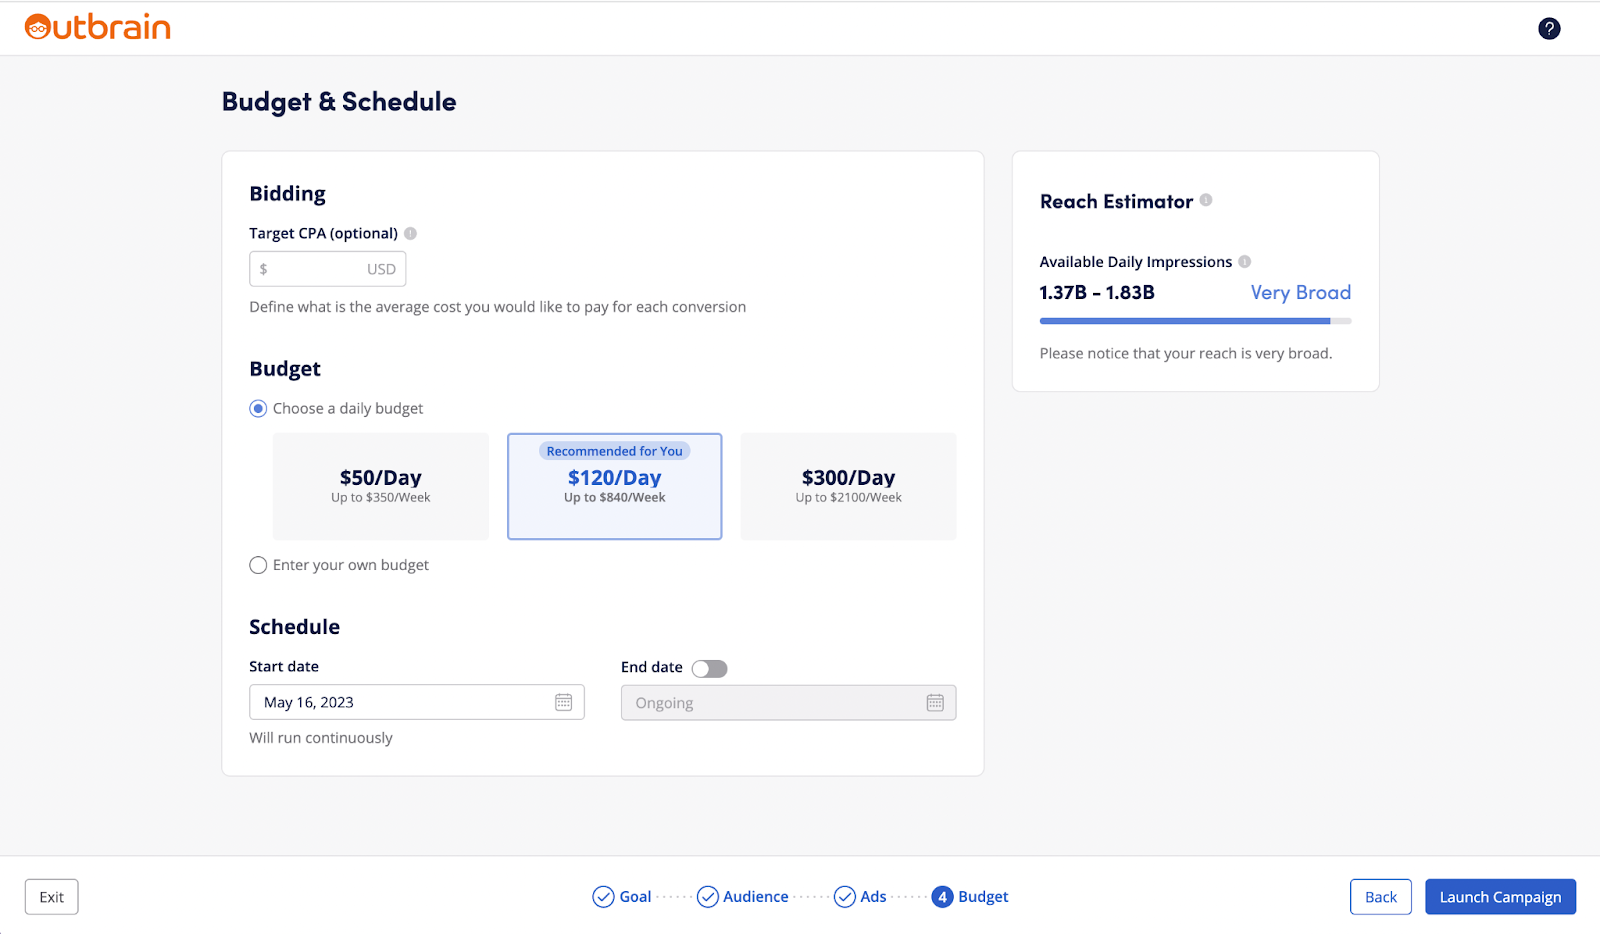
STEP 4: Set Campaign Budget & Schedule
Bidding:
- Optional CPA (only applicable to campaigns with Sales, Leads and App Install objectives): Our system will automatically maximize for conversions, but you have an option to add a specific Target CPA objective that our system will optimize towards.
- Cost per Click (only applicable to campaigns with Traffic objective): Select your target CPC. We recommend starting with a CPC between $0.65 and $0.85. Once the campaign is spending well, you’ll be able to lower that value by a few cents and maximize your budget.
Budget: Select the daily budget from the available preset values or enter your own. We recommend starting with a daily budget of at least $100 – $150 in order to gather enough data to analyze and optimize your campaign.
Schedule: Select start and end dates for your campaign. Setting the campaign to run continuously means it will remain active until you choose to disable it.
STEP 5: Launch your campaign.
Once you’ve launched your campaign, your content will undergo a 1-3 business days review period, making sure that it abides by our Advertising Guidelines.
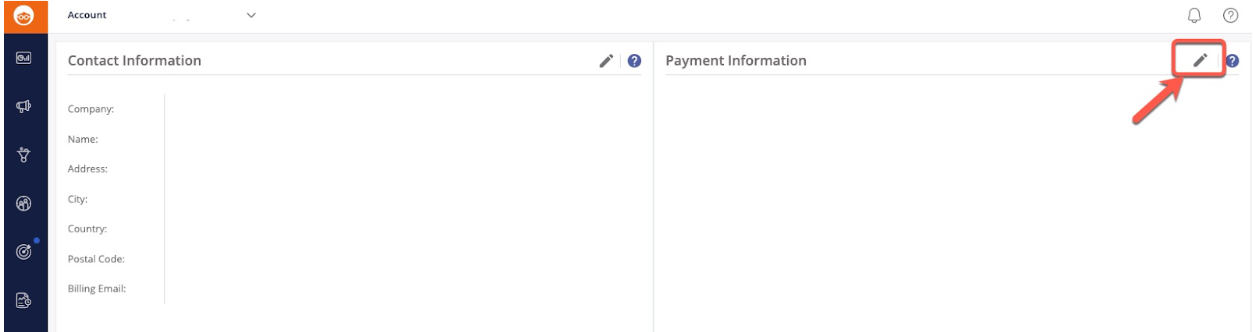
STEP 6: Add your payment details
The last step is to insert your payment details. Simply enter the Payments tab on the left-hand side of your dashboard, and click on the little pencil next to the ‘Payment Method’ headline:
We currently only accept MasterCard, Visa, Discover, and American Express credit cards from countries listed here.
Important note:
- You can switch back to the original Amplify experience any time by turning on/off the “Automated creation mode” toggle in your Account Settings page.
The new campaign creation experience has been designed to make it easier for you to set up your Outbrain campaigns – in case of any feedback, please reach out to our team so we can continue to work and improve this experience.