Successful implementation of your Outbrain pixel is a crucial factor for the success of your campaigns, as it ensures proper conversion tracking.
To help guide you through the setup process, you can find instructions on how to implement the Outbrain pixel based on your website provider.
Please note: The guide below refers to the URL-Based pixel implementation. If you’re looking for instructions on how to implement event-based conversions, please refer to this article.
How to implement the Outbrain pixel in HubSpot
1. Navigate to the “Conversions” tab in the Amplify dashboard, click “Install pixel” on the top right-hand corner, and copy the code to your clipboard. If you have any trouble finding this, refer to our Conversions setup guide here.
2. Log into your website.
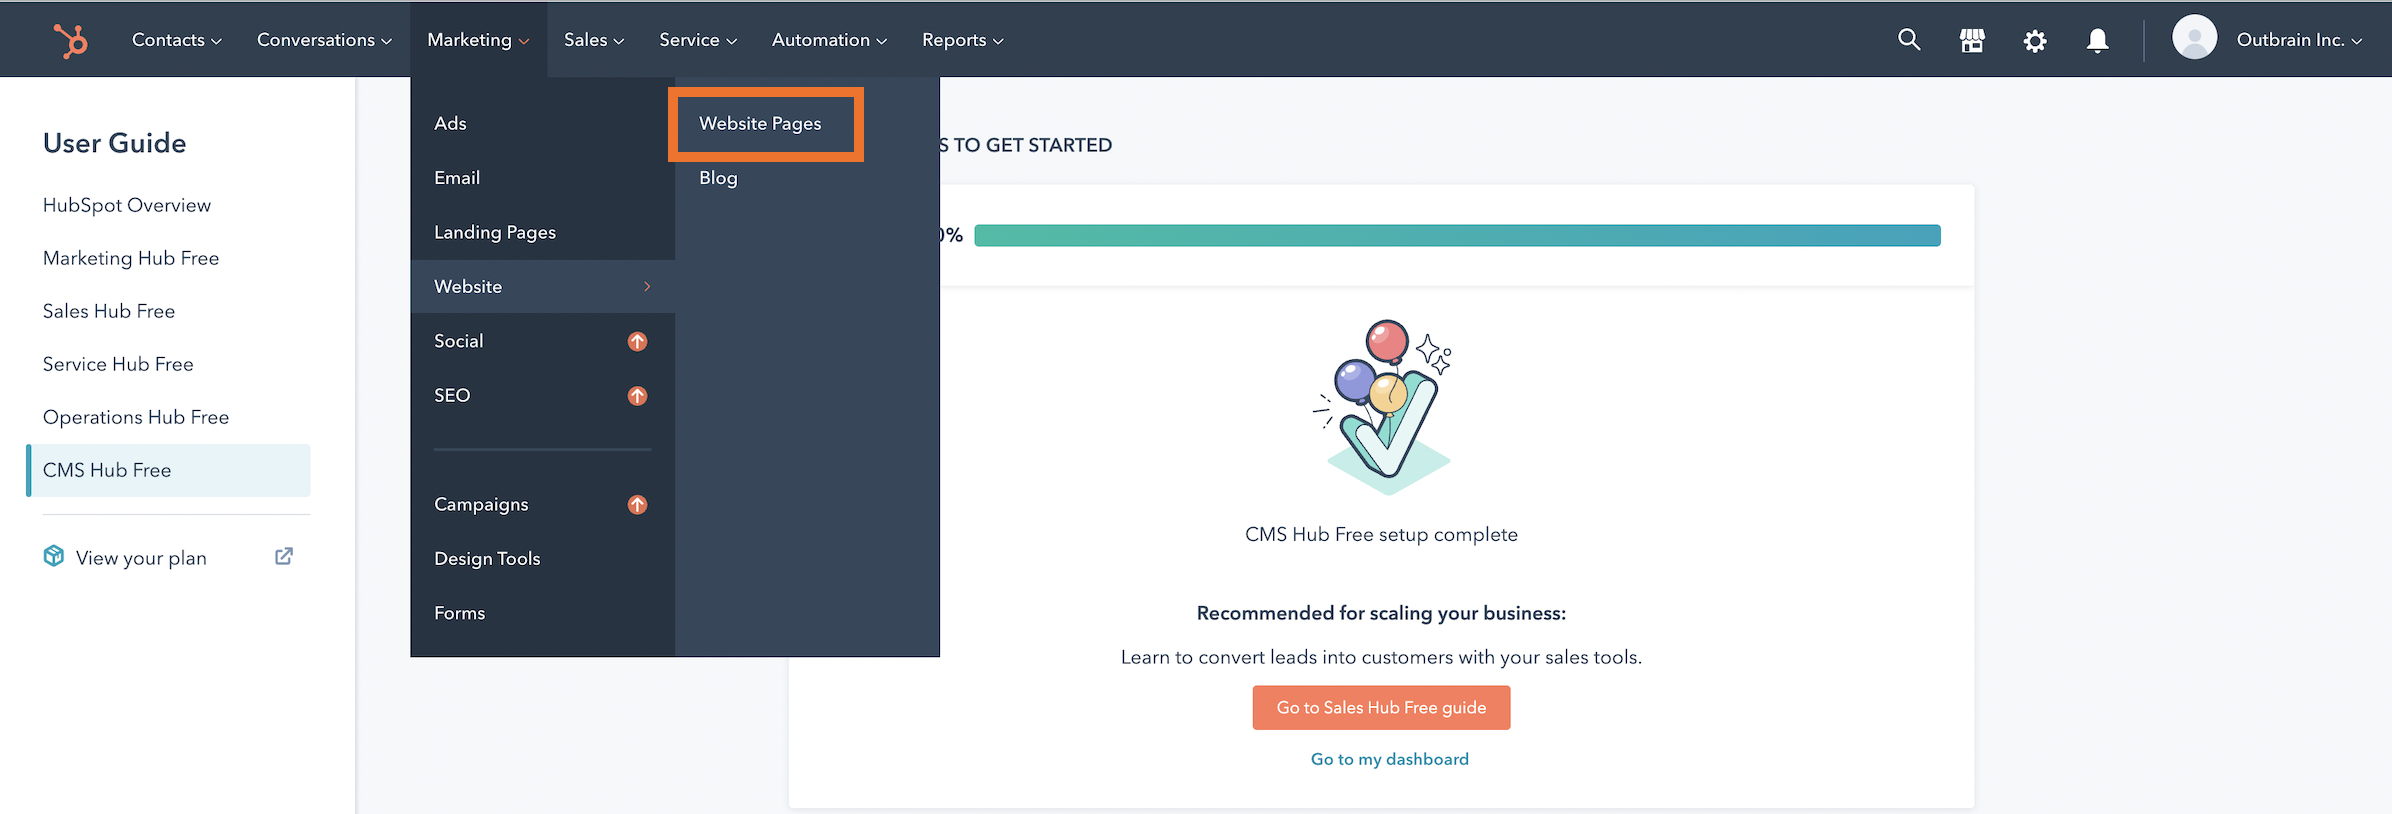
3. When logged in to your Hubspot account, click on “Marketing” > “Website” > “Website Pages” in the top menu.

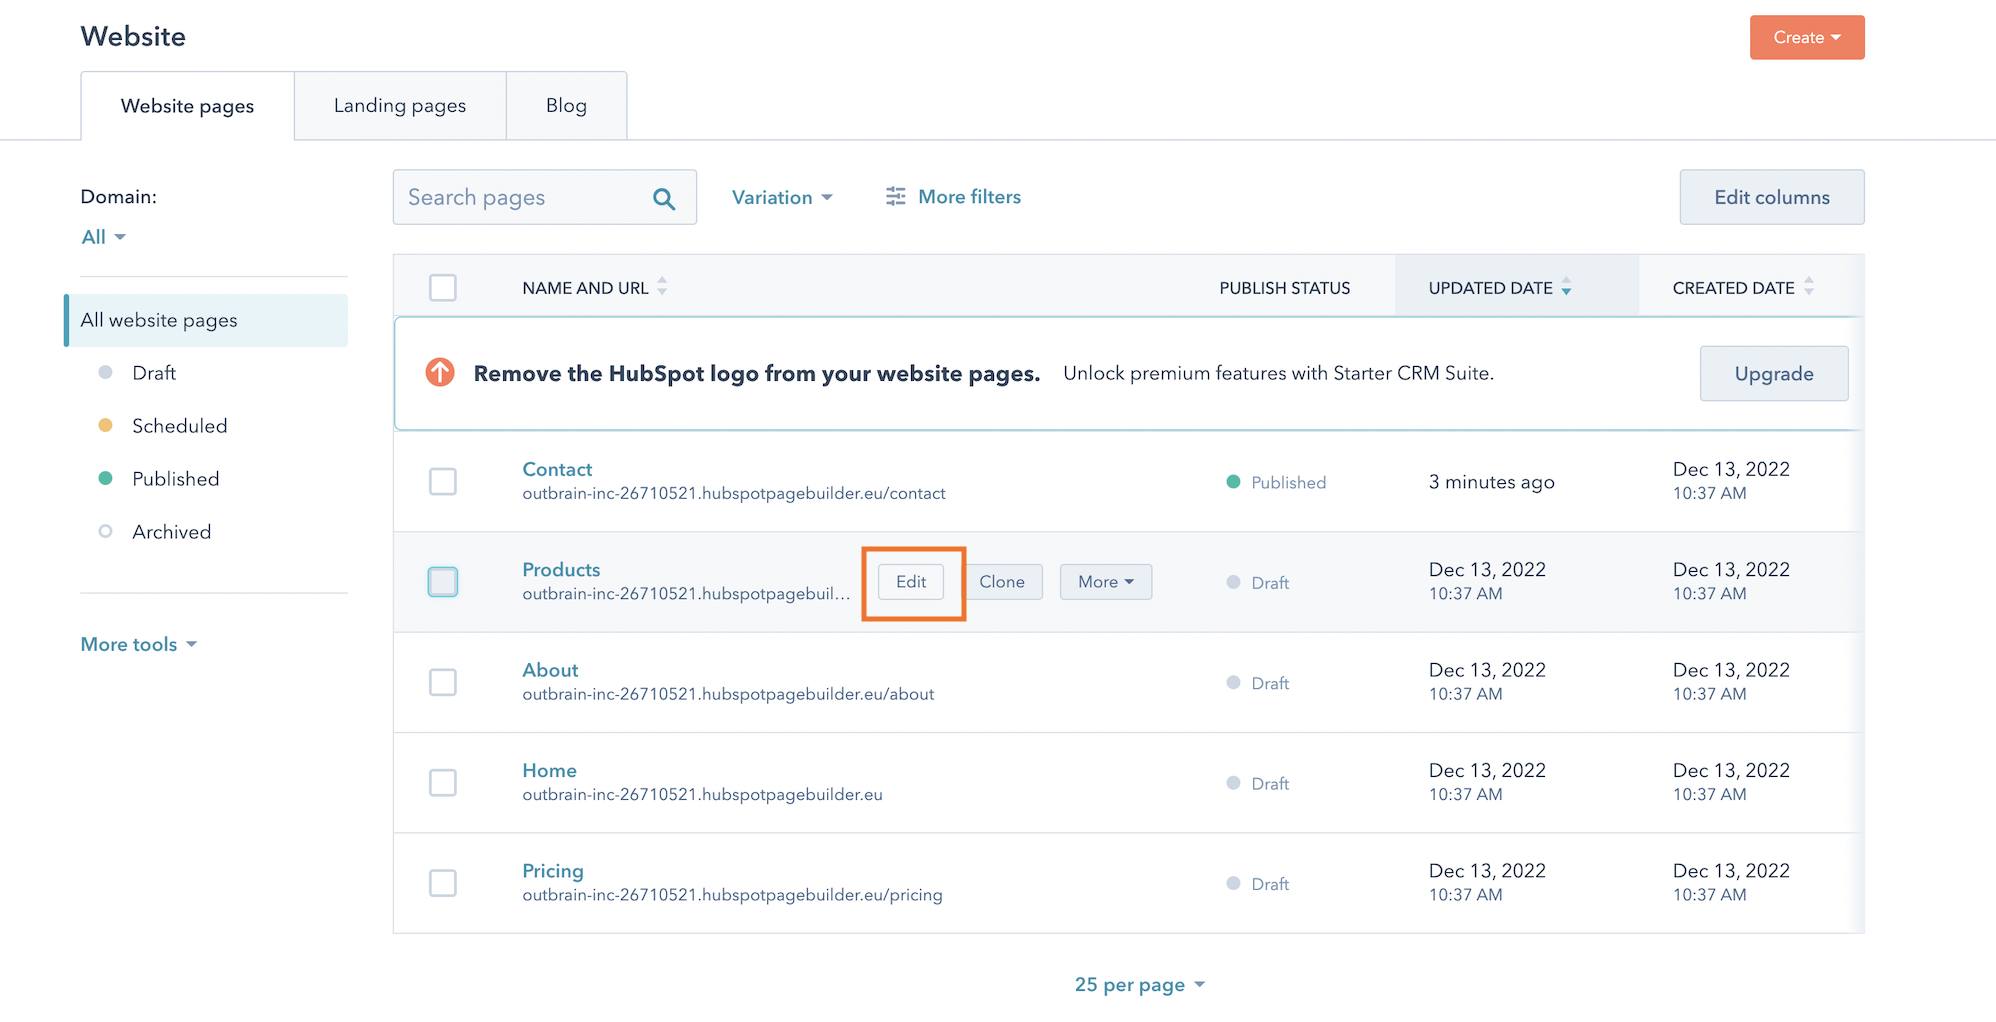
4. Find and hover over the page where you would like to add the Outbrain pixel. Click “Edit“.

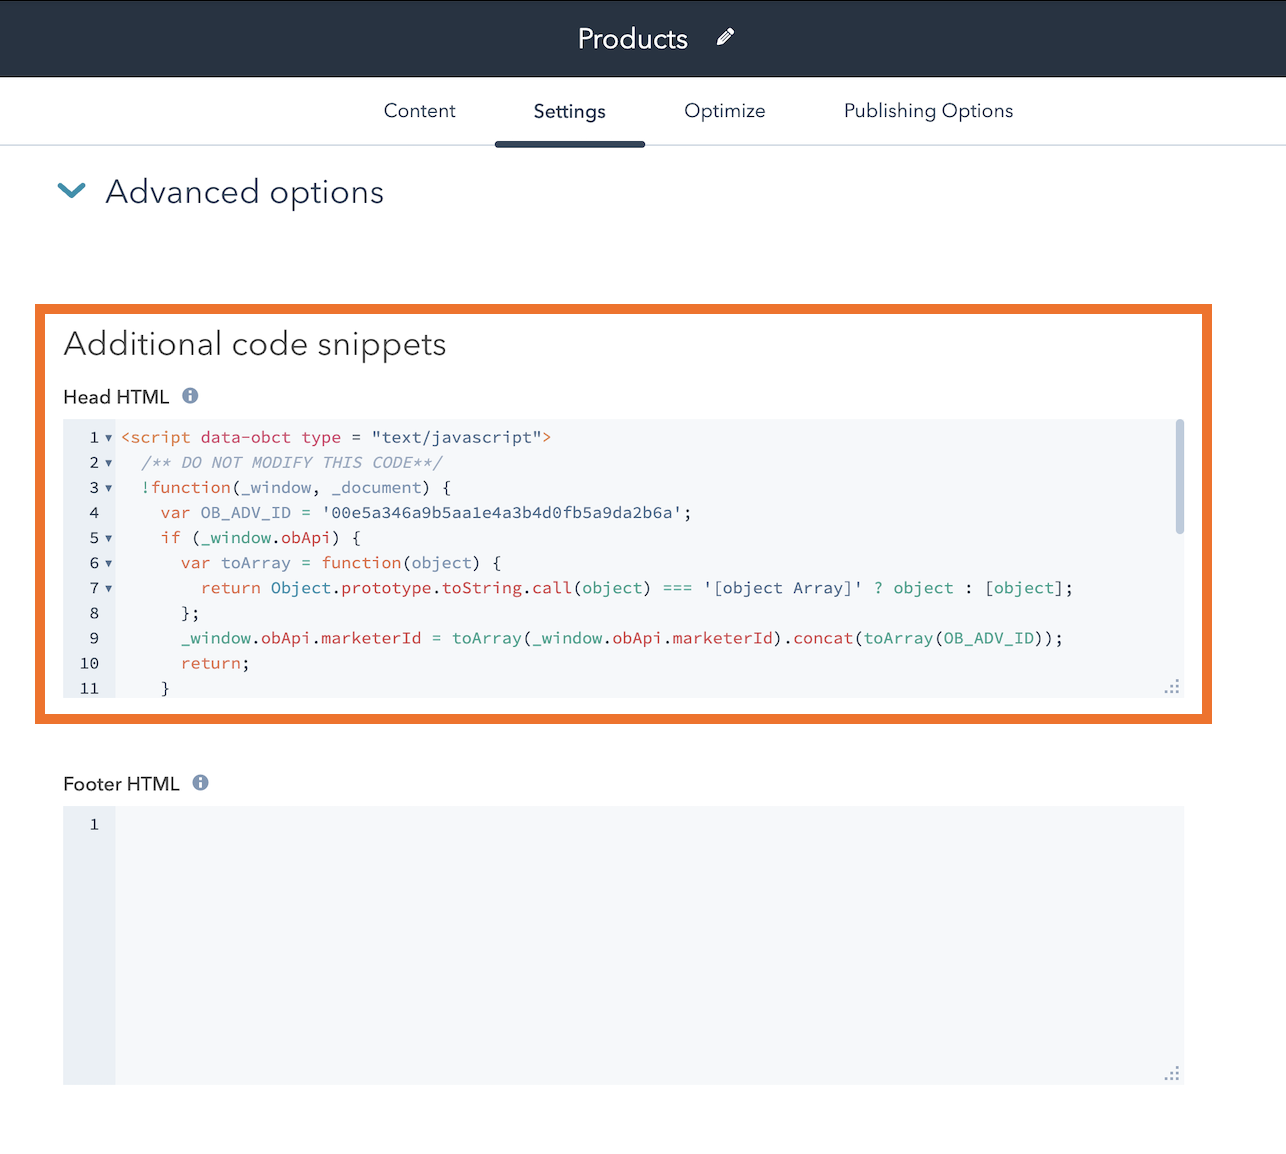
5. In the Edit tab, navigate to “Settings“.

6. Scroll to the bottom, and click on “Advanced options“. Paste the Outbrain pixel code you copied from the Amplify dashboard into the Head HTML section.

7. Click “Publish” and you’re all set!
Please note: If your workspace contains other unpublished changes, they will all go live once you select publish. Alternatively, click “Save” and publish all changes once ready at a later time.
To make sure the pixel is implemented as expected, test the implementation using our pixel tracker extension, and make sure it reads as “Active” back in your Conversions tab.