How do I set up an App Install Smartad campaign?
The App Install Smartad, is custom-built for app marketers to drive more installs from their high-value target users across the open web.
This new ad format is available in the Amplify dashboard along with existing creative formats such as Standard and Carousel Smartads. The App Install Smartad supports both GIFs and static images, as well as brand logo, CTA button, and average app store rating, giving marketers more ways than ever to spark engagement and drive results.
Want to get started? Read on!
Setting Up an App Install Smartad Campaign
Just as you would set up any other campaign, start by selecting “Add Campaign” in the top right-hand corner.
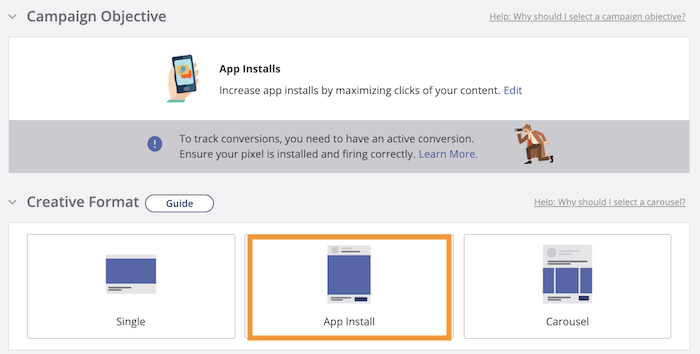
- Be sure to select “App Installs” as your Campaign Objective, as the App Install Smartad will not appear as a creative format option for other objectives.
-
For a full explanation of campaign objectives and how they work, visit this Help Center article.
-
- Once you’ve selected an objective of App Installs and the creative format section appears, simply select the “App Install” format.
- Next, choose your Conversion Bid Strategy. Selecting a Conversion Bid Strategy option is required for App Install Smartad campaigns.
- Conversion Bid Strategy is a great way to allow Outbrain’s algorithm to automatically optimize toward your performance objectives. For App Install campaigns, we recommend selecting the Conversion Bid Strategy mode that’s aligned with your specific goal (whether it be to hit a specific CPA or generally maximize conversions). Read more about the various Conversion Bid Strategy modes in this Help Center article.
- Enter your CPC – Please note that the minimum CPC for App Install campaigns is $0.15, though we recommend launching with a higher CPC and later optimizing down.
-
Continue by filling out all other campaign scheduling and targeting options in the same way that you do for standard Amplify campaigns. If you need a refresher on setting up a campaign, you can visit the Campaign Setup Help Center article.
- Please note: App Install campaigns only run across mobile traffic. Selecting Desktop under Platform Targeting will not actually cause your campaign to run on Desktop.
- Third-party app partner tracking (e.g. Appsflyer, Adjust, Branch) is also supported and recommended. For more information on setting up mobile conversion tracking, check out this dedicated Help Center article.
-
Once you’ve completed each step of the campaign set up, click “Next: App Install” to build your App Install Card.
-
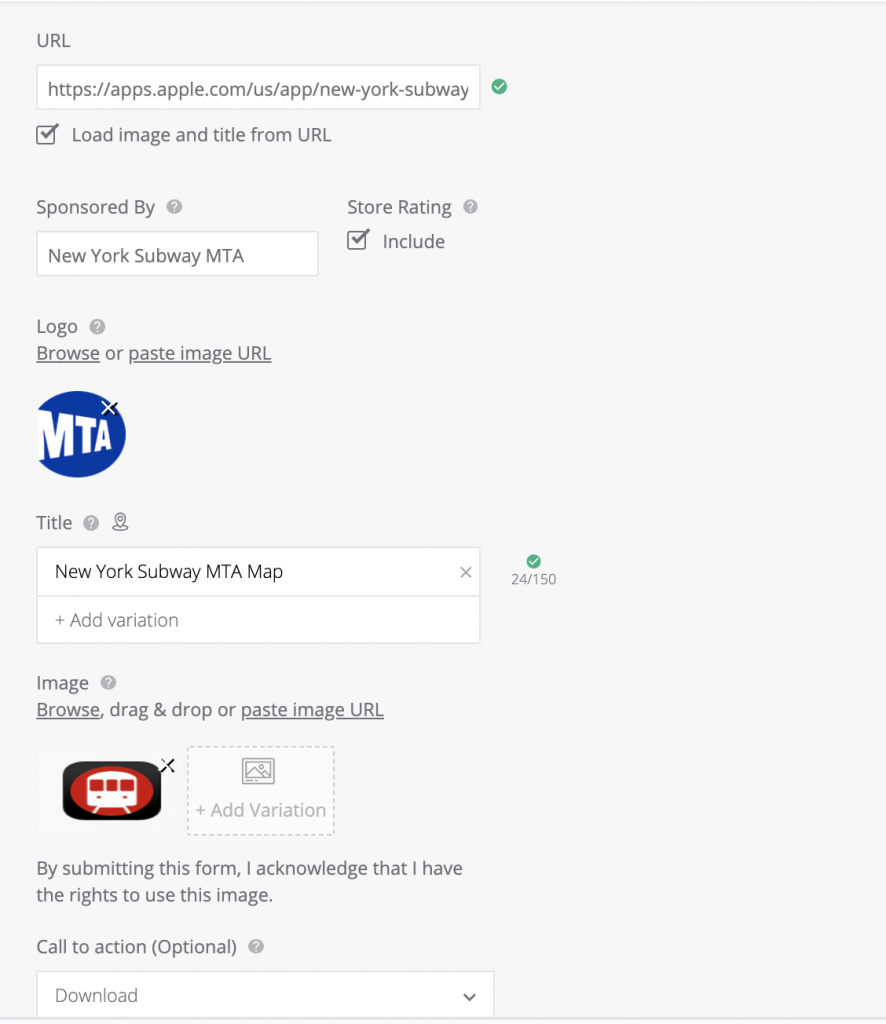
You’ll be brought to the Content Creation screen. You can create this card in the same way that you create standard Amplify content: Enter your app store URL, “Sponsored By,” headline, logo, and image or GIF. Detailed specs for each element are listed below:
- Image: Up to 1200px, in a 1:1 ratio (display size is 300x300px)
- GIF: Maximum file size of 12 MB
- Title: 100 characters max, 60 recommended
- Sponsored By: Maximum 25 characters
- CTA Button: Selected from a predefined list- Apply Now, Book Now, Contact Us, Download, Learn More, Get Quote, Shop Now, Sign Up, Watch More, Listen Now, Subscribe, RSVP, Register Now, Install App, Read more, Play Game, Donate Now, Order Now, Join Now
- Brand Logo: Minimum 40x40px, maximum 400x400px, 1:1 ratio
- App Store Average Rating (OPTIONAL): Check the “Store Rating: Include” box on the content creation screen. Your creative will then display the average rating your app has received in the app store. *Please note this is only supported if the landing page is the App Store*
- For more information about how to upload content, reference this Help Center article.
CTA buttons are supported in 10 languages including English, French, German, Hebrew, Italian, Japanese, Portuguese, Spanish, Dutch, and Swedish.
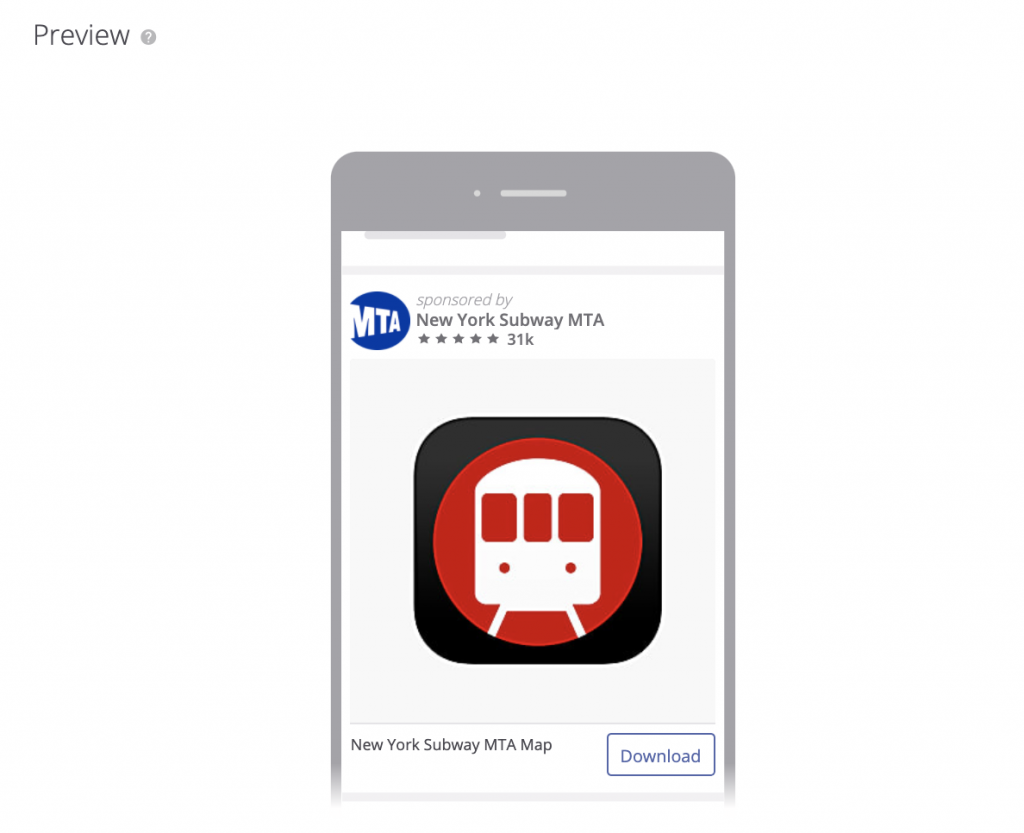
After you’ve completed all of the required fields and are satisfied with how your App Install unit appears in the preview, you can click “Launch Campaign” in the bottom right-hand corner.
Your App Install Card is now complete and ready for approval by our Content Team!
What’s Next?
- Your card will either be “approved,” “rejected,” or “pending” if edits are required.
- If your card requires an edit, simply click the pencil next to the title.