How do I set up an Outbrain campaign with theTradeDesk?
If you’re managing all of your Programmatic campaigns from theTradeDesk and are looking to set up an Outbrain Deal ID, you’ve come to the right place!
In this guide we will cover the following:
- Publisher Deal ID Creation
- Adding Creatives
- Creative Specs
- Creating Ad Groups
- Best Practices
- Troubleshooting
Publisher Deal ID Creation
New Deals are created under the Publisher Management Platform:
- Under Libraries, select publisher management platform (PMP)
- Select “Inventory Contract” > “Private Auction” (PMP)
- Under Supply Vendor Deals, include Outbrain as the Supply Vendor and input the Deal ID (provided by Outbrain) in the “Deal Code” field
- Important: Once a contract is created, ensure that availability forecasting shows volume at bottom of the screen. Once deal/contract is made, it will show up at the bottom of the screen along with “avails.” If “avails” is zero, check that the deal ID code and vendor are correctly selected. The next step will be setting up the campaign, ad group(s) and applying the necessary targeting.
Adding Creatives
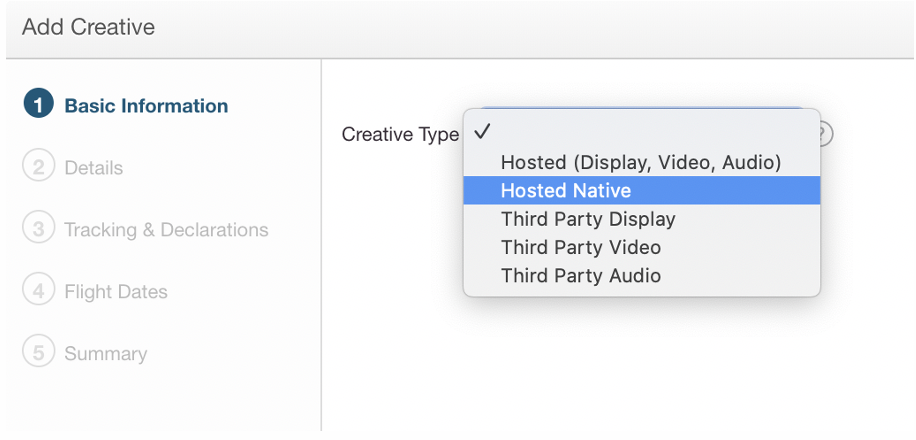
- Under Advertisers > Libraries, select Creatives.
- For Creative Type, select Third Party Display or Hosted Native.
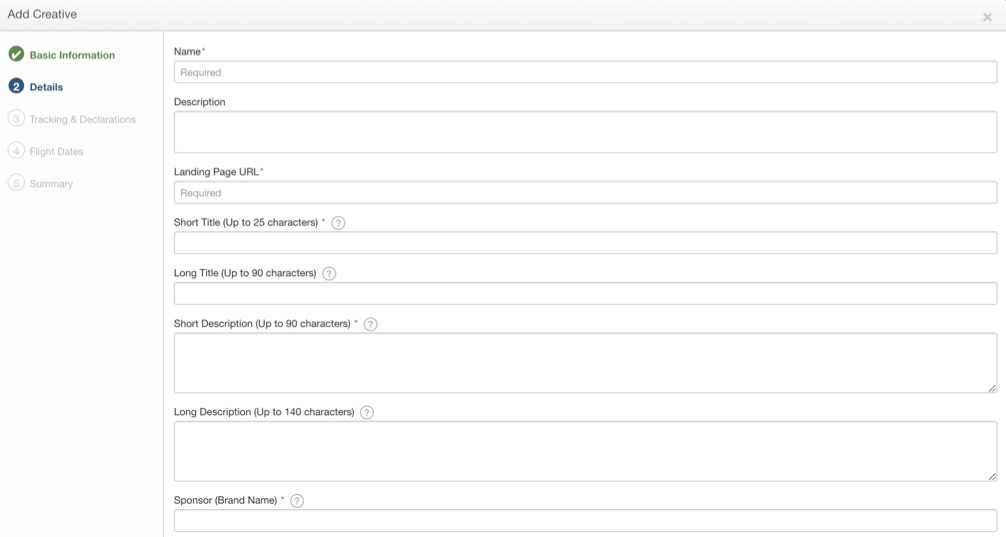
Native Creative Specifications
Important creative specifications to note are:
- Description (Short & Long Description) is only partially supported
A description is partially supported across the Outbrain network. This means that your inputted Description will not be shown across all Outbrain placements, only the select publisher placements which support it. For this reason, you should make sure your headline (title) can stand alone. Adhere to your DSP’s requirements for Description length.
- One headline is required for each ad
Only one headline will render with each of your ads. Your headline should be engaging and able to stand alone. For this reason, Outbrain recommends using the “long title” field. Outbrain accepts maximum 100 characters, but recommends 60.
Note: If you want to ensure your ad renders for all formats, it is best to fill out both the short “headline” and “long headline” fields, so that your ad displays for all widget types.
- Never use images with text within them
To create the best possible ad experience, Outbrain does not approve images that contain text within them. Ensure any necessary text is in your headline.
Creating Ad Groups
Create your Ad Group by selecting Create Ad Group.
- RTB Ad Group Set Up > Creatives > Targeting > Inventory > Confirmation
- Set-Up: specify Ad Group Name, Pacing, Budget.
- Creatives: select Creatives.
- Targeting: Apps & URLs, Keywords, Categories, Environment, Language, Audience Lists, Geography, Day & Time, Browser, Device are supported. JS tracking is not supported.
- Inventory: Supply Marketplace > Supply Vendor Name selection: Outbrain.
- Private Market Selection: When leveraging a deal ID, buyer should select Private Market.
- Confirmation: screen will indicate whether Ad Group was created successfully
Data & Targeting
- Click on “Data Platform” to begin adding any data-based targeting (1st-party-data, 3rd-party data, categories, etc.). Outbrain recommends avoiding substantial additional targeting.
- Specify targeting parameters, then go to Libraries in the top-right corner, select Creatives to apply data targeting, as well as geolocations, tracking, and/or site/app lists.
Best Practices
- Deals will be created under “First Party Inventory Contracts”.
- “Third Party Inventory Contracts” is an “Always On” deal inventory marketplace. This allows organizations to tap into existing “Always On” deals. Often, buyers leverage this to test a publisher before creating a 1:1 contract.
- Want to spend differently across geos/cities within the same ad group(s)
- Look at Locations, where you can adjust the base bid for various DMAs/countries/cities so that you don’t have to create additional ad groups.
Troubleshooting
- Check out Deal Availability within the deal: this will show deal avails. If “0,” likely supply vendor was selected incorrectly or deal code was entered incorrectly during PMP set-up.
- Check out Bid Exclusion Reasons section: this will show why an ad group’s PMP contracts are excluded from bidding.
- Check out Contract Details section within the contract/deal view to ensure that your ad group targeting settings align with the type of inventory that is being passed through this deal/contract.
- Start bid at least 35% higher than listed CPM on Deal ID.
Scaling Concerns?
- Check out the Contract Details within the TTD platform: upon selecting Impression Details, this will show the type of inventory/sampled requests available within the last 7 days. This can help pinpoint ad sizes, ad formats, device types, sites, etc. that are being passed through.
- Limit number of DMP partners applied to the campaign: specific vendors can limit scale. The best (and least expensive) option is The Trade Desk’s Data Alliance, which taps into a data co-op.
- Remove viewability and pre-bid filters.
- Limit DMP parameters and any additional targeting: check out the DMP section within the campaign for forecasting and how many uniques can be reached. The more “and” statements included, the more granular targeting will be and the harder it will be to scale.
Stumped? Reach out to your TTD or Outbrain support contact(s). We are here to help! For more information regarding Outbrain’s programmatic offering, please refer to this Help Center Article.