How do I generate a video creative for my Click-to-Watch campaign?
To create your Click-to-Watch campaign, you’ll first have to generate a creative from your video file in the Video Creative Studio.
Video Creative Studio is where you can upload your video, add a click-through URL, and optionally specify one or more CTA buttons. All the elements are then packaged into a video creative VAST that are used to create your Click-to-Watch video ads.
*If this is your first Click-to-Watch campaign, make sure to check out the Click-to-Watch creative specs and requirements here.
Once you have all the necessary elements ready, continue reading this article to learn how to create your Click-to-Watch video ads.
Compose a new creative in Video Creative Studio
For a quick tutorial, feel free to watch this video, or continue reading for more information.
- Navigate to Video Creative Studio located on the left hand-side of the dashboard.

- Click “+ Add Creative” to open the composer screen.

- Set Creative name: Internal name that will appear on the creatives list, so make sure it is unique.
- Upload Video: Drag and drop the video file to the relevant box (or upload it from your local files).

*Please note: The video will be uploaded to Outbrain’s cloud and transcoded into many formats to accommodate various devices (keep in mind this process might take a few moments). Once loaded, the video will appear in the large player’s area on the left side and can be played there.
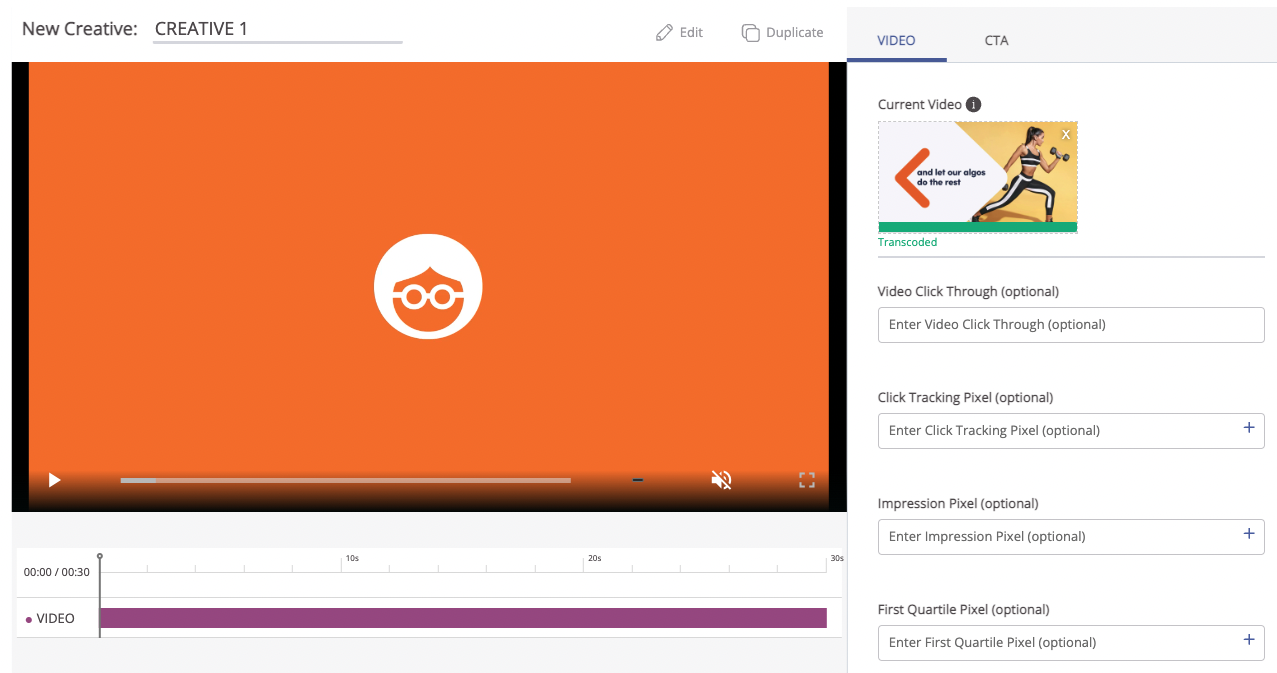
- Set tracking pixels and a click-through URL: Provide an optional video click-through URL and optional tracking pixels that will be triggered at different intervals while the video is playing. If CTA is part of the video, we recommend to use the same click-through URL as that of the CTA button.
- Set a CTA button: One or more CTA buttons can be displayed as part of the video while it is playing. Using a CTA button is optional, however, it is suggested if the campaign’s goal is to generate traffic and drive performance. The settings of each CTA button include:
- CTA button image
- The button position on the video, and its scale
- The start time and duration of the CTA appearance
- Click-through URL that will redirect the user to a landing page
- Optional CTA click-tracking pixel

- Add additional CTA buttons: In case multiple CTA buttons are used, each CTA button would normally be set at another point in the video play, leading to a different target URL. Therefore, each CTA button has its own set of attributes, shown when the thumbnail is selected.
*Please note: Any adjustments you make will be reflected in the left-hand video player. You can preview the video at any stage and ensure that all the elements are rendering correctly. “Save” can be clicked during the upload process to save the most recent draft of the creative.
- Publish your video creative: After you’ve completed all of the required steps and are happy with how your Click-to-Watch video units appear in preview mode, click “Publish. When you publish a creative, a VAST URL, including all the defined elements will be generated. The status of the creative, will change from “Draft” to “Ready”:

What’s Next?
When your creative is “Ready”, you will be able to upload it to your Click-to-Watch video campaign. To learn about how to assign the uploaded creatives to your Click-to-Watch campaign, please refer to this article.