How to import conversion data from Adobe Analytics to Outbrain
To create a conversion report in Adobe Analytics that can be shared with your Outbrain Amplify account, please follow the steps below:
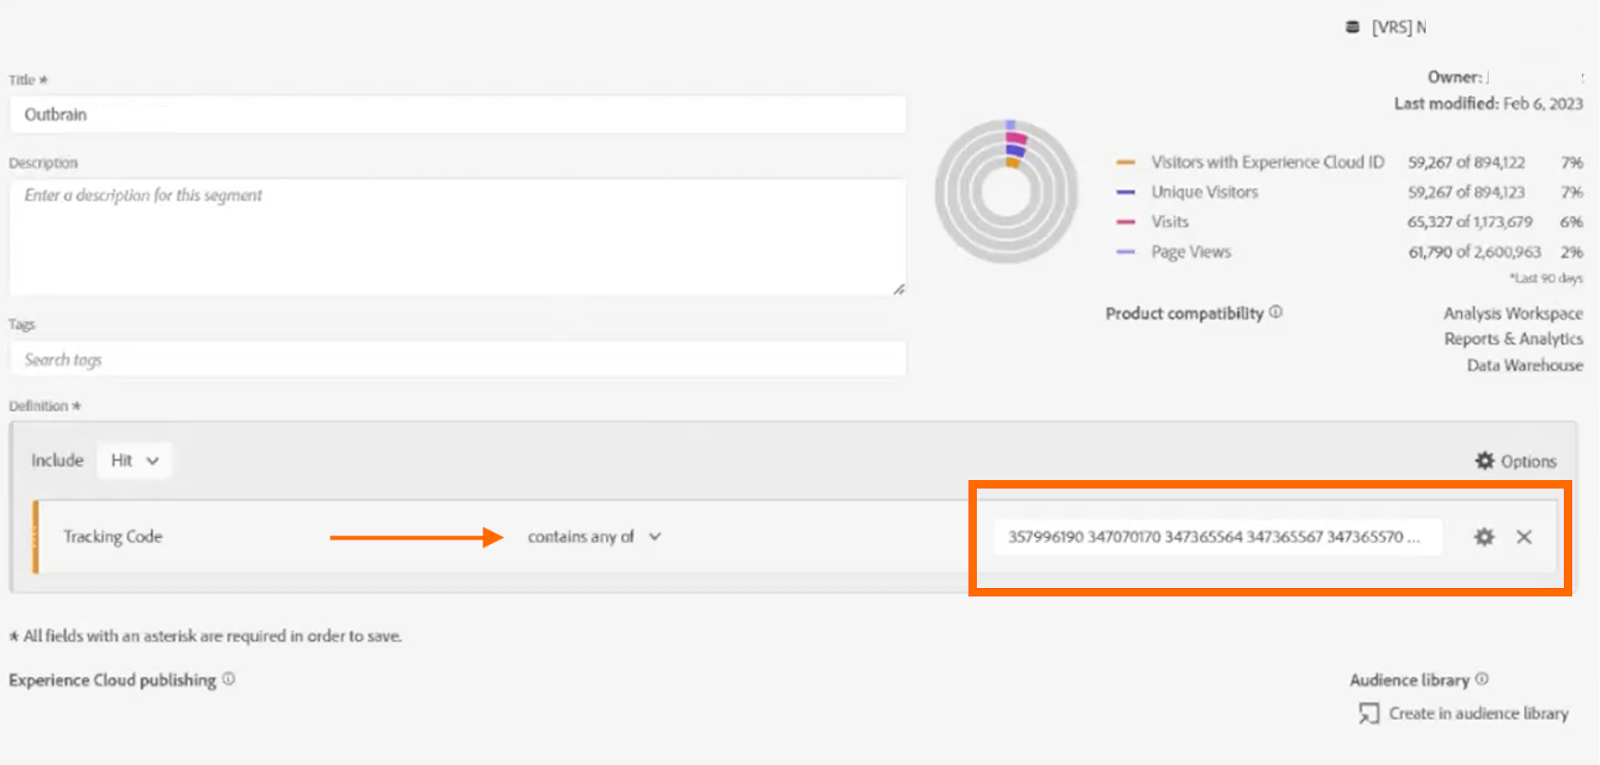
STEP 1: Create a new segment in Adobe Analytics that will be dedicated to collecting traffic for your Outbrain campaigns.
STEP 2: Include your Outbrain campaigns in the segment.
In the Segment tab, search for “Tracking code” (the easiest way to add it is by typing in “Tracking Code” in the search bar on left hand-side and select “Tracking Code”:

In the tracking code field, insert all your internal Outbrain campaign IDs to make sure all campaigns you’re looking to share data for are included. In the operator field, select “contains any of” and save the segment.
STEP 3: Set up segment report parameters:
- Add all the metrics you’d like to optimize for or report on to the reporting table (keep in mind you can include both engagement and conversion metrics).
- Select the period of time for which you want to send data (we recommended to select yesterday’s date to ensure data relevance)
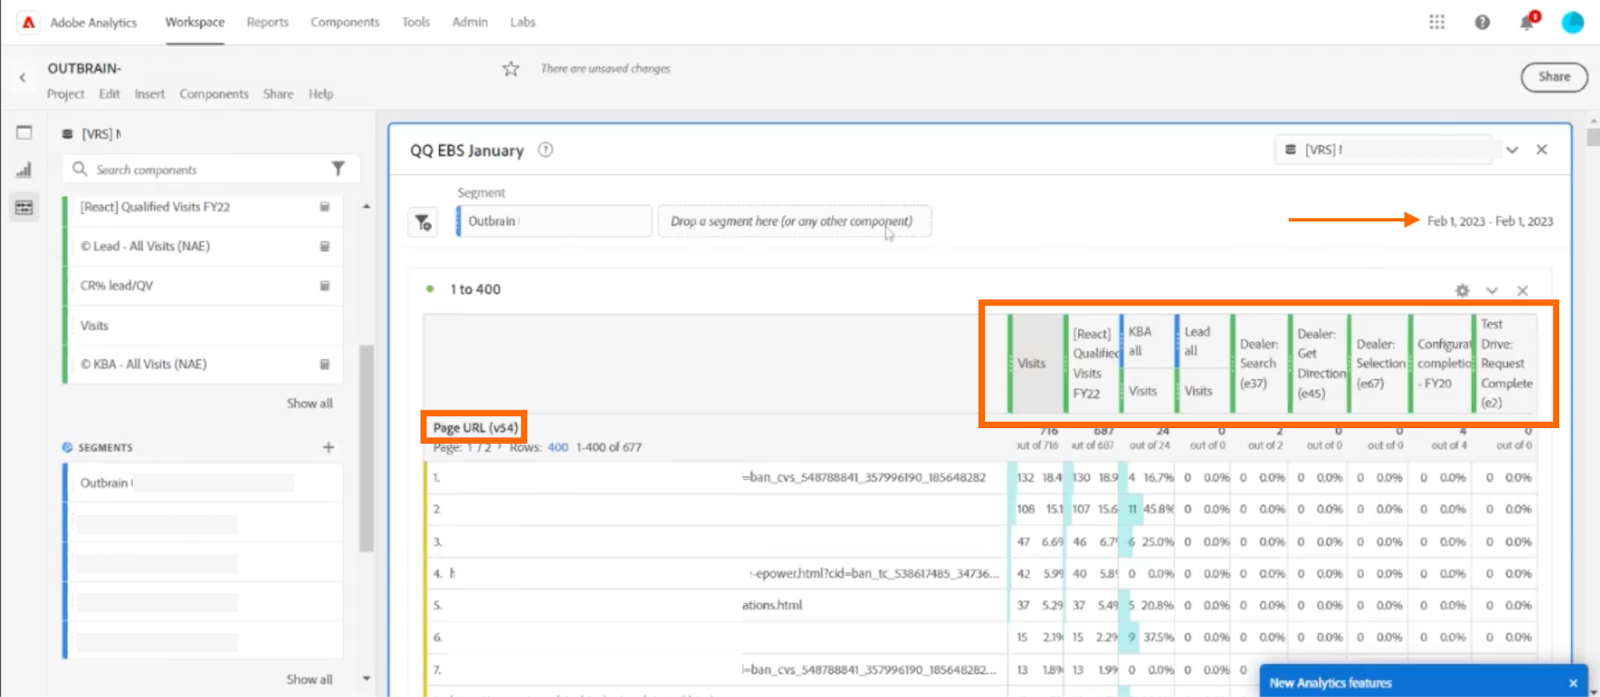
- Include your Page URL eVar (variable used by Adobe to track website activity) to the report to ensure all relevant website activity is tracked in the report.
You can find your account eVar next to the Page URL (example screenshot below – eVar = v54).
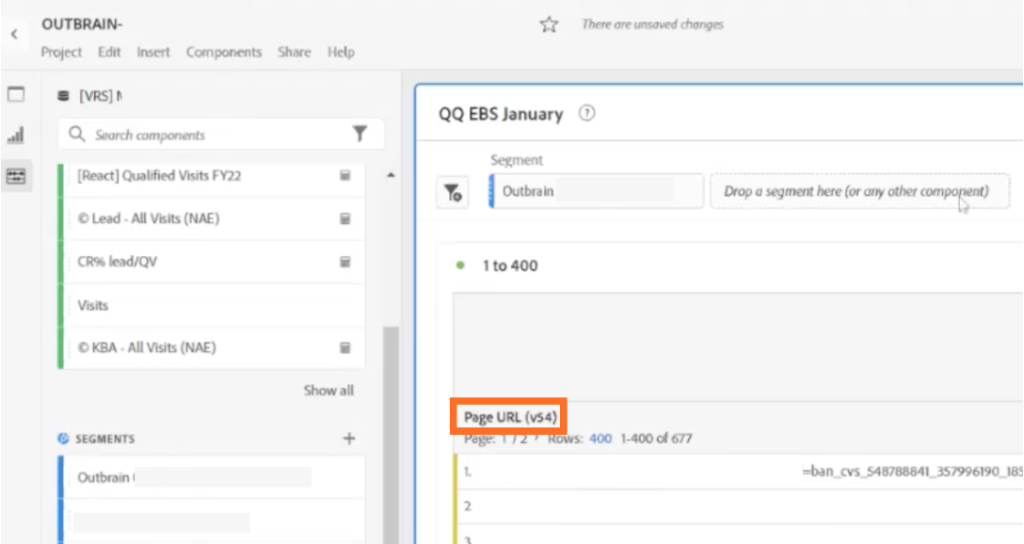
- Copy your eVar into the search field on the left side, select the first option, then hold it down and drag it to the Page URL (as shown on screenshot below):

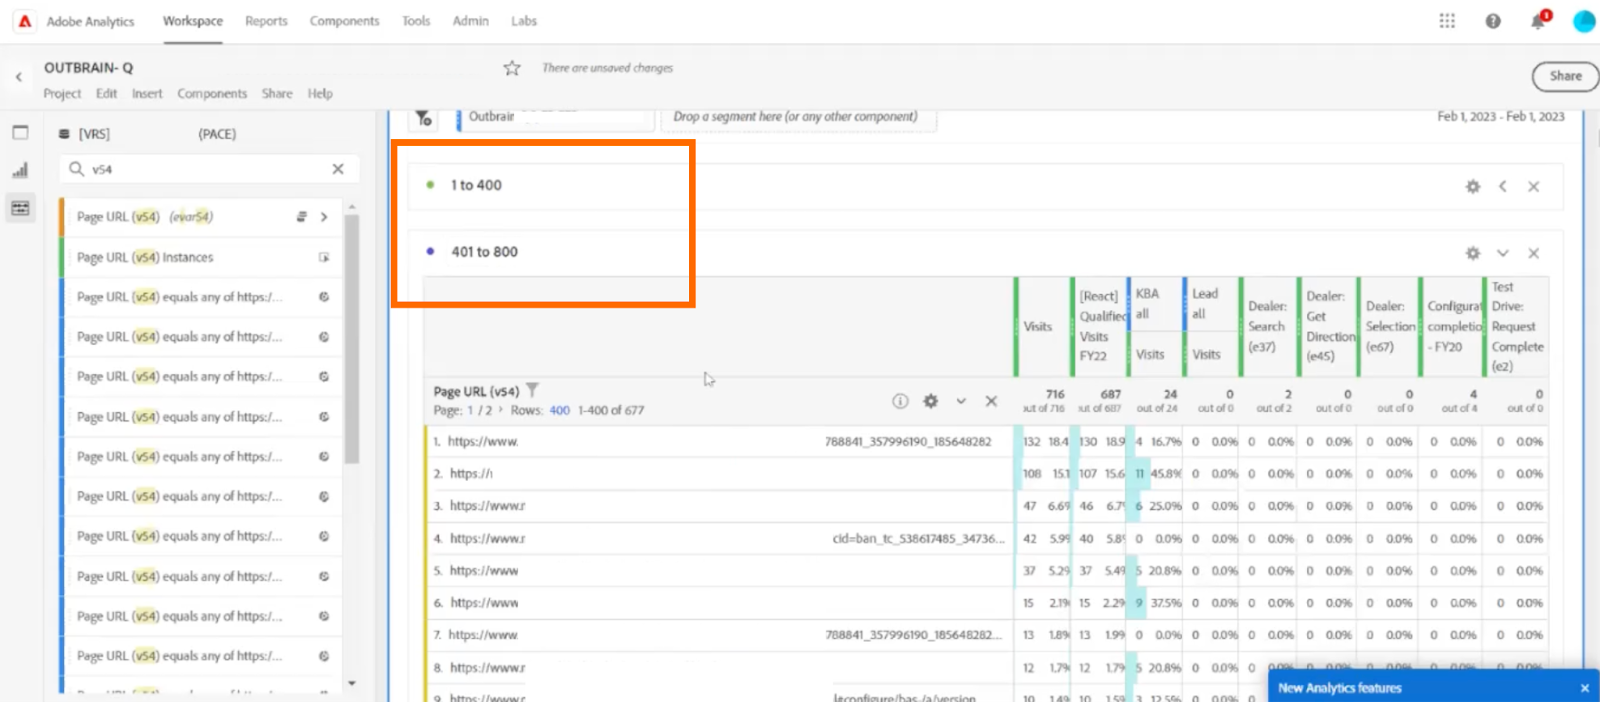
Adobe Analytics automatically limits each segment size to 400 rows – if your report exceeds 400 rows, make sure to create additional segment for each 400 row interval (this can be configured in the same report):
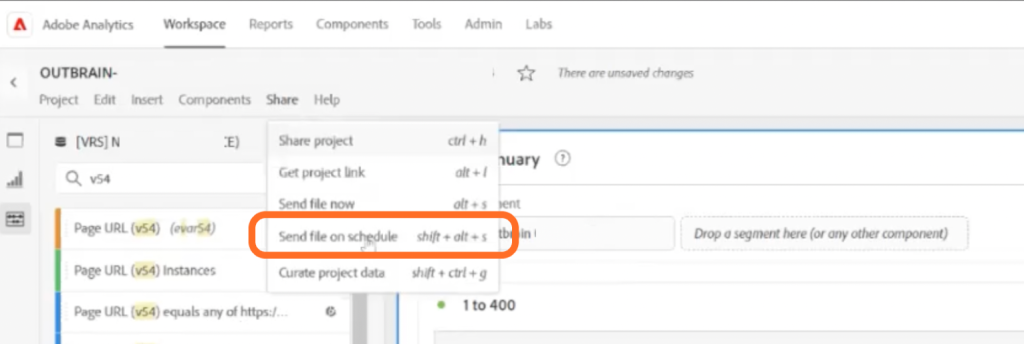
STEP 4: Schedule the created report to be sent to Outbrain
- In the toolbar, click “Share”, then “Send file on schedule”:
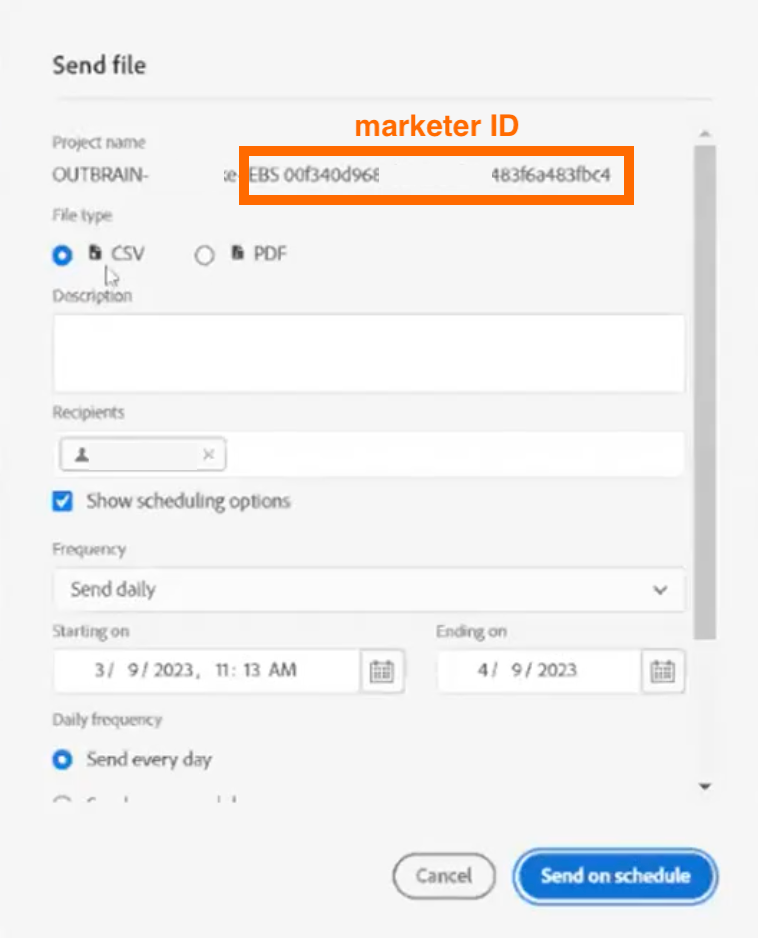
- Configure the report as follows:
- Insert your marketer ID as the Project name. Marketer ID appears as an alphanumeric chain in the URL when you are viewing the Amplify dashboard.
- Example URL: https://my.outbrain.com/amplify/site/marketers/00347edsd71c7be8e9da522a7f9bb52b02b0/reports/campaigns
- Marketer ID for the example above is: 00347edsd71c7be8e9da522a7f9bb52b02b0
- In the “File type” choose “CSV”
- Set the email recipient to: offline_conversions@outbrain.com
- In the “Frequency” field, choose “Send daily” (or select the timeframe relevant for you – daily is recommended):
- Select “Send on schedule”.
STEP 5: Create corresponding conversion events in the Outbrain Amplify dashboard, as described here.
For more information on Imported Conversions, click here.