How do I create conversions using the Outbrain pixel?
*Are you targeting users in the EU or UK? If so, please ensure you have implemented an IAB-compliant CMP. Without properly passing consent, you will not be able to track conversions using the Outbrain Pixel. For more information on CMPs and how to implement see HERE.*
The more conversions you track across your website, the better — this will provide you with the most comprehensive picture of user behavior across your site, fueling data-driven performance optimizations.
If this is the first time you are setting a conversion event, go to the conversion tab and start by hitting the “Start here button”.
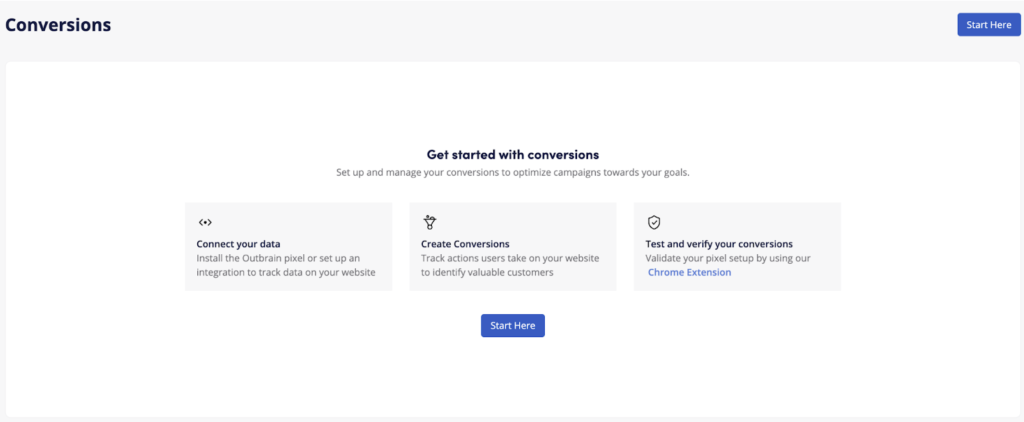
Select the method with which you want to report conversions to Outbrain.
Make sure you read the following article based on your selection:
- Outbrain Amplify Conversion Pixel Installation
- Outbrain Amplify Server to Server guide
- Import Conversions into Amplify
Once you have setup the conversion pixel and tested that it is working you can move to the second step, which is creating your conversion events.
If you have already created a conversion on Amplify simply click the “Create Conversion” on the top right side of the conversion tab:

There are two types of conversions: URL-based conversions and event-based conversions.
Let’s dive into it:
URL-Based Conversions
URL-based conversions track each time a user lands on the URL that you specified in your conversion settings. For example, completing a purchase and landing on a confirmation page.
Installing the pixel in the header of every page on your site will allow you to generate different URL-Based events and provide easier tracking.
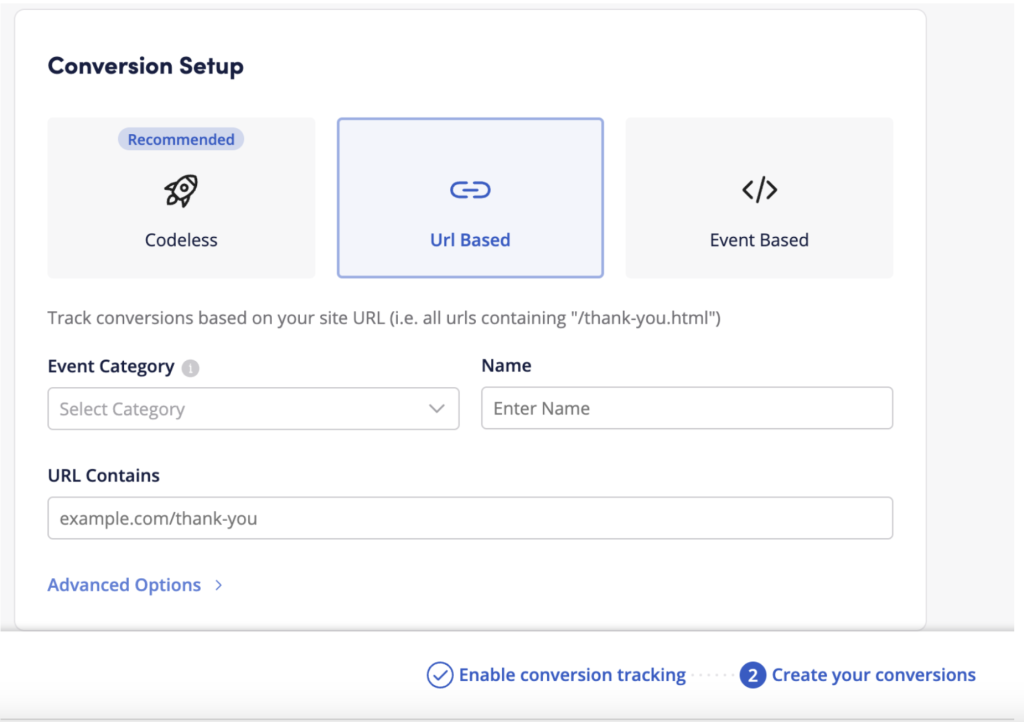
Once you select “URL-Based Conversion” you can start filling up the settings:
- Category: Choose a category that best describes the type of your conversion (this data helps our CBS optimization).
- Name: The name will be automatically populated to match the name of the chosen category, but you are able to change it if necessary. If you’re using Google Tag Manager (GTM), Server to Server or Imported Conversions to track OB pixel, make sure the name of the conversion precisely matches the name of the conversion in GTM/ Server to server vendor or your imported conversion file.
- URL: specify the URL (or key piece of the URL) tied to your conversion. Note that Amplify’s logic checks that your entered URL is contained within the URL your user is visiting. Therefore It is recommended to not include https or HTTP.
Next, you can enter the remainder of your conversion details (under “advanced options”):
- Window: Set the time it usually takes for a prospect to make the conversion you’re optimizing for (the time it takes from click to conversion).
- Value (if applicable): Attribute a fixed value to each conversion. If you’re looking to pass back the value of each conversion dynamically, visit this article (if you set a static value and also send a dynamic value, the dynamic value will be the one that will be reported).
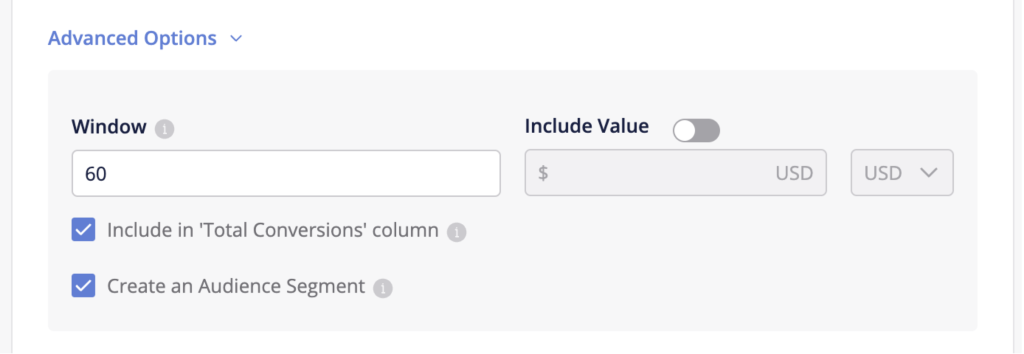
Select “include in total conversions” if you want to view this conversion in the total conversion metrics on Amplify reports (the metrics number of conversions, Conversion Rate, CPA, ROAS etc.).
It is recommended to have 1 conversion to be marked as “include in total”.
Be sure the “Create an Audience Segment” box is checked — this will ensure your converted audiences are pooling in the Audiences tab on the dashboard.
Click “Save” at the bottom once the fields are complete. The Tracking Status will remain as “Pending” until the action has been tested or a conversion has occurred. You can check that the pixel fires properly by using our pixel tracker browser extension.

Event-Based Conversions
Event-Based conversions require knowledge of HTML. Implementation of/ alterations made to the Event-Based conversion pixel code cannot be troubleshot by our Support team. Only use this conversion style if you or someone on your team is up to speed on HTML.
Event-based conversions track a specific action that the reader takes on your site, unrelated to a particular URL. This can include button clicks such as “Add to Cart” or “Subscribe”, or even scrolling down a page.
The creation process for event-based conversions follows the same steps as for URL-based conversions (outlined above). Keep in mind that event-based conversions require extra code (and possibly the assistance of your web developer).
The snippet of code will be provided as soon as you enter or change the conversion name.

Don’t forget: if you are using manual installation (and not Google Tag Manager installation) you will still need to install the Outbrain pixel in addition to the event-based code provided.
If you are using Google Tag Manager installation, you will need to set up a corresponding tag and trigger on Google Tag Manager.
Here are a couple of examples of how the manual event code might be placed:
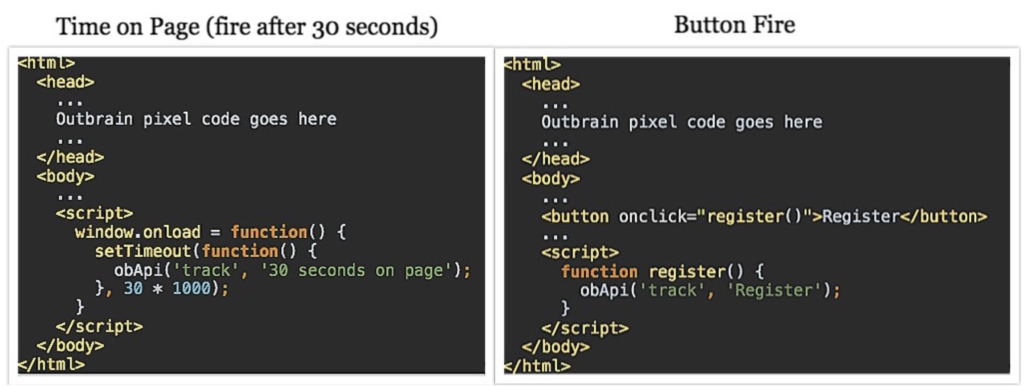
If your conversion requires different values depending on the action taken, check out our helpful guide on how to create Dynamic Values. At any time, you can view the code snippet by clicking on the view (eye) icon next to the conversion type.
Codeless Conversion
Codeless Conversion allows you to create event-based conversions from the Amplify dashboard without touching on your website code. Simply put, this gives you the ability to just enter your website URL in the dashboard, and then identify and select buttons/CTAs for which you’d like to create event-based conversions. To learn more about Codeless Conversion, please visit our dedicated article.
Advanced: Tracking Conversions for Multiple Advertisers on the Same Account
If you have several advertisers listed under the same account, you have the ability to add multiple advertiser IDs within the pixel by separating them with a comma and a space (see example below – note the bolded part of the code, and add the correct marketer IDs). This is a more convenient alternative to implementing multiple pixels on each page. This way, you will be able to capture audiences in each respective advertiser that is tied into this pixel.
<script data-obct type=“text/javascript”>
/** DO NOT MODIFY THIS CODE**/
!function(_window, _document) {
var OB_ADV_ID=[‘00a48561a62513714dfe43b5bc90dd2000’, ‘00a48561a62513714dfe43b5bc90dd2001’, ‘00a48561a62513714dfe43b5bc90dd2002’];
if (_window.obApi) {var toArray = function(object) {return Object.prototype.toString.call(object) === ‘[object Array]’ ? object : [object];};_window.obApi.marketerId = toArray(_window.obApi.marketerId).concat(toArray(OB_ADV_ID));return;}
var api = _window.obApi = function() {api.dispatch ? api.dispatch.apply(api, arguments) : api.queue.push(arguments);};api.version = ‘1.1’;api.loaded = true;api.marketerId = OB_ADV_ID;api.queue = [];var tag = _document.createElement(‘script’);tag.async = true;tag.src = ‘//amplify.outbrain.com/cp/obtp.js’;tag.type = ‘text/javascript’;var script = _document.getElementsByTagName(‘script’)[0];script.parentNode.insertBefore(tag, script);}(window, document);obApi(‘track’, ‘PAGE_VIEW’);
</script>
Don’t forget: you’ll need to set up audiences based on URL-based rules identically for each advertiser within the dashboard. For conversions (and the audience segments that are built from them), the same step of setting up the actual rule in the dashboard for each individual account is still necessary. Please note, that this process works for both URL and event-based conversions, as both are dependent on the universal pixel including that marketer’s respective ID.
If you do use it for event-based conversions, just make sure that each advertiser that is tied into this pixel has the same event name as all other advertisers (see example below).

To prevent attributing the same conversion to multiple advertisers, we recommend to set the conversion window to one day. For example, a brand selling in both France and Belgium has a pixel that is triggering for both the French and Belgian advertisers. If a user clicks on the ad from Belgium and two days later clicks from France, having the attribution window set to just one day will prevent that same conversion to be attributed to both the French and the Belgian advertisers.
Pixel and Conversion Tracking Status
To check whether the pixel has been correctly implemented, check the implementation status in the Conversion tab:
Active – Firing accurately
No Recent Activity – No recorded pixel or conversion activity in over 72 hours
Not Active – Pixel hasn’t been activated or hasn’t yet fired
In the Conversions column, you’ll also be able to check the status of each conversion connected to the pixel. Simply hover over the status for an explanation of what it means and how to troubleshoot:
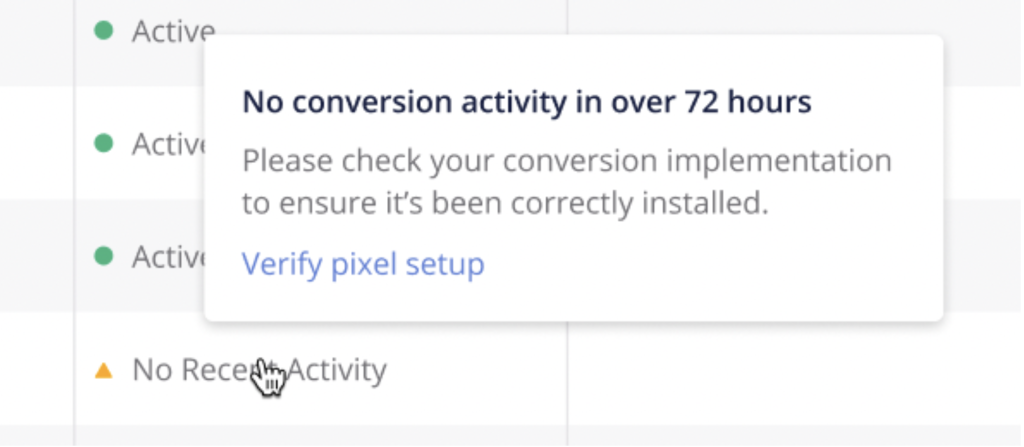
In case you see that your pixel is not active or hasn’t fired in a while, use our easy-to-use Outbrain pixel tracker browser extension to double-check the pixel has been correctly added to your website.
If you choose to edit the pixel’s destination URL for URL-based conversions or the event name for event-based conversions, the conversion status will change to “Pending” until a conversion matching the new name/URL is triggered.
Testing the pixel will not register a conversion in the dashboard. A conversion will only be recorded when a reader clicks on your ad in the Outbrain widget, reads through your awesome content, and completes the desired action you have outlined in your dashboard.
Now that you’re all set, please visit this article on how to track conversions using the Outbrain Pixel.