What targeting options are available to me?
You know your customer best, which is why we’ve given you tons of ways to identify your ideal audience and find the right users at the right time.
We are constantly assessing our marketers’ needs in order to improve existing targeting capabilities and add useful new tactics. Below, you can find a comprehensive guide of all targeting options available to you on the Amplify dashboard along with how they are best utilized.
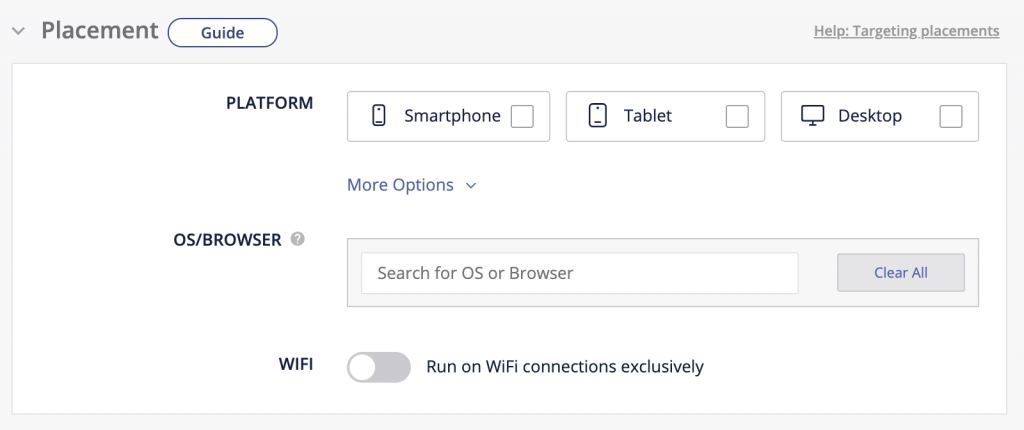
Placement Targeting
When setting up an Outbrain campaign within the Amplify dashboard, you will first come across your placement targeting capabilities:
- Platform (Device) Targeting: Here, you can specify which devices you’d like to target. We recommend breaking out your campaigns by device, as CPCs vary and this will provide you with more control to optimize efficiently.
- OS/Browser Targeting: If you’d only like to appear on certain browsers or operating systems, this is your opportunity to indicate that.
- WiFi: You can opt to serve only to mobile devices connected to WiFi. This enhanced targeting feature is particularly useful when looking to reach mobile users with a high-speed connection. A few sample use cases include: redirecting users to a data-heavy landing page, pushing downloads for an app or game, or your desired conversion requires online payment.
Standard Targeting Capabilities
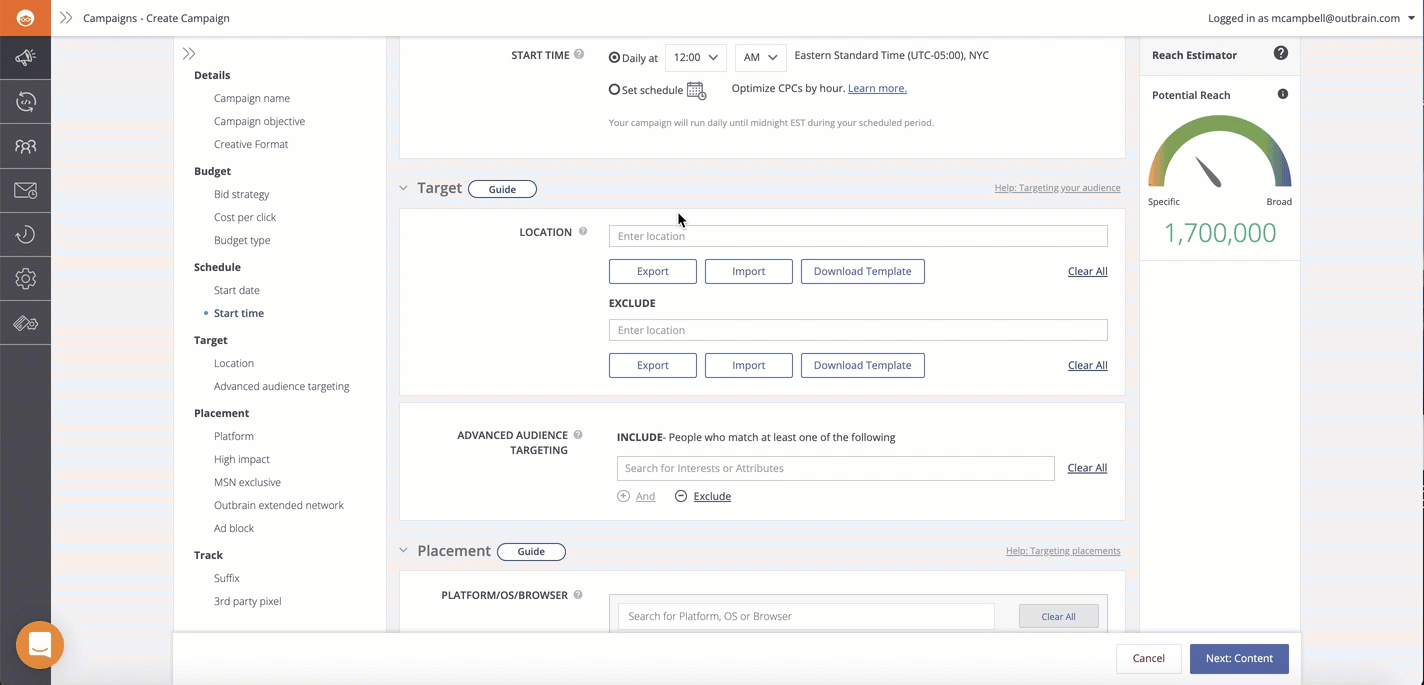
When you get to the Targeting portion of the campaign setup process, you will first encounter your standard tactics, starting with location:
- Location (Geo-Targeting): Target by country, region, DMA, or zip code. You also have the ability to narrow location targeting by exclusion, if applicable. Please note, the Potential Reach Estimator does not support exclusions or postal codes at this time. Therefore, if you are utilizing either of these options, scale may be more limited than it appears.
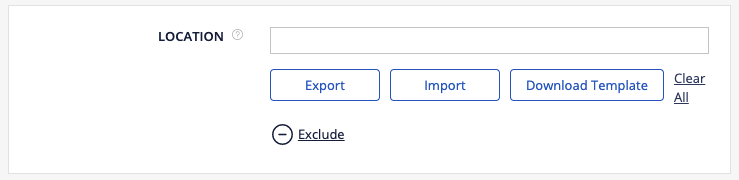
To target or exclude multiple locations at once, download the template and fill out the fields accordingly. You are able to upload up to 7,000 postal codes to one campaign. There is one template for importing location inclusions/exclusions with the following headers:
– Location Type (country, region, DMA, postal code): mandatory to enter
– Location Name: relevant for country, region, DMA
– Country Initials: relevant for postal codes
– Postal Code: relevant for postal codes
*Please leave irrelevant cells empty*
Finally, select “Import” below the targeting inclusions or exclusions and choose your saved CSV file. These location names will auto-populate upon successful upload.
- Audience Segmentation: Specify which custom audience segments you’d like to reach (or exclude).
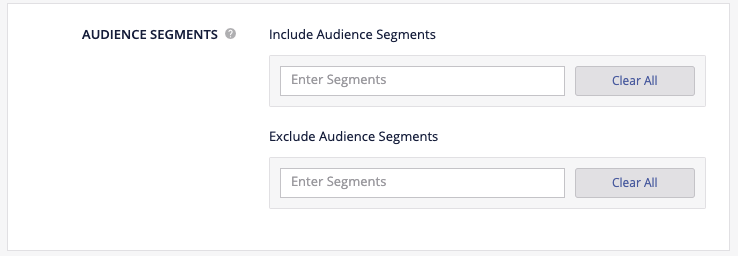
You can utilize the Audiences tab on the left-hand siderail to manage your audiences. Use this tab to create custom audiences meant to retarget existing users, target campaign clickers, or target users who “look like” your existing users by creating lookalike audiences.
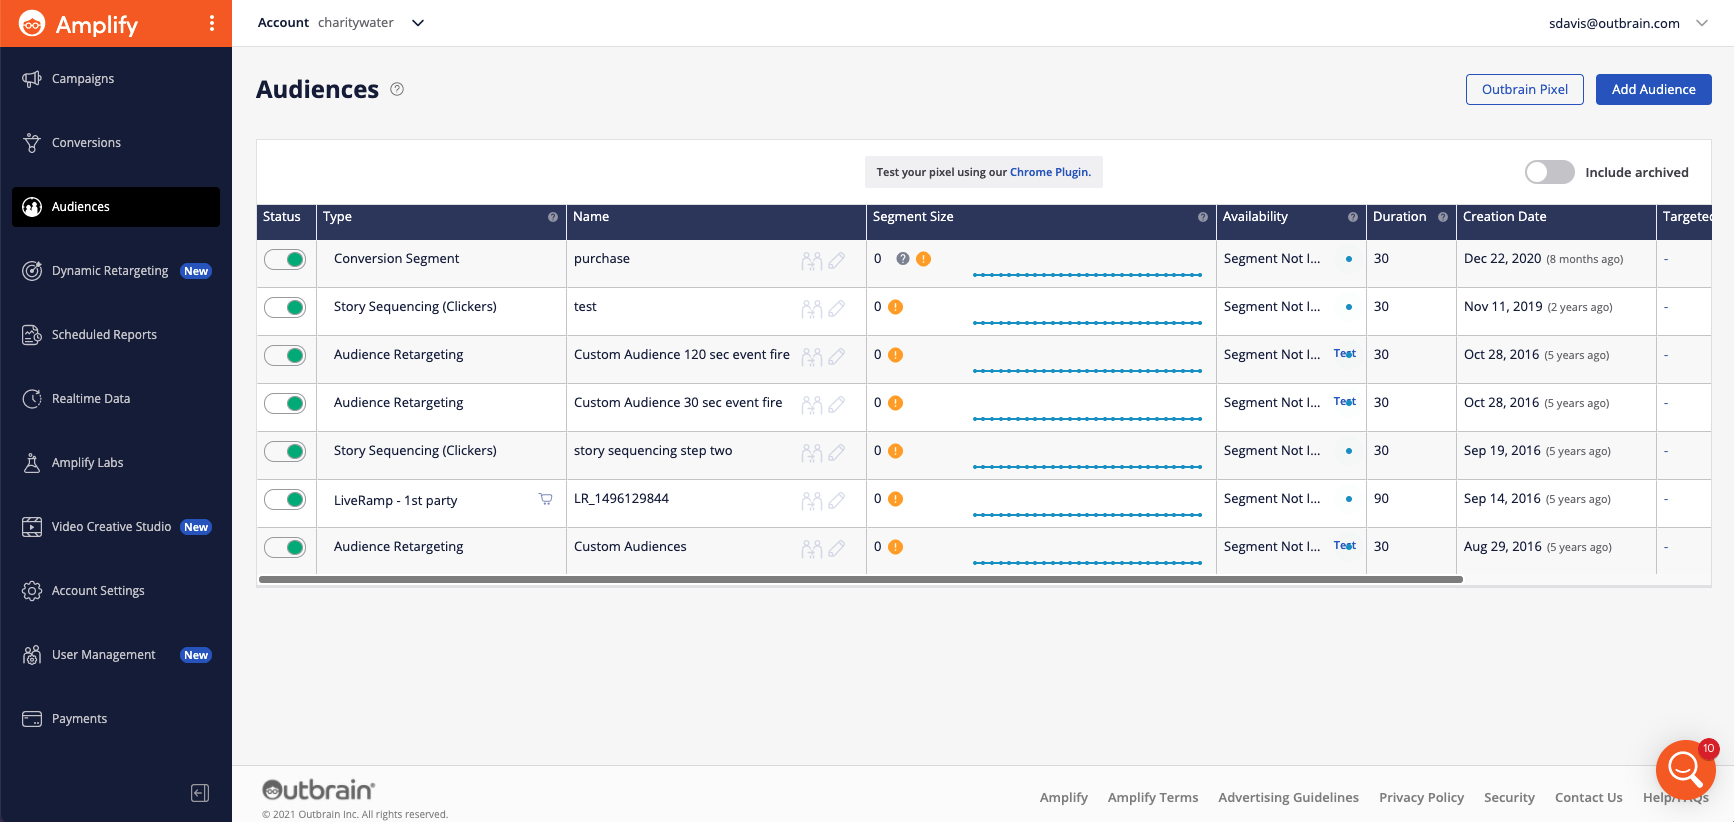
Once you’ve created your audience segment, we recommend letting it reach a size of at least 30,000 users. Once this is all set, head back to your campaign settings menu and find the Targeting section. From here, you’ll be able to target your campaign to the custom audience segment that you made.
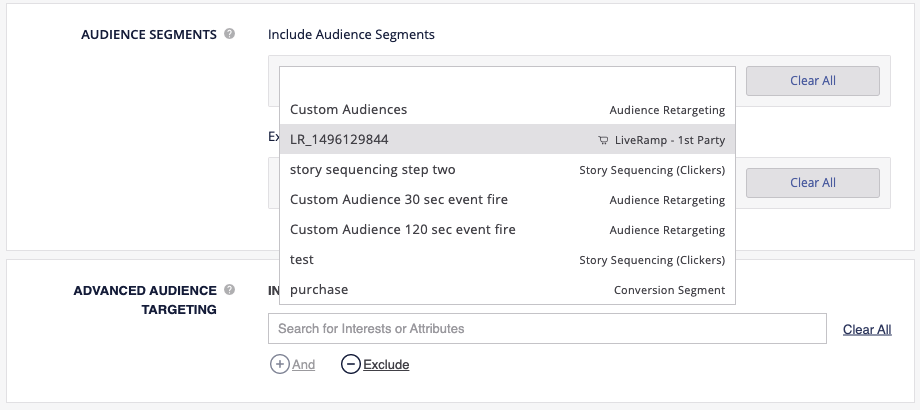
Using the “Include Audience Segments” field, select which audience segment to target. You can also exclude audiences that you’ve created. For example, if you built a Custom Audience of users who purchased your product, you can then exclude this group in order to target only those who haven’t yet made a purchase.
You can also import your first-party audiences into Amplify using one of our integrated DMP partners, such as LiveRamp or Oracle. To learn more about how to import first-party audiences, check out this Help Center article.
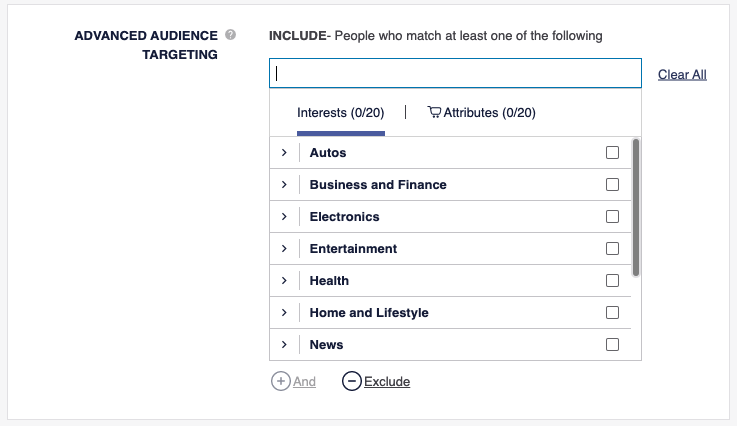
Advanced Audience Targeting
Further along in the campaign setup process, you will be presented with our Advanced Audience Targeting capabilities, which enable you to further hone in on more granular audiences.
- Interest Targeting: Target (or exclude) consumers based on their interests. This advanced targeting capability utilizes Outbrain’s proprietary Interest Graph that consists of first-party data on all consumers that engages with our content.
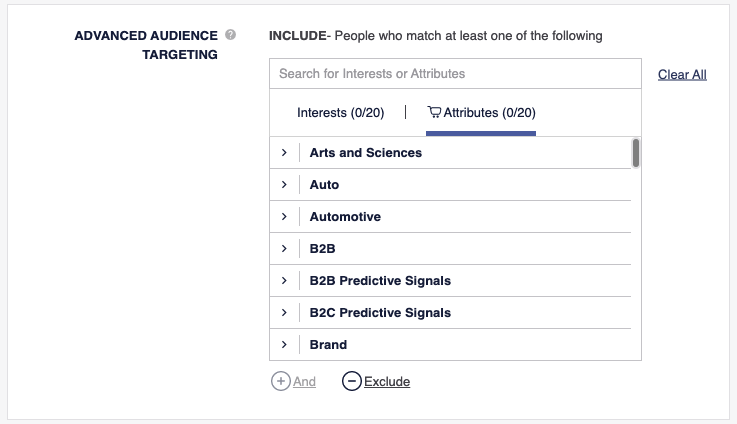
- Attribute Targeting: Target (or exclude) consumers based on their unique attributes. This advanced targeting capability utilizes third-party data from our vendor partners. Please note, including Attribute Targeting will incur a third-party data fee on top of your CPC.
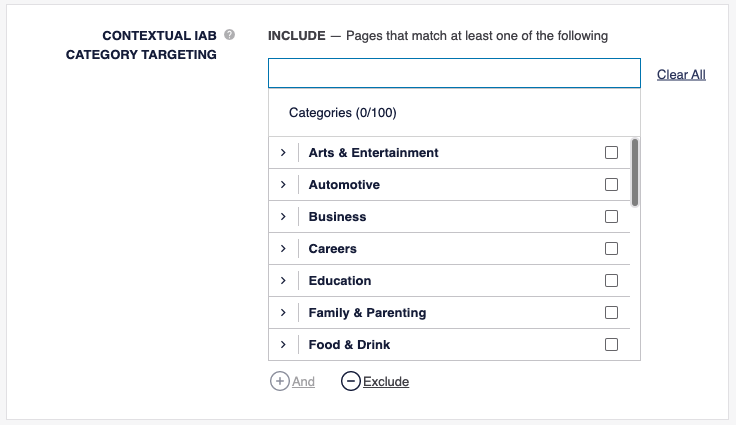
Contextual Targeting
In addition to our audience targeting tactics, you have the option to include contextual targeting in order to reach your consumers as they browse the most relevant content.
- IAB Category Targeting: Choose from an extensive list of vertical categories as defined by the IAB, ensuring your campaign only runs across specific pages that meet your specified criteria. You’re also able to exclude categories, if applicable. From broader areas like “Business & Finance” to niche topics like “Hobbies & Interests > Chess,” you’re bound to find something that satisfies your needs. To learn more about how you can employ IAB Category Targeting on your campaigns, check out this Help Center article.
Advanced Placement Targeting
While standard placement targeting lives at the start of the campaign setup process, you’ll encounter advanced placement targeting near the end of the page. This is where you can make additional customizations to who receives your ads:
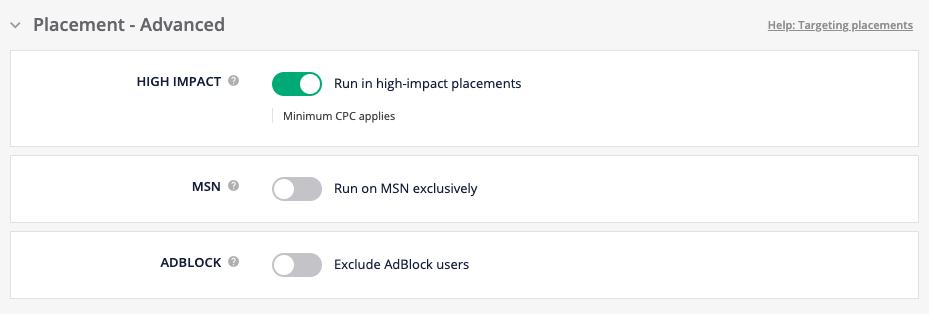
- High Impact: Command consumer attention with brand-exclusive units served in the Smartfeed and in-article. These placements are ideal for marketers who want to alleviate concerns over brand adjacency and feature their content in more diverse placement types across the Outbrain network. For more information on High Impact placements, check out this Help Center article.
- AdBlock: Exclude users who have ad-blocking software installed by turning this feature on. We do our best to ensure your content isn’t served to these users; however, we are unable to detect an ad blocker when users target specific publisher sites, which may result in a small portion of traffic coming from these sources.
Setting Targeting Parameters: New vs Existing Campaigns
In order to customize targeting for a new campaign during the setup process, it’s as simple as scrolling through the process from top to bottom. You will be presented with all your targeting options, moving from the most basic (Location) to the most specific (Dynamic Retargeting).

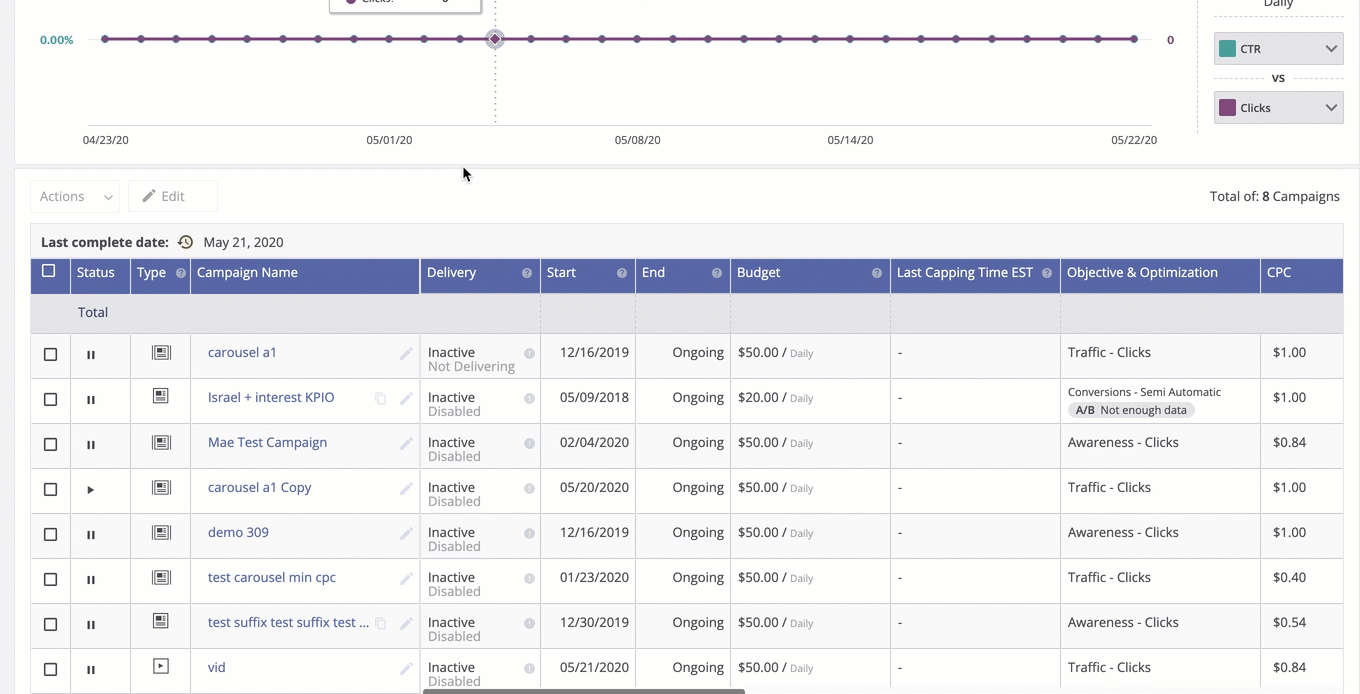
To edit targeting for an existing campaign, open up your campaign settings using the pencil icon to the right of the campaign name. From here, you can access all the unique targeting options for your campaign by scrolling down to the “Targeting” or “Placement” section.
Key Takeaways
- Adding too many audience targeting features may restrict the reach of your campaign and lead to poor performance. If you are having trouble reaching your daily budget, try removing some of your audience targeting.
- You should always ensure your CPC is competitive, but it is especially important with a narrower audience. If your targeting is a bit restrictive and you aren’t seeing scale or performance, try raising your CPC.
- When using any targeting options, always keep an eye on the Potential Reach Estimator to ensure that your campaign reaches enough audiences. Please note, this tool is providing a rough estimate meant to be used as a guide; these are not exact figures. In addition, please remember that targeting exclusions (including location) and location targeting based on postal code are not pulled into the Potential Reach Estimator’s calculations.
Any questions? We’re here to help.