
Create Vertical Video with Amplify AI Video Creative Suite
Creating video assets for your campaigns just got easier.
Amplify AI Video Creative Suite, powered by Runway using Seedance model, lets you create 9:16 Vertical Video assets directly in Amplify. Start with a text prompt, an image or an existing video, and turn them into video creatives ready to launch in your campaigns.
Generate, experiment, and refine your video creatives directly in Amplify, at no additional cost.
Where to find it
You can access the AI Video Creative Suite directly from the Content page, while creating an ad. (You won’t see it while editing an ad because the video needs to be created from scratch.)
In the Media section, click Generate to open the AI video creation experience. From there, choose how you want to create your Vertical Video — from text, an image, or an existing video.
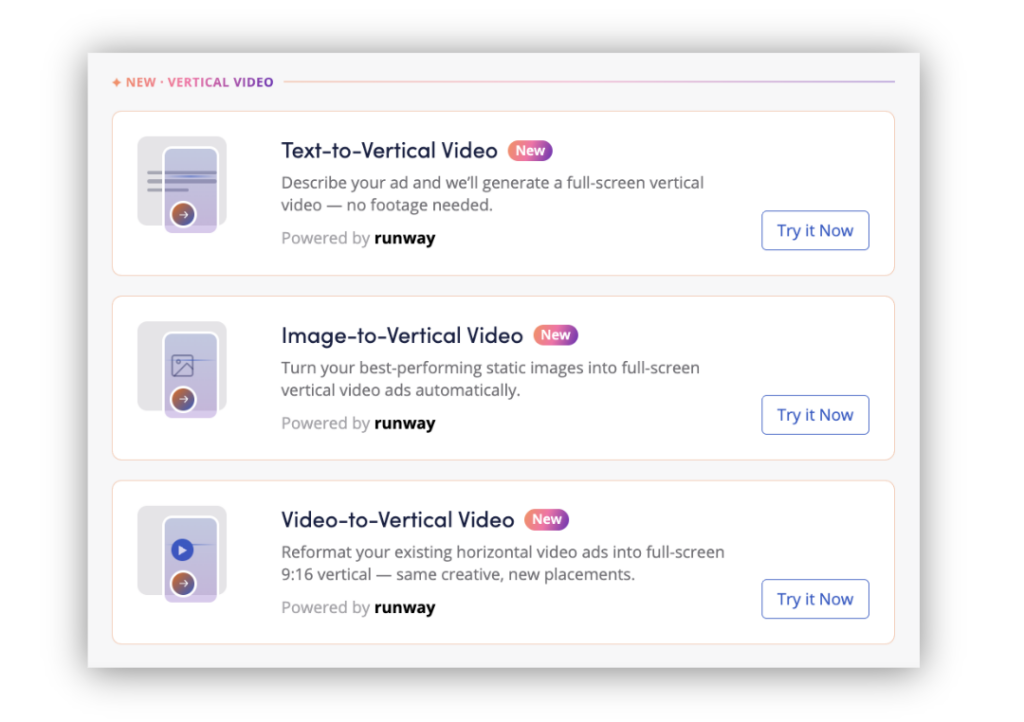
Three ways to create
Text to Video
Start from scratch by describing the video you want to create.
Your prompt can define the setting, people, actions, camera movement, style, dialogue, audio, and overall story.
Best for: creating new concepts and testing creative ideas when you don’t have an existing asset.
Prompt tip: describe both what the scene looks like and what happens.
Image to Video
Turn a static image into a Vertical Video.
Upload an image or provide an image URL. Add a prompt to describe how you want the image to come to life, including subject movement, camera motion, and scene progression.
Best for: animating product images, lifestyle photography, and existing campaign assets.
Prompt tip: the image already provides the visual starting point, so focus mainly on movement, action, camera behaviour and how the scene develops.
Video to Video
Upload an existing video and use it as the starting point for a new creative. The file is in a supported video format, such as MP4, WebM, or MOV
Best for: repurposing your existing video assets and creating new variations.
Prompt Tip: your uploaded video already provides the motion and visual starting point. Focus your prompt on what you want to change or transform. Be specific about the desired result, avoid making too many major changes at once, and generate variations to refine the output.
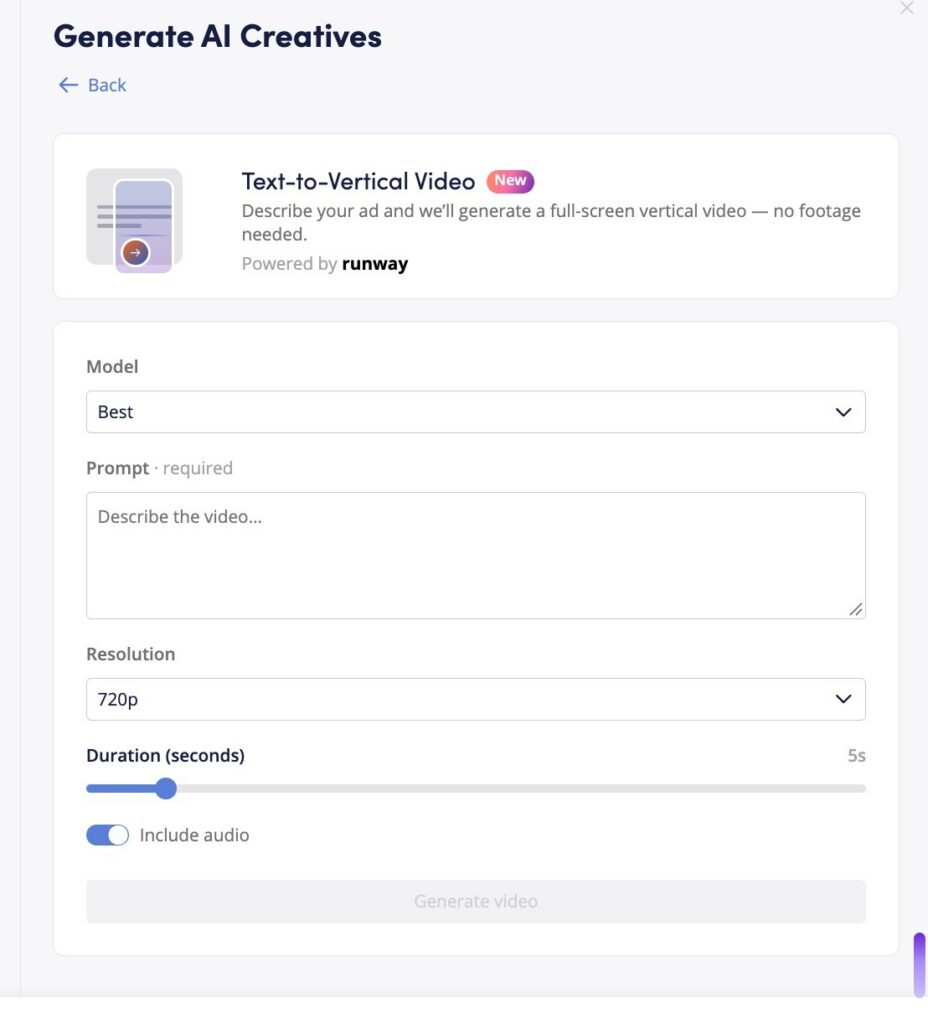
Choose your generation quality
When creating a video, you can choose between two generation options:
- Fast (Recommended): Optimized for speed while maintaining high visual quality. Best for quickly generating and testing different creative ideas.
- Best: Optimized for higher visual quality and detail. Generation may take longer, making it best suited for more polished creatives where visual fidelity is the priority.
Both options support Text-to-Video, Image-to-Video, and Video-to-Video creation.
Customize your video
Choose your preferred video duration, up to a maximum of 15 seconds, and select from the available resolution options. Keep in mind that generation time may vary, with longer videos and higher resolutions typically taking more time to process.
You can also choose to include audio. Specify any dialogue, music, or sound effects you want in your prompt. If no audio instructions are provided, the AI will generate audio based on the context of your prompt.
When you’re ready, select Generate video and preview your result before adding it to your ad.
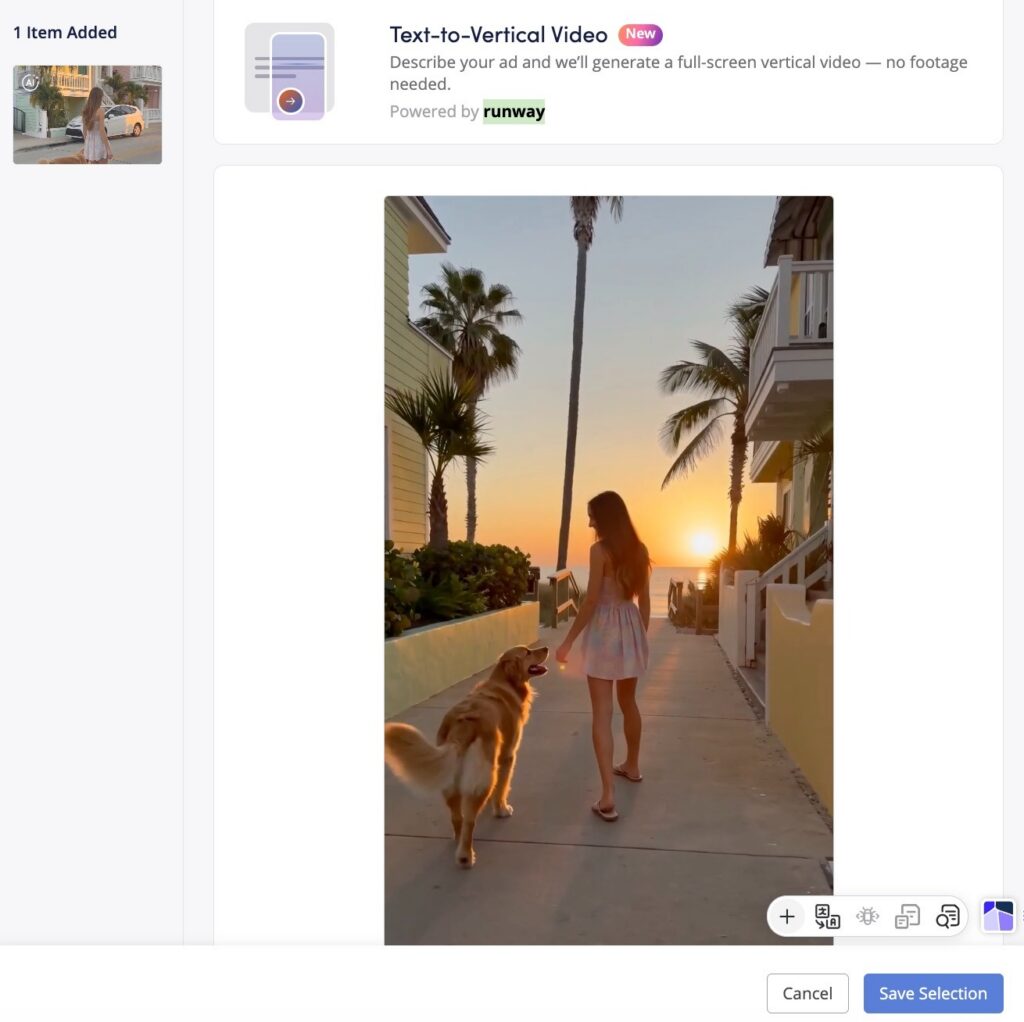
Once your video has been generated:
- Preview your video and review the result.
- Click Save Selection to add the video to your ad.
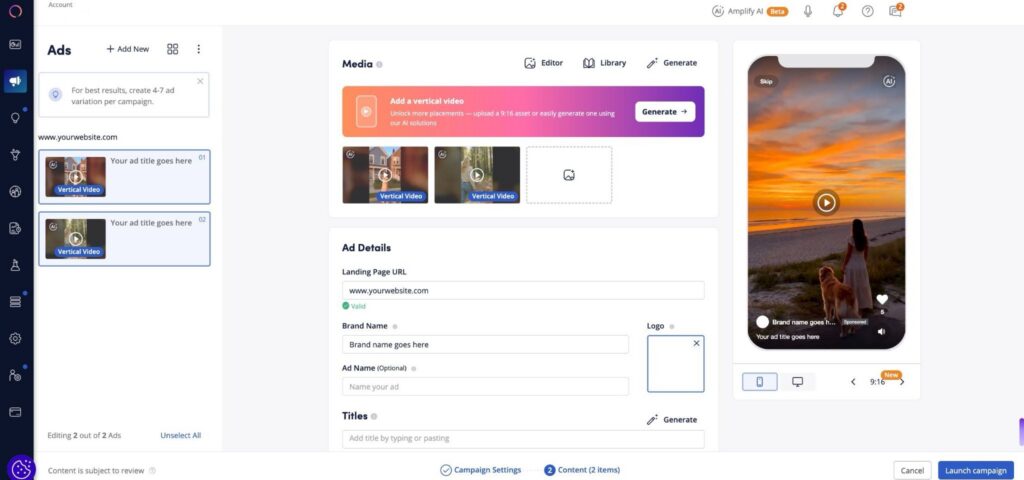
- Your generated video will appear in the Media section and in the ad preview, where you can see how it will look in the 9:16 Vertical Video placement.
- Complete the rest of your ad details and continue with your campaign setup.
- Videos generated with the AI Video Creative Suite will include an AI watermark by default.
How to write a good prompt
There’s no single formula for the perfect prompt. The guidance below is a starting point to help you structure your ideas and give the AI clear creative direction. Different concepts may benefit from different approaches, so experiment with your prompts, generate variations, and refine based on the results.
Think of your prompt as a short creative brief. Describe what should happen, how the story develops, and how you want the video to look and feel.
1. Pick a video framework
A video framework gives your creative a clear structure from the opening hook to the CTA.
| Framework | Structure |
| Problem Solver | Hook → Problem → Solution → CTA |
| Breaking News | Hook → What’s New → Why It Matters → CTA |
| Customer Story | Hook → Experience → Result → CTA |
| Before & After | Hook → Before → After → CTA |
| Expert Advice | Hook → Expert → Recommendation → CTA |
| Curiosity Hook | Hook → Discovery → Benefit → CTA |
Use these as starting points rather than fixed templates.
2. Build your scenes
For a video of up to 15 seconds, around three scenes is a good starting point:
Scene 1 — Hook: Capture attention and establish the context.
Scene 2 — Build: Show the experience, product, problem, or key benefit.
Scene 3 — Close: Resolve the story and finish with your main message or CTA.
Keep each scene focused on one main action.
3. Add creative direction
Give the AI additional direction where useful:
- Camera: handheld, selfie, close-up, slow push-in
- Style: UGC, editorial, cinematic, documentary
- Movement: describe what the subject or camera should do
- Dialogue: include exactly what you want the person to say
- Audio: describe speech, music, ambient sound, or sound effects
- Text overlay: specify the text you want displayed
AI models aren’t always accurate when generating written text, so keep text overlays short and always review them before using the creative.
Example prompt
Solar savings ad — 15 seconds
Scene 1 — Hook: A woman stands outside her home with solar panels behind her. She looks at the camera and smiles. Handheld UGC style, natural morning light.
Scene 2 — Build: She turns towards the solar panels. The camera slowly pulls back to reveal the roof.
Scene 3 — Close: She turns back towards the camera and smiles.
Production details: Authentic UGC, warm tones, natural daylight.
Dialogue: “Ready to save on your energy bills? Find out if you qualify.”
Add text overlay: “Find out if you qualify.”
Tips for better results
Keep prompts clear, visual, and focused on movement. Avoid trying to fit too many actions into a single scene.
When starting from an image, focus your prompt on what you want to happen to the image, rather than describing what’s already visible.
AI generation can produce different results from the same prompt. Generate a few variations, refine your instructions if needed, and always review the final video before using it in a campaign.
FAQ
Who can use Amplify AI Video Creative Suite?
All Amplify clients.
Does it cost extra? Is there a generation limit?
No. There is no additional cost and no generation limit.
What can I use as my starting point?
You can start from text, an image, or an existing video.
Can images include people?
Yes, provided you have the appropriate rights to use the image and the person’s likeness.
What’s the maximum video length?
15 seconds.
What’s the minimum video length?
4 seconds.
Can I generate audio?
Yes. Enable audio to include generated dialogue and other sounds where appropriate.
Can I generate captions or text overlays?
You can request text through your prompt, but AI models may not always render it accurately. Keep it short and review the result carefully.
What if I don’t like the result?
Generate another version or refine your prompt. Simplifying the instructions or being clearer about movement can improve the output.
Why was my generation blocked?
The AI models used by Amplify apply third-party content moderation. Certain prompts or assets may be blocked, particularly when they involve recognizable public figures, protected brands or logos, violence, explicit material, or other restricted content.
Make sure your content follows Amplify’s content guidelines and that you have the appropriate rights to the assets, brands, and people you use.
If your content follows Amplify’s guidelines but you’re still receiving an error, try adjusting your prompt or source asset. If the issue continues, contact your Account Manager for support.
Why am I getting an error when uploading a video?
Make sure your file is in a supported video format, such as MP4, WebM, or MOV. GIFs are treated as images and can’t be used as the source for Video-to-Video generation.
If you’re uploading a supported video format and still receive an error, try re-uploading the file, as it may have been incorrectly identified during upload. If the issue persists, contact your Account Manager for support….
Why does the AI voiceover sometimes mispronounce German words?
When generating videos with German voiceover, the AI voice may occasionally struggle with the pronunciation of certain German letters and letter combinations, particularly:
- ä
- ü
- ö
- au
- eu
- ei
If you notice a pronunciation issue, we recommend adjusting the wording or spelling phonetically in the prompt/script to help the AI produce the intended pronunciation.
We’re aware of this limitation and are working to improve German voiceover pronunciation.