
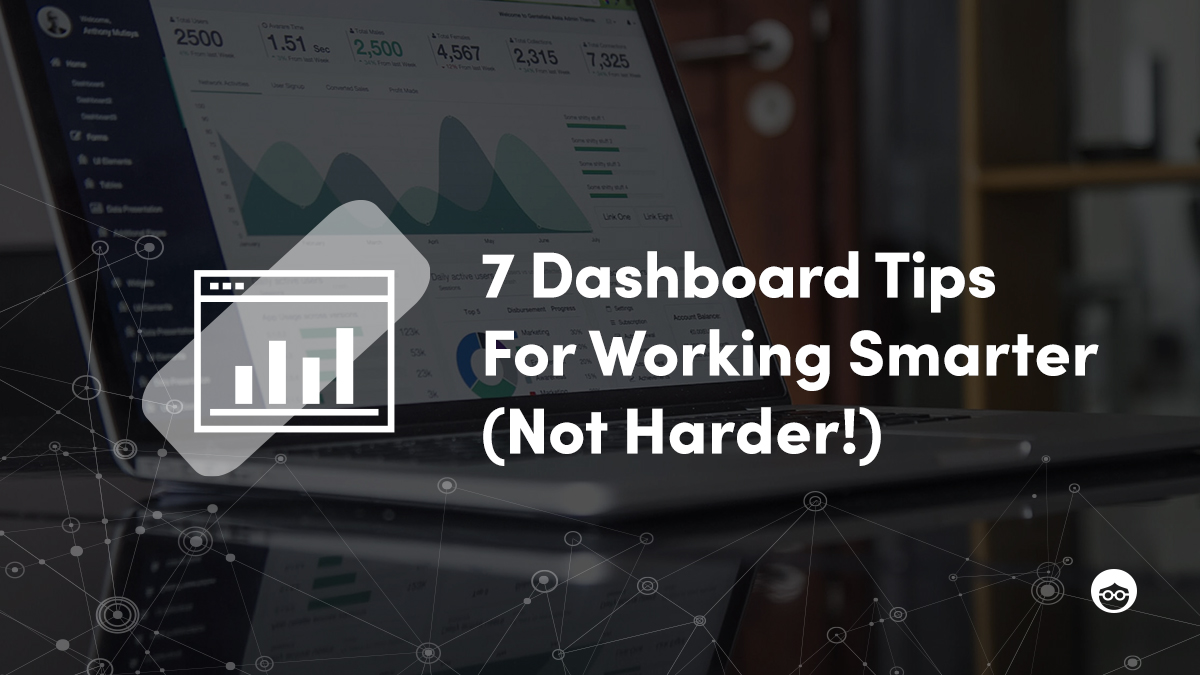
7 Amplify Dashboard Tips For Working Smarter (Not Harder!)

Ever find yourself fiddling with a marketing dashboard for hours trying to perform a task that you later realized shouldn’t have taken more than five minutes?
Having been a member of the Customer Success team at Outbrain for the past year and a half, I can confidently call myself a dashboard expert.
I spend a solid chunk of my day, every day, in the dashboard: creating, optimizing, reviewing, and reporting on campaigns, and I’m sure a lot of you reading this are in the same boat.
While some tasks are inevitably time-consuming, I’ve picked up on a few tricks to make my time spent in the dashboard way more efficient. And I’d love to share them with you.
-
Data-Analyzing? Excel Export.
What? When performing data analysis, export the information you’re seeing in the dashboard into a quick Excel file.
Why? It can get a bit overwhelming trying to extract specific information by merely looking at the dashboard. Exporting this to an Excel file allows you to pivot the data, delete rows and columns seamlessly, see more decimal places of certain values, and compare Outbrain data to your third-party analytics platforms.
How? Maneuver to the section of the dashboard that you’re looking to analyze. From there, click on the “Reports” dropdown menu in the top right corner, then click “Export Report.”

💡 Brainy Tip: Always make sure to double check the date range in the top right corner of the dashboard before exporting, as this is the time frame that the data you export will reflect. The default view of the dashboard is “Last 30 days,” so if you’re looking for a different time period, make sure to update accordingly!
-
Creative Refresh? Mix & Match New Imagery.
What? Pair your top-performing headlines with new images for a quick and easy creative refresh.
Why? I often find myself spending a lot of time brainstorming new headlines to test. Yet pulling new images is just as (if not more!) impactful to CTR, and takes much less brain power and time.
How? Choose a URL you want to refresh, and copy 3-5 top-spending headlines that you’re currently using on Outbrain for that page. Then, click the “Add Content” button in the top right corner for the campaign you’re looking to gain traction for, and paste the headlines in as “Titles.” Add in the URL and 3-5 new images, click “Submit,” and you’re good to go.
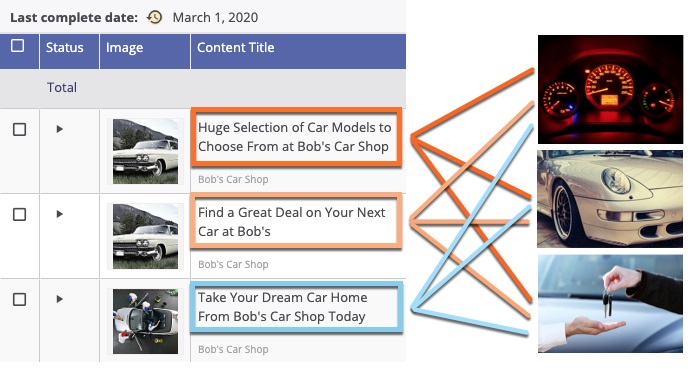
💡 Brainy Tip: If you have a finite number of images, try cropping them in different ways or updating them to black and white to see if minimal changes resonate better with your audiences.
-
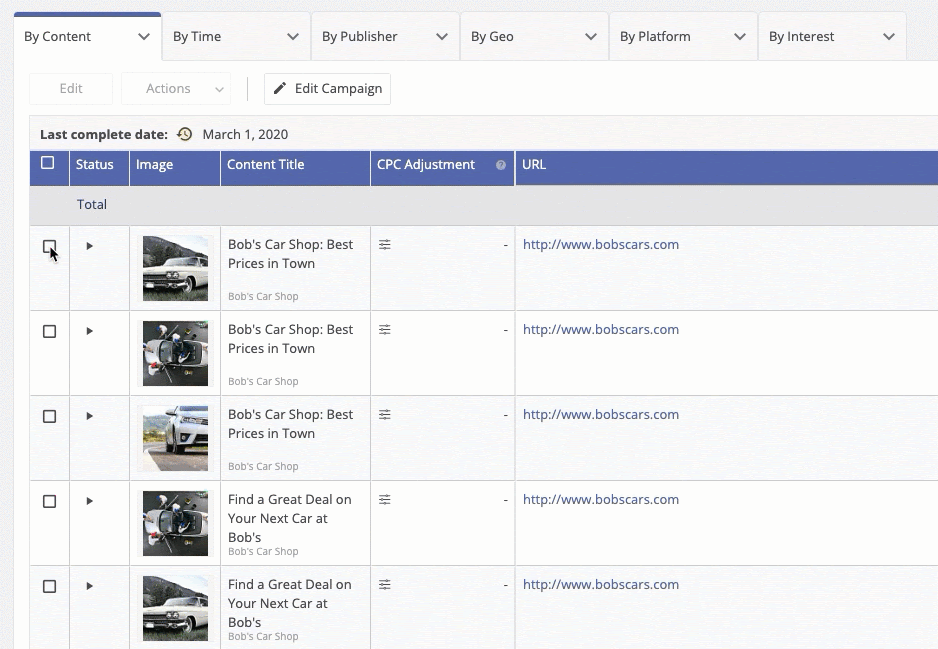
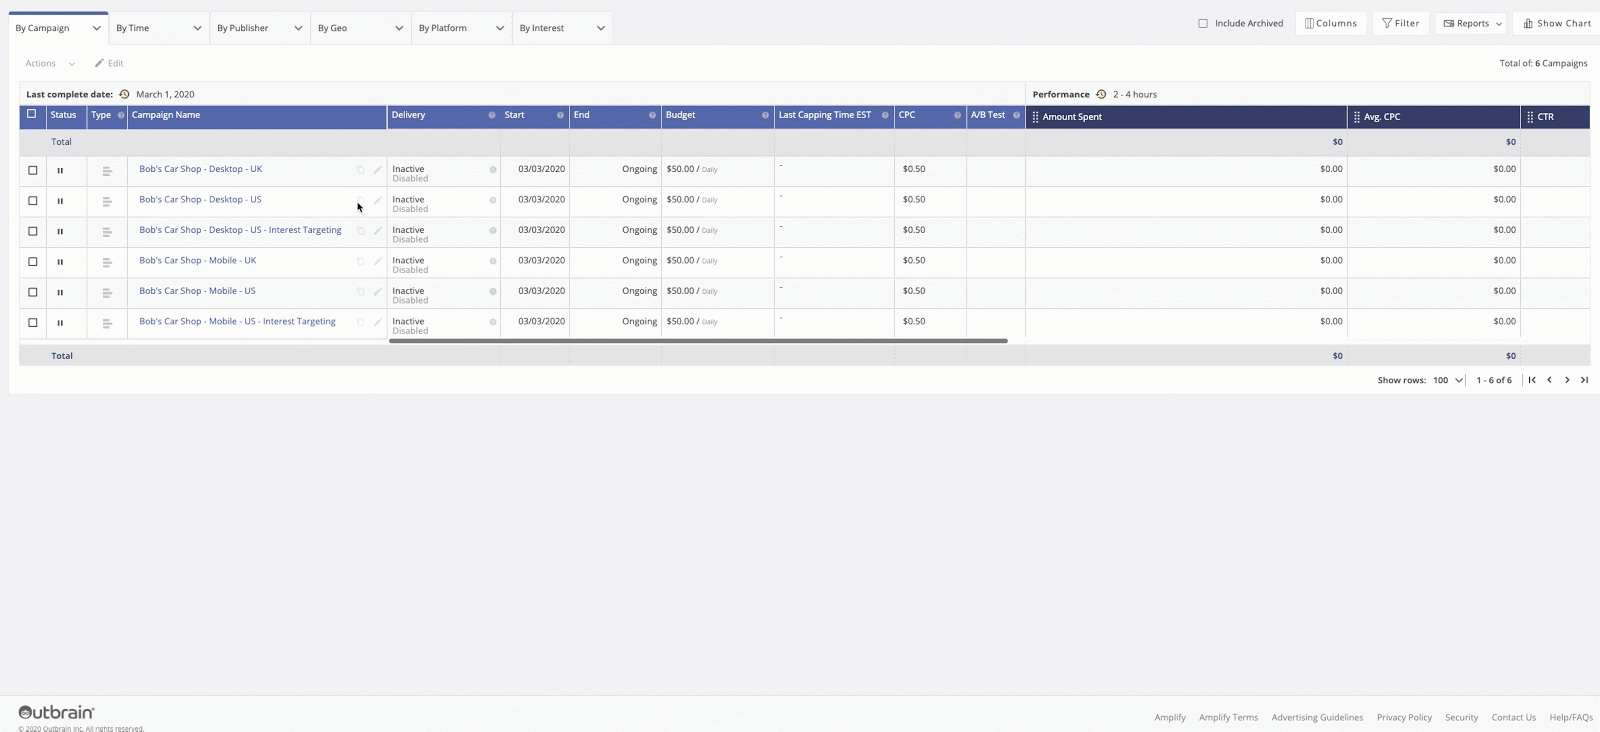
Reviewing Performance? Filter.
What? Don’t forget about the “Filters” feature in the dashboard!
Why? Find exactly what you’re looking for in any section of the dashboard without wasting time trying to “Control + Find” or scrolling through dozens of rows.
How? Click on the “Filter” button in the top right corner of the dashboard and a dropdown menu of filters will appear. Select what you want to filter by, fill in the additional fields that pop-up after selecting one, and click “Apply.” If you want to add another filter on top of the first, just click the plus sign to the right of the original filter, and repeat!
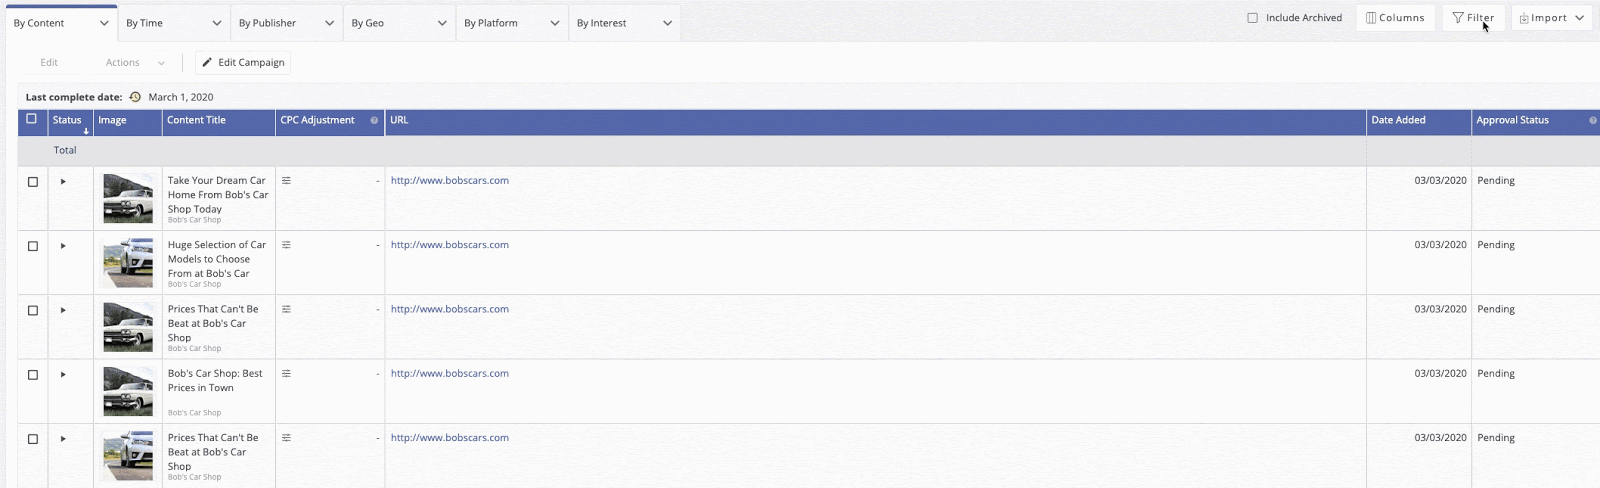
💡 Brainy Tip: If you’d rather sort the data than filter it, just click on the dark blue column name to sort all rows from largest to smallest (or Z-A if alphabetical). Click that same column name once more to sort from smallest to largest (or A-Z, if alphabetical).
-
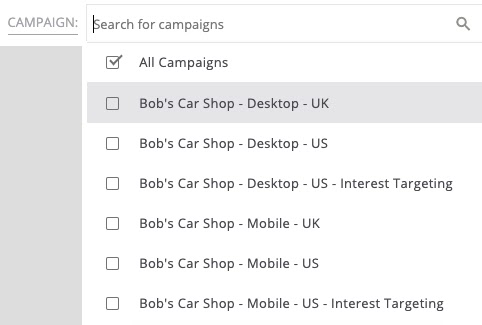
Adjusting Campaigns? Bulk Update.
What? Make adjustments across multiple campaigns, ads, or referring sources at once with the “Bulk Actions” tool.
Why? If you’re looking to enable, pause, or update multiple campaigns, ads, or publishers at once, this tool is definitely the most efficient way to do so. It even allows you to make multiple edits at once to a given set.
How? Check off the boxes to the left of the rows that you wish to modify. Then, click either the “Actions” or “Edit” button right above the chart. You can bulk pause or play content or campaigns via the “Actions” dropdown. You can also bulk exclude or remove exclusions on publishers and sections with this tool. The “Edit” button only works at the campaign level, but it allows you to bulk-update CPCs, flight dates, targeting, and tracking strings.
💡 Brainy Tip: You can only edit 25 campaigns or 100 ads at once. You can change the number of rows in the bottom right corner of your screen to either 25 or 100 depending on which you’re editing, so you can simply select all instead of manually checking boxes off!
-
New Campaigns? Duplicate.
What? Duplicate new campaigns from existing ones instead of starting from scratch.
Why? Avoid the frustration of repeatedly selecting the same geos, devices, tracking strings, and more. You can always tweak these settings after the initial duplication and before pushing the campaign live, but it’s much easier to make a few small edits than re-filling in each field every time.
How? Click on the layered squares next to any campaign line-item in the dashboard. This will take you to a new window where you can tweak your new campaign’s settings before launch. After making the necessary edits, create the campaign and everything will carry over from the original (unless you specify not to!) The campaign will automatically be enabled upon duplication no matter what the status of the original campaign is, so make sure to pause it after creation, if you don’t want it running yet.
💡 Brainy Tip: Depending on how you break out your campaigns, it may be worth creating a few “Template” campaigns that are permanently paused, to use as a shell for duplicating from. Though be sure you uncheck the “Also Duplicate: Campaign content” box at the top of the duplicated campaign settings.
-
Campaign Naming? Keep It Consistent.
What? Be detailed and uniform in your campaign naming conventions.
Why? Clicking into every campaign’s settings and ads to remember which is which can be a huge time drain. By including the device targeting, geo-targeting, any advanced targeting, and a brief description of what the content is about in each campaign name, you’ll be able to differentiate much more easily.
How? If you’re new to Outbrain, this is a super easy habit to integrate into your account right off the bat! If you’re an existing marketer, you can easily edit campaign names by clicking the pencil icon next to the campaign and updating it from there.
💡 Brainy Tip: Depending on personal preferences, you can separate out the different parts of your campaign names with dashes, underscores, or vertical bars. Just make sure to be consistent for easy searching and sorting.
-
Quick Performance Review? Customize Columns.
What? Customize your dashboard columns to only include the metrics that are relevant to you.
Why? This makes it very easy to perform high-level check-ins on your campaigns, allowing you to review the information that you value most all in one snapshot — no need to scroll through dozens of columns of conversions you no longer use, just to find the one you’re looking for!
How? Click on the “Columns” button on the top right corner of the dashboard. From there, check off the columns you want to have included in your default view, and uncheck the ones you don’t. You can always go back and edit these whenever needed, so feel free to play around until you find the view that works best for you.
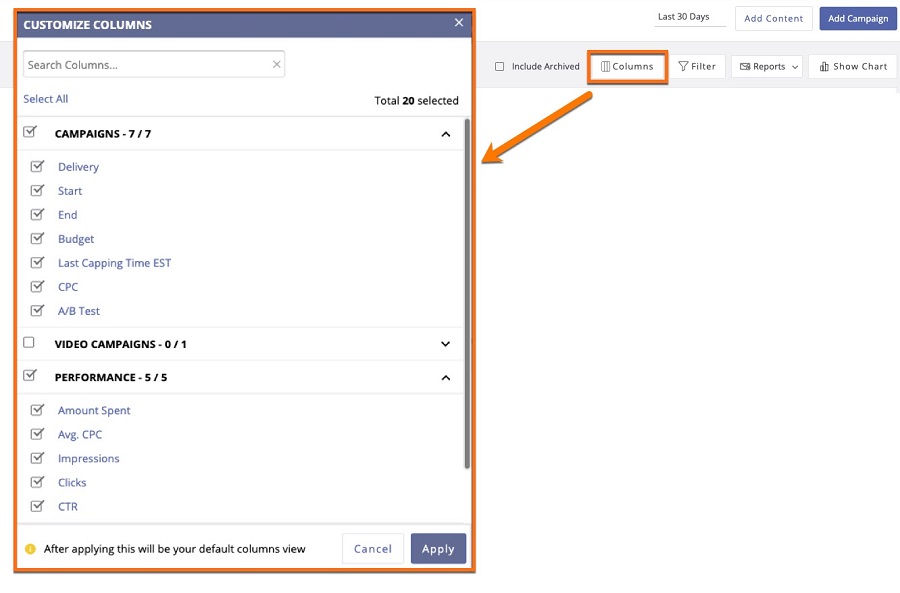
💡 Brainy Tip: Once you set your preferred column view, every time you log in, it will stay that way. If there are multiple users operating in your account, each of you can set up personalized columns independently, that will only show up for your personal username.
Hopefully, these tips will be as helpful for you as they have been for me.
And hey, if you have any time-saving dashboard hacks that I didn’t mention here, be sure to leave a comment below to share the wealth!
For those of you who are new to Outbrain, what are you waiting for? Sign up for an account here and take these time-saving tips with you to the starting line.